
This post is the next in the series on authentication and authorisation in ASP.NET Core. It shows how to modify the UI you present based on the authorisation level of the current user. This allows you to hide links to pages the user is not authorised to access, for example.
While important from a user-experience point of view, note that this technique does not provide security per se. You should always use it in combination with the authorisation policy techniques described previously.
Posts in the series:
- Introduction to Authentication with ASP.NET Core
- Exploring the cookie authentication middleware in ASP.NET Core
- A look behind the JWT bearer authentication middleware in ASP.NET Core
- An introduction to OAuth 2.0 using Facebook in ASP.NET Core
- An introduction to OpenID Connect in ASP.NET Core
- Introduction to Authorisation in ASP.NET Core MVC
- Custom authorisation policies and requirements in ASP.NET Core
The default user experience
In my previous post on authorisation in ASP.NET Core, I showed how to create custom authorisation policies and how to apply these to your MVC actions. I finished the post by decorating one of the controller actions with an AuthorizeAttribute to restrict access to only VIPs.
public class VIPLoungeController : Controller
{
    [Authorize("CanAccessVIPArea")]
    public IActionResult ViewTheFancySeatsInTheLounge()
    {
       return View();
    }
}
This secured the endpoint, so any unauthenticated users trying to access it would be redirected to the login screen. Any user that was already logged in who didn't satisfy the authorisation requirements would receive a 403 - Forbidden response.
This satisfies the security aspect of our requirements but it does not necessarily provide a great user experience out of the box. For example, imagine we have a link in our web page which takes you to the MVC action described above. If the user is logged in, and does not have permission, they will probably be presented with a message similar to this:
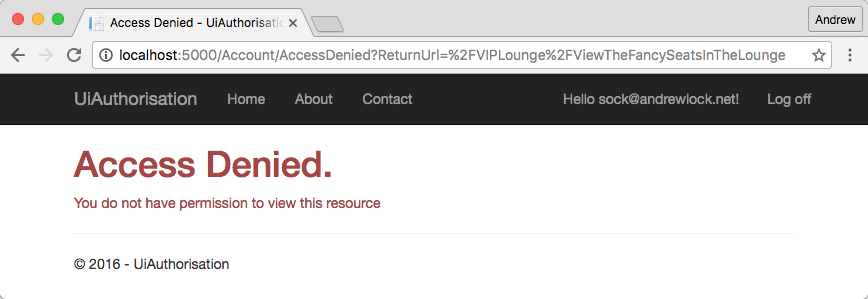
or possibly even this:

If the user was not going to be allowed to access the page, they really should not have been shown the link to let them try!
The next question is how to go about conditionally hiding the link to this inaccessible page. So far we have only seen how to apply authorisation policies using attributes at the Controller or Action level (as shown above), or alternatively at a global level.
Before we see exactly how to update the UI, we'll take a slight detour to look at the key enabler service, the IAuthorizationService.
The IAuthorizationService
In my previous introduction to authorisation I described the process that occurs when you decorate your MVC Actions and Controllers with the AuthorizeAttribute. Under the hood, the MVC pipeline is injected with an AuthorizeFilter, which is responsible for authenticating the current user, and verifying whether they have access based on the applicable AuthorizationPolicy.
In order to perform the authorisation, the AuthorizeFilter retrieves an instance of IAuthorizationService from the application's dependency injection container. This service is responsible for actually evaluating the applicable AuthorizationHandler<T>s for the current policy being evaluated. It implements two related methods:
public interface IAuthorizationService
{
    Task<bool> AuthorizeAsync(ClaimsPrincipal user, object resource, IEnumerable<IAuthorizationRequirement> requirements);

    Task<bool> AuthorizeAsync(ClaimsPrincipal user, object resource, string policyName);
}
The IAuthorizationService has just one job to do - it takes in a ClaimsPrincipal (User), an IEnumerable<IAuthorizationRequirement> (or a policy name) and an optional resource object (we'll come back to this in a later post), and determines whether all the requirements are satisfied. After checking each of the associated AuthorizationHandler<T>s, it returns a boolean indicating whether authorisation was successful.
Using the IAuthorizationService in your views
In the same way that MVC uses the IAuthorizationService to verify a user's authorisation, we can use it directly in our Views by injecting the service using dependency injection. Simply add an @inject directive at the top of your view page:
@inject IAuthorizationService AuthorizationService
The page will automatically resolve an instance of the IAuthorizationService from the DI container, and make it available as an AuthorizationService property in the view.
We can now use the service to conditionally hide parts of our UI based on the result of a call to AuthorizeAsync. We wrap the link to ViewTheFancySeatsInTheLounge in a call to the AuthorizationService using the User property and the name of the same policy we used previously in the AuthorizeAttribute:
@if (await AuthorizationService.AuthorizeAsync(User, "CanAccessVIPArea"))
{
  <li>
    <a asp-area=""
       asp-controller="VIPLounge" asp-action="ViewTheFancySeatsInTheLounge"
    >View seats in the lounge</a>
  </li>
}
Now when we view our site as someone who is authorised to call the Action, the link will be available for us:

But when we are unauthenticated, or are not authorised to view the link, it won't be available at all:

Summary
In this post, we introduced the IAuthorizationService and how it can be used for imperative authorisation. We showed how you can inject it into a View, allowing you to hide or modify portions of the UI which the current user will not be authorised to access, providing a smoother user experience.