
In this post I'm going to describe the process for beginners to go from 'Code in Github' to 'Package on NuGet'. It is very much inspired by (read: copied from) Jimmy Bogard's post on his OSS CI/CD pipeline, which I really recommend checking out as he explains the whole process.
I'm going to assume you've been building a .NET Core library and you have all your code on GitHub. I'll assume you have been building and testing locally using dotnet build and dotnet test, whether in Visual Studio or Visual Studio Code. Now you're at a point where you want to push your packages to NuGet, but you don't want to go through the laborious process of uploading your packages by hand. This is where the fun of CI comes in!
As we're going to be running our CI/CD build using AppVeyor our pipeline is going to be Windows only at this stage; I'll cover running CI on Linux in a later post.
Updating your build process
The first step to having a dependable CI pipeline is to make sure you have a dependable build script. You want to be sure that when you build locally on your machine, you will consistently get the same results. Similarly, you want to be sure that your build server is using the same build process, and so is equally consistent.
To give this guarantee, we will use a build script that lives as part of the project source control. It is almost completely taken from Jimmy Bogard's MediatR library, and is a powershell script that performs 5 operations:
- Clean any previous build artifacts
- Restore necessary dependencies
- Build the project
- Run tests
- Package project for NuGet
If you are following along with your own project, the first thing you'll want to do is create a branch, e.g. configure_ci, in your repo for your CI build setup:
> git checkout master
> git pull origin
> git checkout -b configure_ci
Next, update the project.json of your .NET Cor library to use SemVer versioning if you are not already, with a variable build number. Also add any packOptions settings for your NuGet packages here, e.g.:
{
  "version": "0.1.0-beta-*",
  "packOptions": {
    "licenseUrl": "https://github.com/andrewlock/NetEscapades.AspNetCore.SecurityHeaders/blob/master/LICENSE",
    "projectUrl": "https://github.com/andrewlock/NetEscapades.AspNetCore.SecurityHeaders/",
  }
Now we add the build script itself Build.ps1 in the root of our repo:
if(Test-Path .\artifacts) { Remove-Item .\artifacts -Force -Recurse }

EnsurePsbuildInstalled

exec { & dotnet restore }

Invoke-MSBuild

$revision = @{ $true = $env:APPVEYOR_BUILD_NUMBER; $false = 1 }[$env:APPVEYOR_BUILD_NUMBER -ne $NULL];
$revision = "{0:D4}" -f [convert]::ToInt32($revision, 10)

exec { & dotnet test .\test\YOUR_TEST_PROJECT_NAME -c Release }

exec { & dotnet pack .\src\YOUR_PROJECT_NAME -c Release -o .\artifacts --version-suffix=$revision }
Note that the first half of the script is being ommitted here for brevity - the definition of EnsurePsBuildInstalled and exec is included in the full script found at the bottom of this post.
The script pretty much just works through the 5 steps we outlined above, and adds an auto-incrementing build number to any packages produced. To run your build process you just have to run the powershell script .\Build.ps1 and it will clean, build, test and package your project. Be sure to insert your main and test project names in the YOUR_PROJECT_NAME placeholders at the bottom of the file.
Note: when you first run the script on your machine,
psbuildis installed if it is not already found. When I first ran it, I received an error: Exception calling "DownloadString" with "1" argument(s): "The remote name could not be resolved: 'raw.githubusercontent.com'". If this happens to you, the script failed to connect to the interwebs to downloadpsbuild. Resetting my network adapter fixed the issue.
Hopefully at this stage you have a successful build process, all your tests pass and your .\artifacts folder contains your nupkg files:

With step 1 down, just commit those files and we'll move on to the fun bits!
> git add .
> git commit -m "Add build scripts"
Signing up to MyGet
In order to be able to publish our packages, we need somewhere to publish our packages to. You could just push all your packages to NuGet, but you don't necessarily want all your pre-release and CI build packages being pushed up for everyone to immediately pull down when they may or may not be ready.
The suggested alternative is to use MyGet as your hosted package server for CI. For that you will need to signup for a free (for open source) account at https://www.myget.org/.
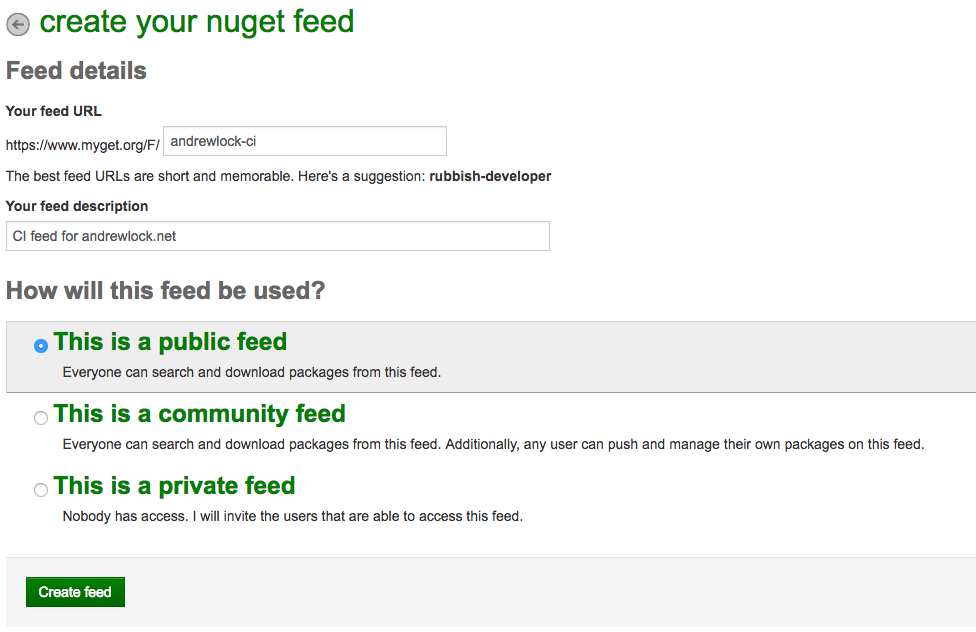
After creating an account, you will be prompted to create a new feed, providing a unique url and a description. I used andrewlock-ci as the feed name:
After creating your feed, navigate to the details page, in my case https://www.myget.org/feed/Details/andrewlock-ci. Here you can see the NuGet feed URLs and your API key. Take a note of the v2 feed url and your API key as you'll need them later:

Signing up for NuGet
If you haven't already, you will probably want to sign up for an account on NuGet so you can publish your package for others to consume. Again free, sign up at https://www.nuget.org and create your account, going through the usual email verification rigmarole.
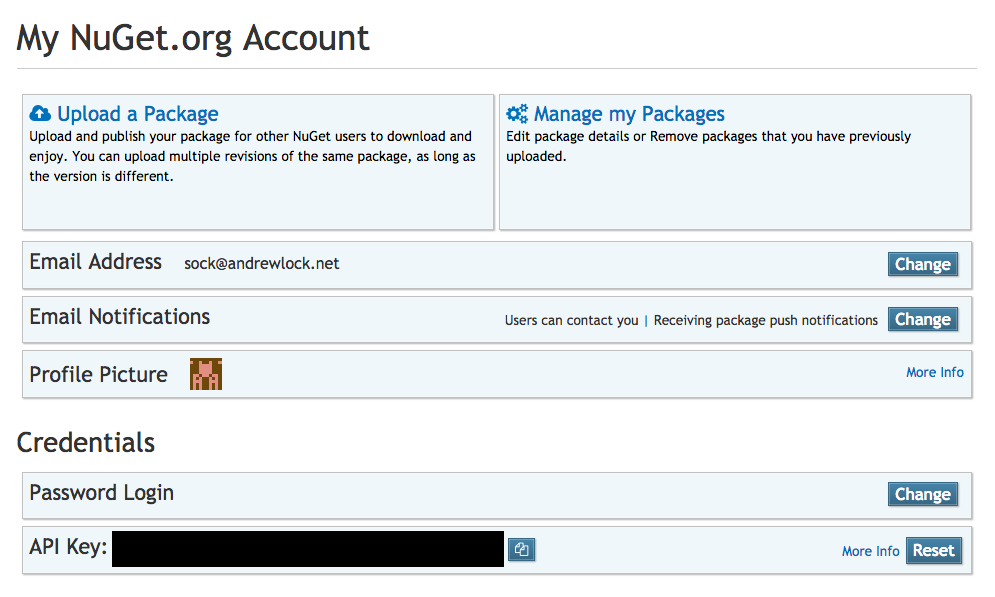
Once you're in, navigate to your account page and again make a note of the API key as we'll need it to allow AppVeyor to publish for us directly.
Setting up AppVeyor
We're getting there, just a couple more steps. In order to hook up our GitHub repo with AppVeyor and to configure our CI/CD, we first need to create an account with them.
Visit https://www.appveyor.com/ and sign up for an account (free for open source projects) - you can create an account with them or use any of a number of OAuth accounts.
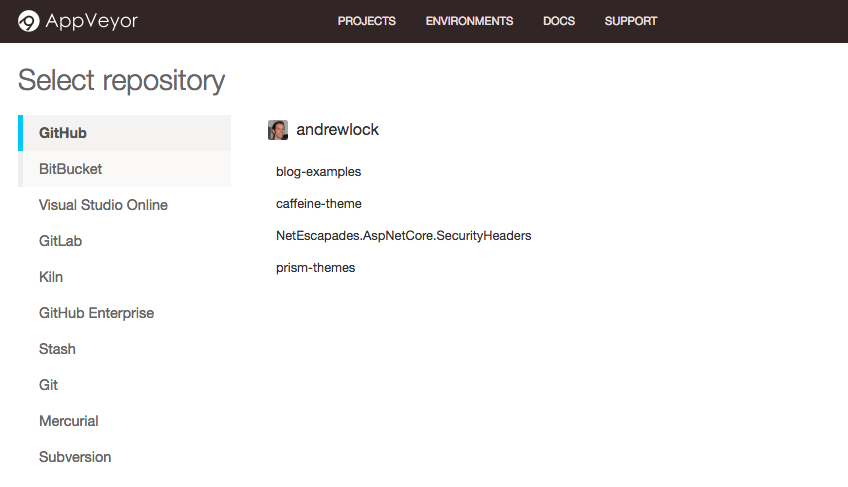
Once you are all signed up, you should be taken to the 'New Project' screen. You can add projects from lots of different sources, GitHub, BitBucket, VS Online, directly from Git etc. Select GitHub, choose the project you are configuring, and authorise the app to hook in to your repository:
We are going to configure AppVeyor to use WebHooks to listen for activity on our repo. In particular, we are going to configure the following rules (again, following Jimmy Bogard's lead here):
- When a pull request is made, build the branch.
- When a branch is merged to master, build and publish the package to MyGet.
- When master is tagged, build and publish a package to NuGet.org.
To set this up, we will add an appveyor.yml file in the root of our repo:
version: '{build}'
pull_requests:
  do_not_increment_build_number: true
branches:
  only:
  - master
nuget:
  disable_publish_on_pr: true
build_script:
- ps: .\Build.ps1
test: off
artifacts:
- path: .\artifacts\**\*.nupkg
  name: NuGet
deploy:
- provider: NuGet
  server: https://www.myget.org/F/andrewlock-ci/api/v2/package
  api_key:
    secure: lyyiBvn6TJr0kN0WCgou8bYVU+J5ymVbM9x4xvv05LDxWCLbJ92Sm4LIk1j3WSh3
  skip_symbols: true
  on:
    branch: master
- provider: NuGet
  name: production
  api_key:
    secure: K9fYWxy1AnyvMSW/zrMyiH5OiCZGBNjh9qH/K8OcSYfElGWpm5/qJD9wqH/Uw==
  on:
    branch: master
    appveyor_repo_tag: true
This file gives AppVeyor all the details it needs to run our build process, just as we have on our local machine, and to deploy packages to MyGet and NuGet. Note that there are 2 NuGet providers listed - the first one is our MyGet feed, the second one is our NuGet.org feed.
There are a couple of fields you will need to replace:
- Update the
servervalue in the firstdeploysection to use your MyGet v2 NuGet URL. - Replace the API key for MyGet (first key).
- Replace the API key for NuGet (second key).
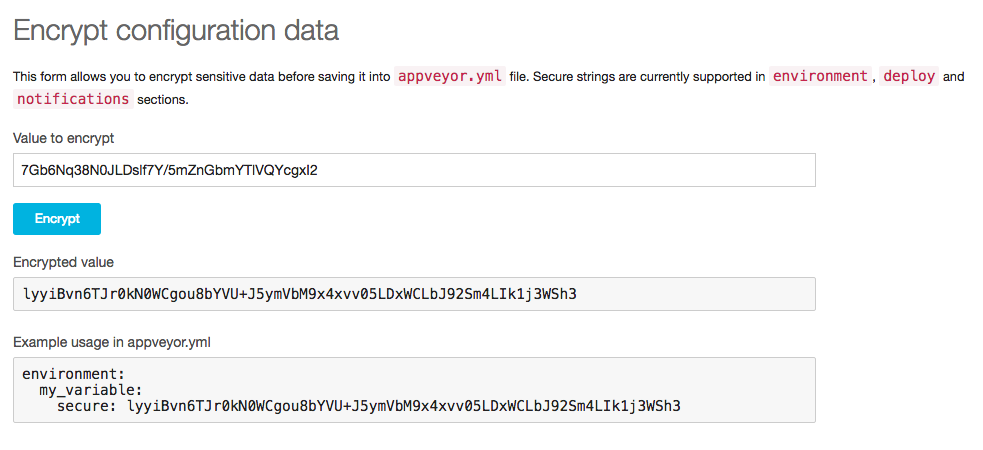
Note that the API keys are encrypted. To encrypt your keys, navigate to https://ci.appveyor.com/tools/encrypt and paste in the key you noted from MyGet/NuGet. It will then spit out your encrypted version which you can paste into appveyor.yml.
Commit this file to your repo and push your branch up to GitHub - we're ready to take it for a spin!
> git add "appveyor.yml"
> git commit -m "Add appveyor config"
> git push origin configure_ci
Putting it all together
We now have all the pieces in place for our complete CI/CD pipeline, and we can test it with our new configure_ci branch.
Building pull requests
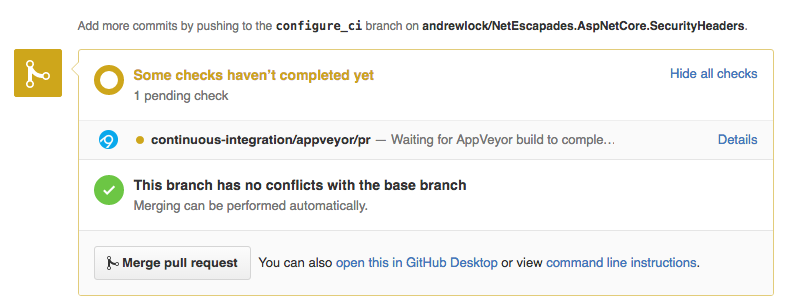
Our first step is to create a pull request in GitHub. As we described earlier, this should trigger AppVeyor to build our project. Sure enough, shortly after you create the pull request, you should see the feed update, noting that our continuous integration checks have not completed yet:
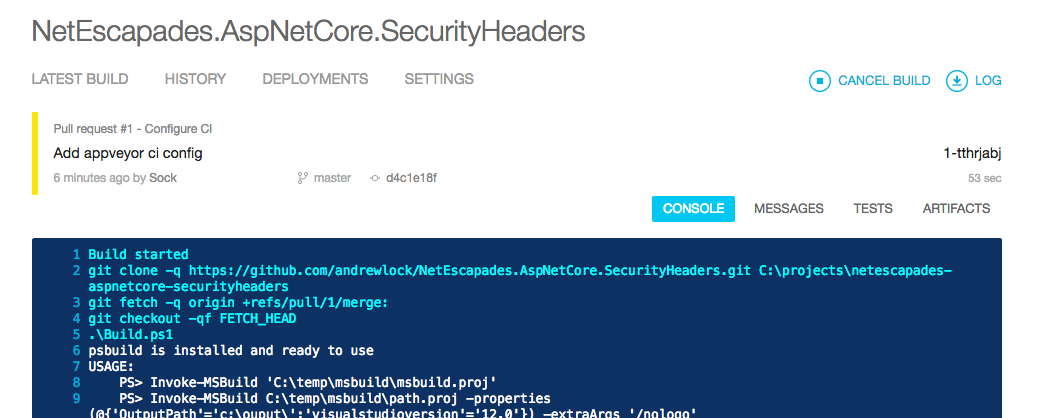
If we check on our project in AppVeyor, you should see it queued and then building. My project was queued for 5 minutes before I saw any movement so be patient!
Once the build is underway you can view the console output in realtime, see any tests that were discovered and run as part of the build process, and the artifacts it generated.
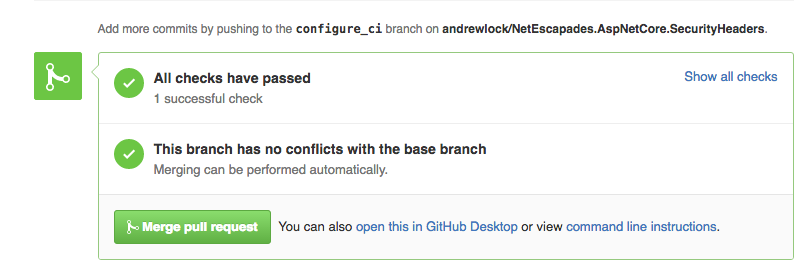
Assuming all goes well and your build is successful, the AppVeyor build should turn green, and if you flick back to your pull request, you can see it has been given the all clear:
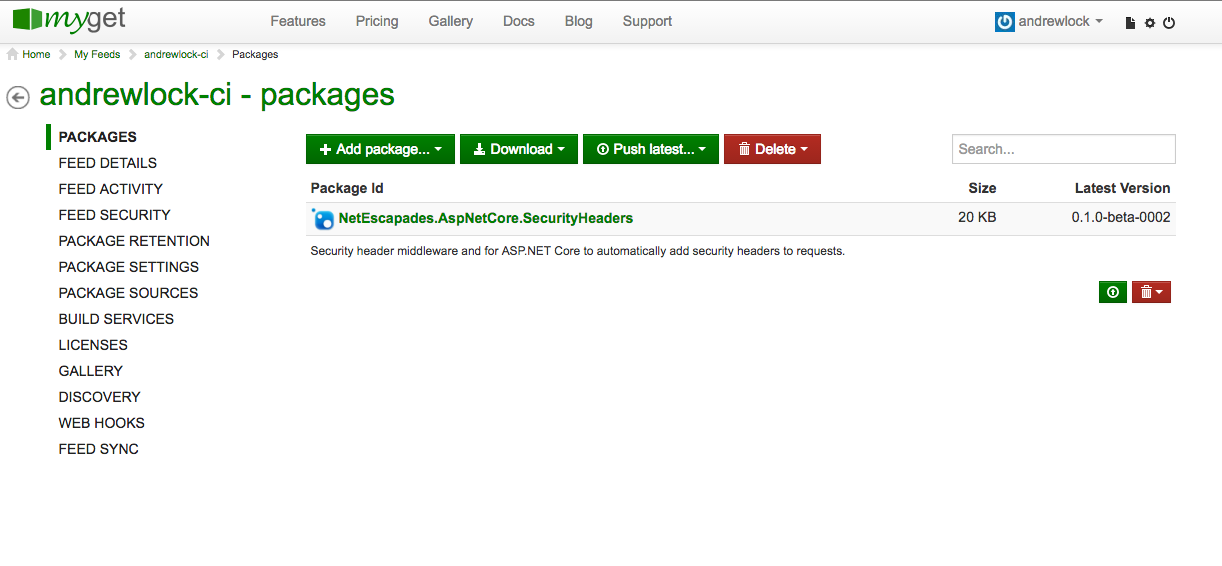
Publishing to MyGet
Now we have our pull request all primed, it's time to merge it to master. Clicking the Merge pull request button to merge configure_ci to master triggers another build in AppVeyor, but this time, it finishes by publishing your packages to to NuGet. If you navigate to your package list (for me located at https://www.myget.org/feed/Packages/andrewlock-ci), you can see a shiny new package there ready and waiting:
Now you have your packages hosted on your feed, you just configure your NuGet client (e.g. Visual Studio) to use it. One way to do this with the new tooling is to add/update a nuget.config file in the root of your repo to add a new package source. This will allow dotnet restore to find your packages. For example this nuget.config uses the ASP.NET CI feed, my CI feed and the NuGet.org feed to source packages.
<?xml version="1.0" encoding="utf-8"?>
<configuration>
  <packageSources>
    <add key="AspNetVNext" value="https://www.myget.org/F/aspnetcidev/api/v3/index.json" />
    <add key="AndrewLockCI" value="https://www.myget.org/F/andrewlock-ci/api/v3/index.json" />
    <add key="NuGet" value="https://api.nuget.org/v3/index.json" />
  </packageSources>
</configuration>
Publishing to NuGet
Finally, we can publish our package to NuGet by pushing a tag to master using:
> git checkout master
> git pull origin
> git tag v0.1.0-beta
> git push origin --tags
This will trigger another build on AppVeyor, and will publish your package to NuGet with the version tag provided in your project.json (including the AppVeyor build number).

And there you go, you now have a full CI/CD build powered by your GitHub activity.
Bonus - adding build badges to your readme.md
Just for fun, why not add the build and package status badges to the readme.md of your repo:

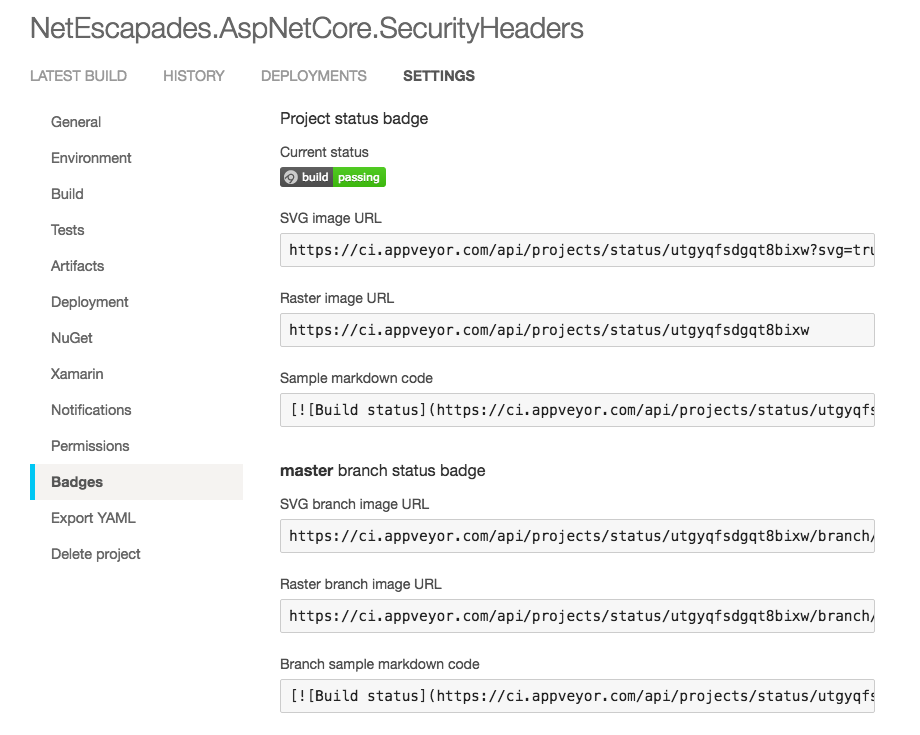
First, the AppVeyor badge is pretty easy as they do all the hard work for you - just head to your AppVeyor project, and click on Badges. They give you the links and all the markdown you need to add it to your site
Next up is your MyGet package. This is slightly trickier, but is made significantly easier by https://shields.io which does all the hard work for you.
Essentially they provide some demo urls for different build and package feeds, and you just need to replace the repo and package names. So for MyGet, we start with the demo url for mongodb: https://img.shields.io/myget/mongodb/v/MongoDB.Driver.Core.svg. We then replace mongodb with your feed name (e.g. andrewlock-ci in my case) and replace MongoDB.Driver.Core with your package name. It's then just a case of adding a link to your package feed and converting it to markdown:
[](http://myget.org/gallery/acndrewlock-ci)
For NuGet itself, the link is almost identical, but you obviously don't specify the specific feed, just the package name. For example:
[](https://www.nuget.org/packages/NetEscapades.AspNetCore.SecurityHeaders/)
Summary
To setup CI/CD, we needed to do 3 things:
- Update
project.jsonwith our package options and version number - Add
build.ps1to the root of the repository - Add
appveyor.ymlto the root of your repository
- Update the MyGet feed url
- Encode and update the MyGet api key
- Encode and update the NuGet api key
The actual deployment steps were then triggered by :
- When a pull request is made, the branch is built.
- When a branch is merged to master, the package is published to MyGet.
- When master is tagged, the package is published to NuGet.org.
Resources
- https://lostechies.com/jimmybogard/2016/05/24/my-oss-cicd-pipeline/
- https://ci.appveyor.com/tools/encrypt
- http://shields.io/
The full build script (from the MediatR repo) is listed below
<#
.SYNOPSIS
    You can add this to you build script to ensure that psbuild is available before calling
    Invoke-MSBuild. If psbuild is not available locally it will be downloaded automatically.
#>
function EnsurePsbuildInstalled{
    [cmdletbinding()]
    param(
        [string]$psbuildInstallUri = 'https://raw.githubusercontent.com/ligershark/psbuild/master/src/GetPSBuild.ps1'
    )
    process{
        if(-not (Get-Command "Invoke-MsBuild" -errorAction SilentlyContinue)){
            'Installing psbuild from [{0}]' -f $psbuildInstallUri | Write-Verbose
            (new-object Net.WebClient).DownloadString($psbuildInstallUri) | iex
        }
        else{
            'psbuild already loaded, skipping download' | Write-Verbose
        }

        # make sure it's loaded and throw if not
        if(-not (Get-Command "Invoke-MsBuild" -errorAction SilentlyContinue)){
            throw ('Unable to install/load psbuild from [{0}]' -f $psbuildInstallUri)
        }
    }
}

# Taken from psake https://github.com/psake/psake

<#
.SYNOPSIS
  This is a helper function that runs a scriptblock and checks the PS variable $lastexitcode
  to see if an error occcured. If an error is detected then an exception is thrown.
  This function allows you to run command-line programs without having to
  explicitly check the $lastexitcode variable.
.EXAMPLE
  exec { svn info $repository_trunk } "Error executing SVN. Please verify SVN command-line client is installed"
#>
function Exec
{
    [CmdletBinding()]
    param(
        [Parameter(Position=0,Mandatory=1)][scriptblock]$cmd,
        [Parameter(Position=1,Mandatory=0)][string]$errorMessage = ($msgs.error_bad_command -f $cmd)
    )
    & $cmd
    if ($lastexitcode -ne 0) {
        throw ("Exec: " + $errorMessage)
    }
}

if(Test-Path .\artifacts) { Remove-Item .\artifacts -Force -Recurse }

EnsurePsbuildInstalled

exec { & dotnet restore }

Invoke-MSBuild

$revision = @{ $true = $env:APPVEYOR_BUILD_NUMBER; $false = 1 }[$env:APPVEYOR_BUILD_NUMBER -ne $NULL];
$revision = "{0:D4}" -f [convert]::ToInt32($revision, 10)

exec { & dotnet test .\test\MediatR.Tests -c Release }

exec { & dotnet pack .\src\MediatR -c Release -o .\artifacts --version-suffix=$revision }