
In this post I take a short look at the open source ASP.NET Core eCommerce platform, nopCommerce. I show the experience of building the application locally and hosting it in a Docker container.
What is nopCommerce?
Many years ago I helped build out the ecommerce store for a UK retail shop. We built the application using ASP.NET MVC and nopCommerce, an open source eCommerce platform. It provided the basic platform we needed, while also being easy to extend and customise, with a range of open source and commercial plugins available to extend its capabilities.
You can view a live demo site of a "bare bones" nopCommerce install with sample data to get a feel for what nopCommerce provides. There are also providers that will provide a hosted nopCommerce install for you if that's what you would prefer.
Since I last used it over 5 years ago, nopCommerce has continued to grow. I was very impressed to see they made the somewhat tricky migration from ASP.NET to ASP.NET Core 2.0 all the way back in 2017. They followed the (at that time) advised approach of moving to the ASP.NET Core framework while still running on the .NET Framework platform, before migration to the .NET Core platform. This let them move the application forward while they waited for packages they relied on to catch up.
Unfortunately, that's no longer really an option for people looking to migrate from ASP.NET to ASP.NET Core. Instead you have to migrate to ASP.NET Core and .NET Core at the same time. For that reason, it's generally advisable to follow a Strangler Fig pattern, to slowly migrate chunks of your application over time.
NopCommerce have succeeded in keeping up with the rapid ASP.NET Core updates and currently supports .NET 5! On top of that, they no longer rely on MS SQL Server as a backing store; they also support MySQL and PostgreSQL. Even though MS SQL Server does run in Linux, I'm sure many db admins will be very happy to see this.
Seeing this support for Linux containers made me want to try out nopCommerce again, so I decided to install it and have a play!
Building nopCommerce locally
The first step for running nopCommerce is to download the repository from GitHub. Be warned, this is a big repo!
> git clone https://github.com/nopSolutions/nopCommerce.git
Cloning into 'nopCommerce'...
remote: Enumerating objects: 210, done.
remote: Counting objects: 100% (210/210), done.
remote: Compressing objects: 100% (16/16), done.
remote: Total 284102 (delta 198), reused 194 (delta 194), pack-reused 283892
Receiving objects: 100% (284102/284102), 818.27 MiB | 9.42 MiB/s, done.
Resolving deltas: 100% (212711/212711), done.
Updating files: 100% (8133/8133), done.
A large part of that is history—nopCommerce has been going for well over a decade now!—and there are a few media files in the repo too.
I was surprised to see one file, browscap.xml was over 80MB! Apparently provided by the Browser Capabilities Project, I intend to dig into this further later
NopCommerce is an ASP.NET Core application, so you can build and debug it locally using all your usual tools. In the src folder there's a NopCommerce.sln file that you can open in Visual Studio to get started. It contains about 20, logically grouped, projects, so you shouldn't have any difficulties.
Rather than take this route, I wanted to jump straight into running the application, so I turned to Docker. There are instructions for using Docker on the nopCommerce website, but I chose to dive in and see how far I could get on my own.
In the root folder are three docker-compose files:
- docker-compose.yml—the default docker-compose file that uses MS SQL Server as the database.
- mysql-docker-compose.yml—uses MySQL as the database.
- postgresql-docker-compose.yml—uses PostgreSQL as the database.
I wanted to give the PostgreSQL version a try. Out of interest I opened up the postgresql-docker-compose.yml docker-compose file to see all the dependencies. As you can see below, it's a simple setup with just two containers and a volume: a PostgreSQL server container, the nopCommerce web app itself, and the nopcommerce_data volume:
version: "3.4"
services:
    nopcommerce_web:
        build: .
        container_name: nopcommerce
        ports:
            - "80:80"
        depends_on:
            - nopcommerce_database
    nopcommerce_database:
        image: "postgres:latest"
        container_name: nopcommerce_postgres_server
        restart: "always"
        environment:
          POSTGRES_PASSWORD: "nopCommerce_db_password"

volumes:
  nopcommerce_data:
The docker-compose file builds the nopcommerce_web app using the Dockerfile in the root folder, and then links it to the nopcommerce_database container. All pretty straight forward as docker-compose files go! To build the application, run docker-compose -f .\postgresql-docker-compose.yml build. This took about 7 minutes on my (mediocre and old) personal laptop, but there were no issues at all building the nopcommerce_nopcommerce_web image:
> docker-compose -f .\postgresql-docker-compose.yml build
nopcommerce_database uses an image, skipping
Building nopcommerce_web
[+] Building 464.5s (58/58) FINISHED
 => [internal] load build definition from Dockerfile                       0.1s
 => => transferring dockerfile: 3.37kB                                     0.0s
 => [internal] load .dockerignore                                          0.1s
...
 => => exporting layers                                                    2.1s
 => => writing image sha256:0b1b8afa89ba5ff57f9f26b59a2b4f12305ccff4f8870  0.0s
 => => naming to docker.io/library/nopcommerce_nopcommerce_web             0.0s
Successfully built 0b1b8afa89ba5ff57f9f26b59a2b4f12305ccff4f88708277da4d4f34ce40e61
Now we've built our container we can run it!
Running nopCommerce and the initial setup screen
To run the docker-compose file use docker-compose -f .\postgresql-docker-compose.yml up. This will create the network to link the containers, create the volume, and pull the specified PostgreSQL container, postgres:latest. Finally, docker-compose will run the containers:
> docker-compose -f .\postgresql-docker-compose.yml up
Creating network "nopcommerce_default" with the default driver
Creating volume "nopcommerce_nopcommerce_data" with default driver
Pulling nopcommerce_database (postgres:latest)...
Starting nopcommerce_postgres_server ... done
Starting nopcommerce                 ... done
Attaching to nopcommerce_postgres_server, nopcommerce
...
You can now visit the app in the browser at http://localhost.
The docker-compose files uses port 80 as it's the "standard" HTTP port, but if you need to use a different port, change the ports definition
"80:80"in the docker-compose file to something like"5432:80"to listen on port 5432 instead.
When you first visit the nopCommerce application, you'll be redirected to http://localhost/install and presented with the install screen. This is only shown the first time you set up nopCommerce, and is used to configure the connection string to the database, and the credentials for your admin user.
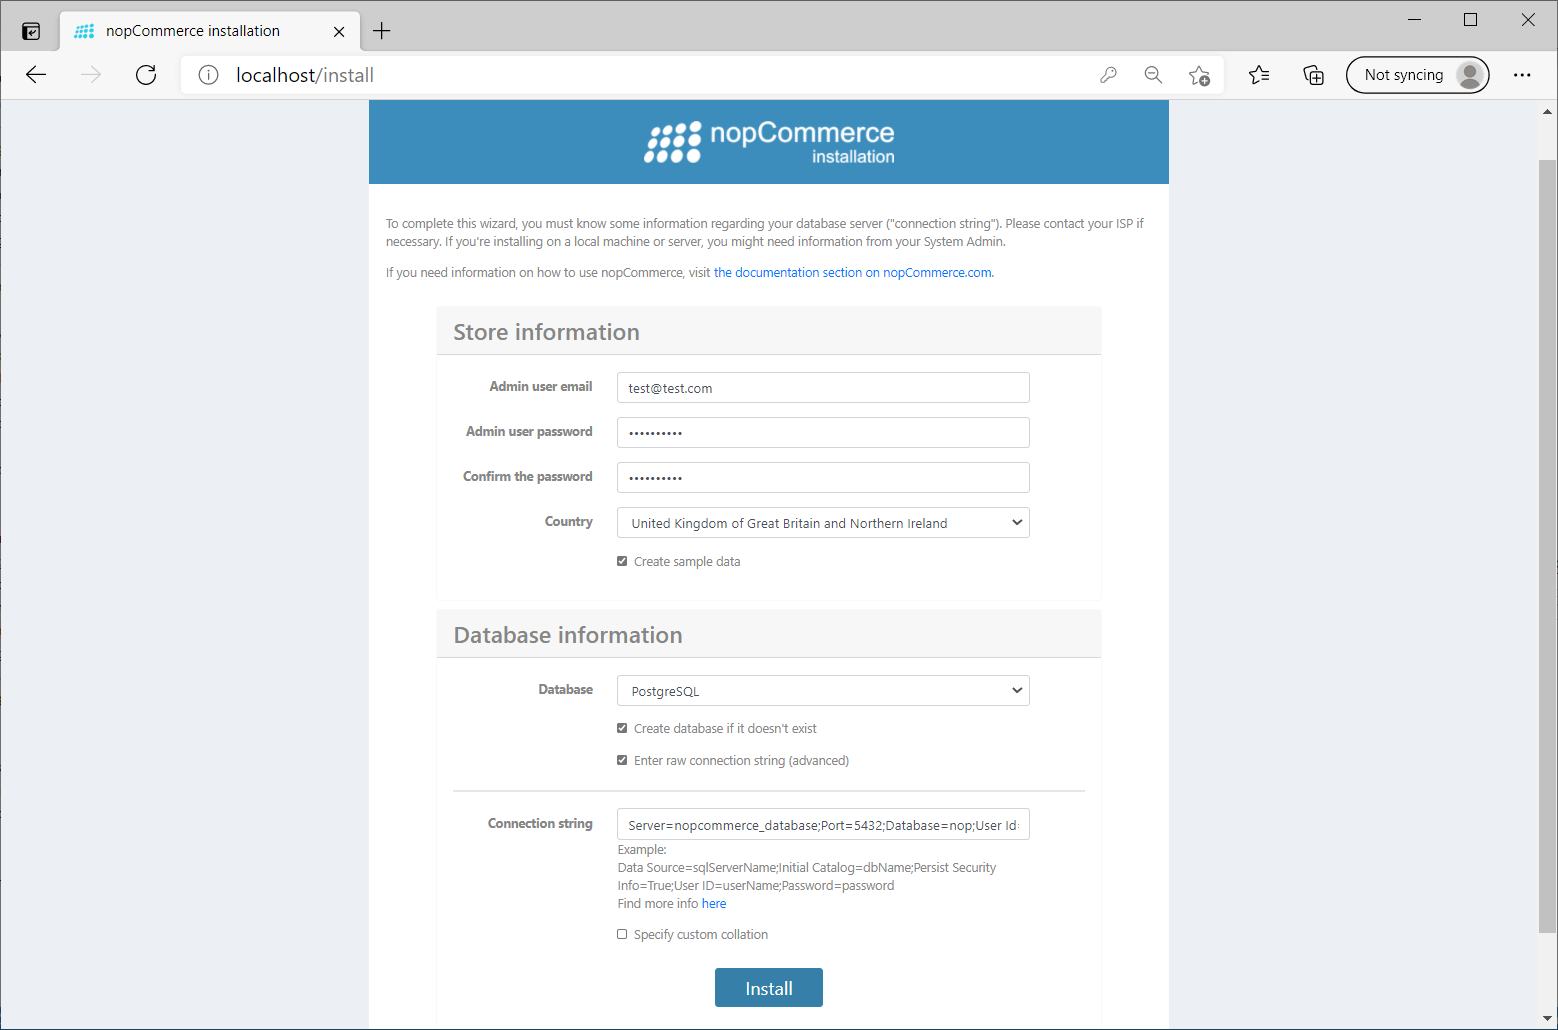
Enter an admin username and password, choose a location, and select "Create Sample Data". This loads in some demo products etc in the database, so that you can see an example of a real application.
Next, change the database type to PostgreSQL, and check both "Create database if it doesn't exist" and "Enter raw connection string". Enter the following connection string:
Server=nopcommerce_database;Port=5432;Database=nop;User Id=postgres;Password=nopCommerce_db_password;
This is a standard PostgreSQL connection string:
Server=nopcommerce_database;—nopcommerce_databaseis the name of the container in the docker-compose filePort=5432;—the default portDatabase=nop;—the name of the database to create in postgres. You can choose anything you want hereUser Id=postgres;—postgresis the default username in the postgres docker image. Change this in production.Password=nopCommerce_db_password;—the password defined in the docker-compose file. Obviously change this in production!
After clicking install, the app creates the database, configures the container, migrates the database, and seeds it with the sample data.
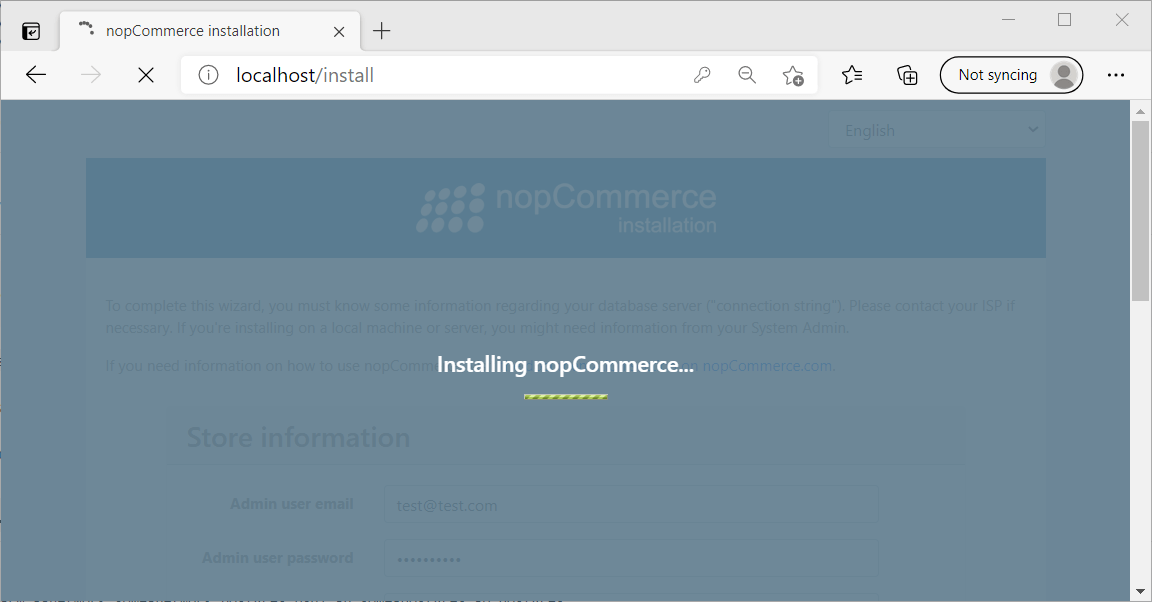
After migrating the database, nopCommerce tries to restart the app. However, as this is a docker container, the app just stops!
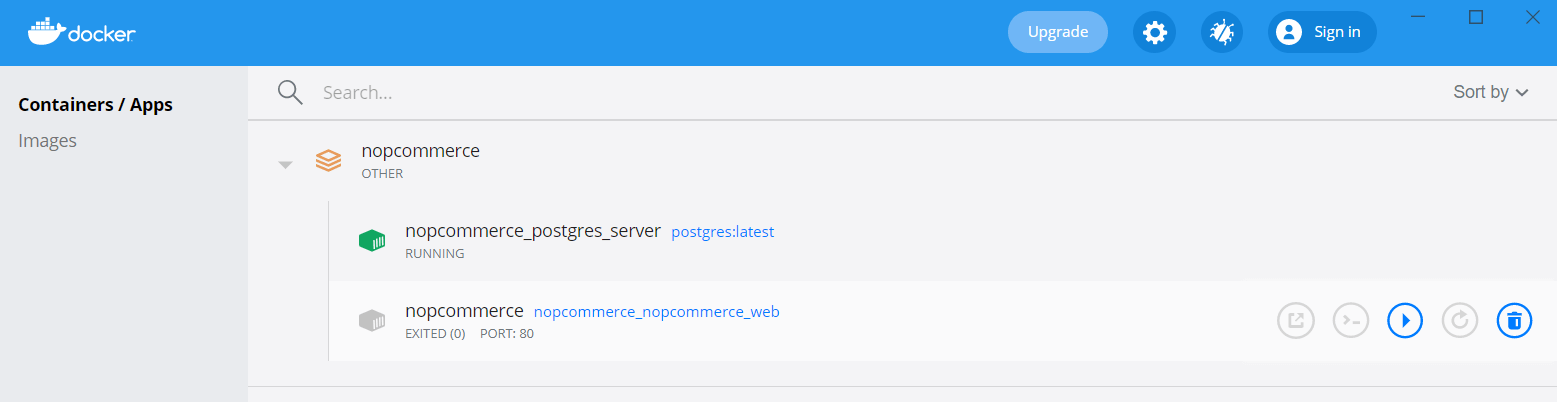
You can start it again from Docker Desktop, or run docker-compose -f .\postgresql-docker-compose.yml up again to restart it.
I was interested to know what had changed in the container during the installation, so I ran docker diff <CONTAINER> using the container ID (found using docker ps). This showed several new files:
> docker diff 151c74c4dbf5
C /app
C /app/App_Data
C /app/App_Data/DataProtectionKeys
A /app/App_Data/DataProtectionKeys/key-e3ce73a2-33a9-4945-9660-59fdff8bd7b8.xml
A /app/App_Data/appsettings.json
A /app/App_Data/dataSettings.json
A /app/App_Data/plugins.json
The first file is the data protection key file. you can read more about data protection keys in my introductory post. Plugins.json and appsettings.json stores various other details such as which plugins are enabled, installation configuration, and distributed cache settings. The dataSettings.json files stores the database connection details:
{
  "DataConnectionString": "Server=nopcommerce_database;Port=5432;Database=nop;User Id=postgres;Password=nopCommerce_db_password;",
  "DataProvider": "postgresql",
  "SQLCommandTimeout": null,
  "RawDataSettings": {}
}
That's the installation procedure over, so let's take a look at the app itself!
Exploring the app
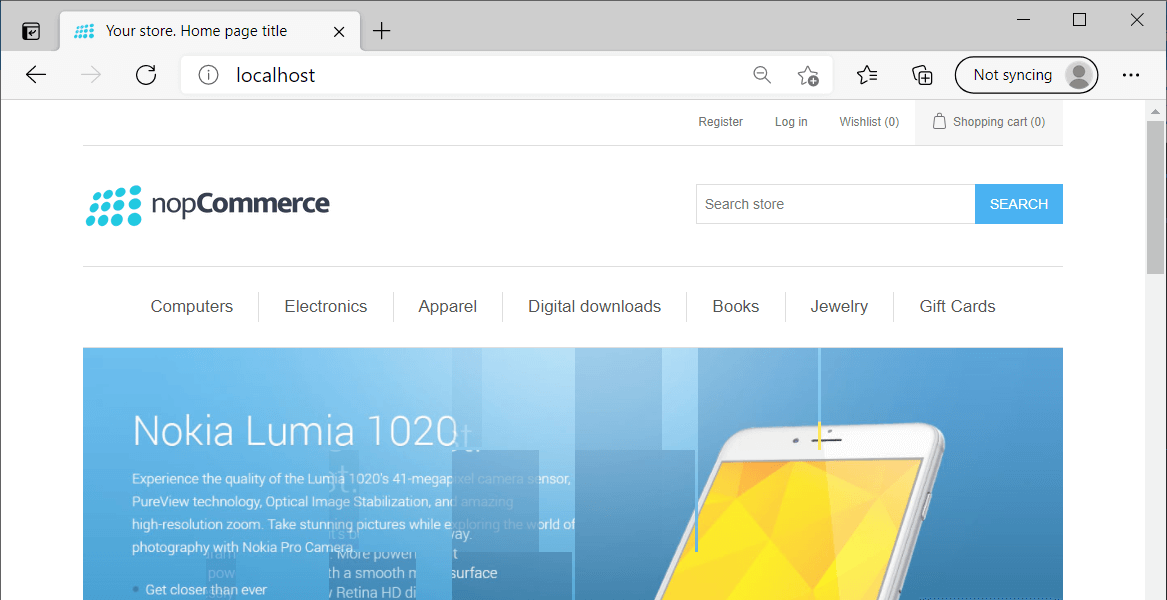
To explore the nopCommerce app itself, navigate to http://localhost. This takes you to the home page, which includes all the typical eCommerce things you'd expect: hero graphics, product categories, search, a shopping cart, and user register/login links:
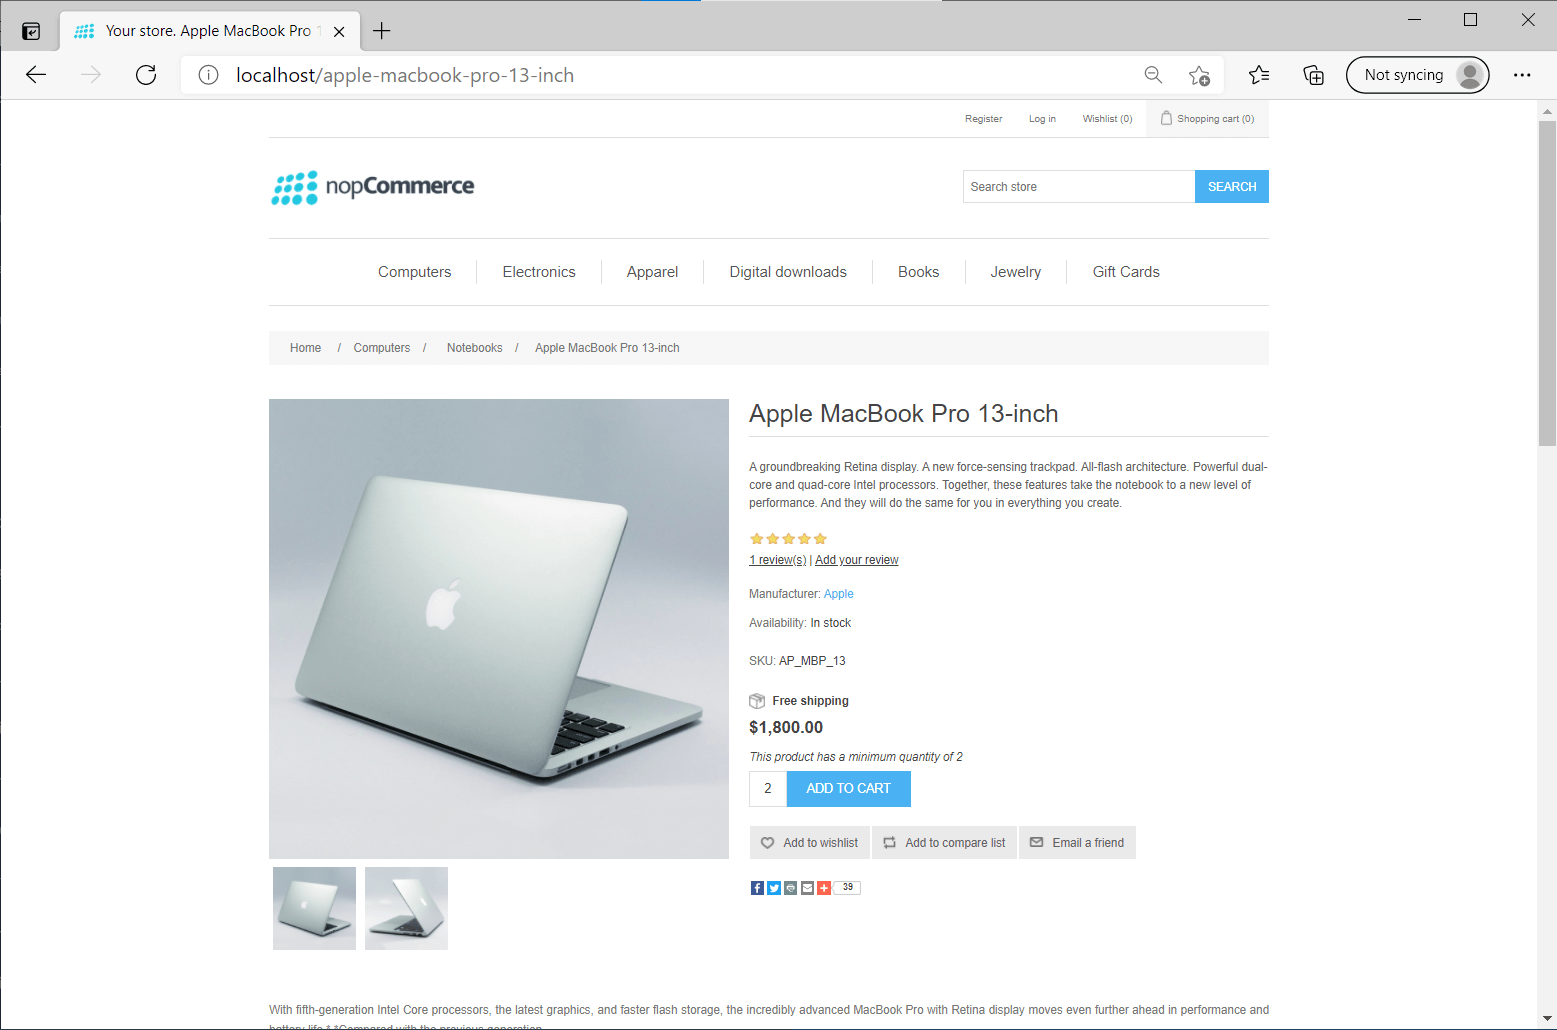
You can navigate around the categories, and view a product page, such as the example below. This shows that you can have manufacture pages, reviews, stock availability, Shipping, wish lists, and much more. NopCommerce really is fully featured!
NopCommerce includes support for both customer and admin accounts. Navigate to http://localhost/admin. This will redirect you to the login page:
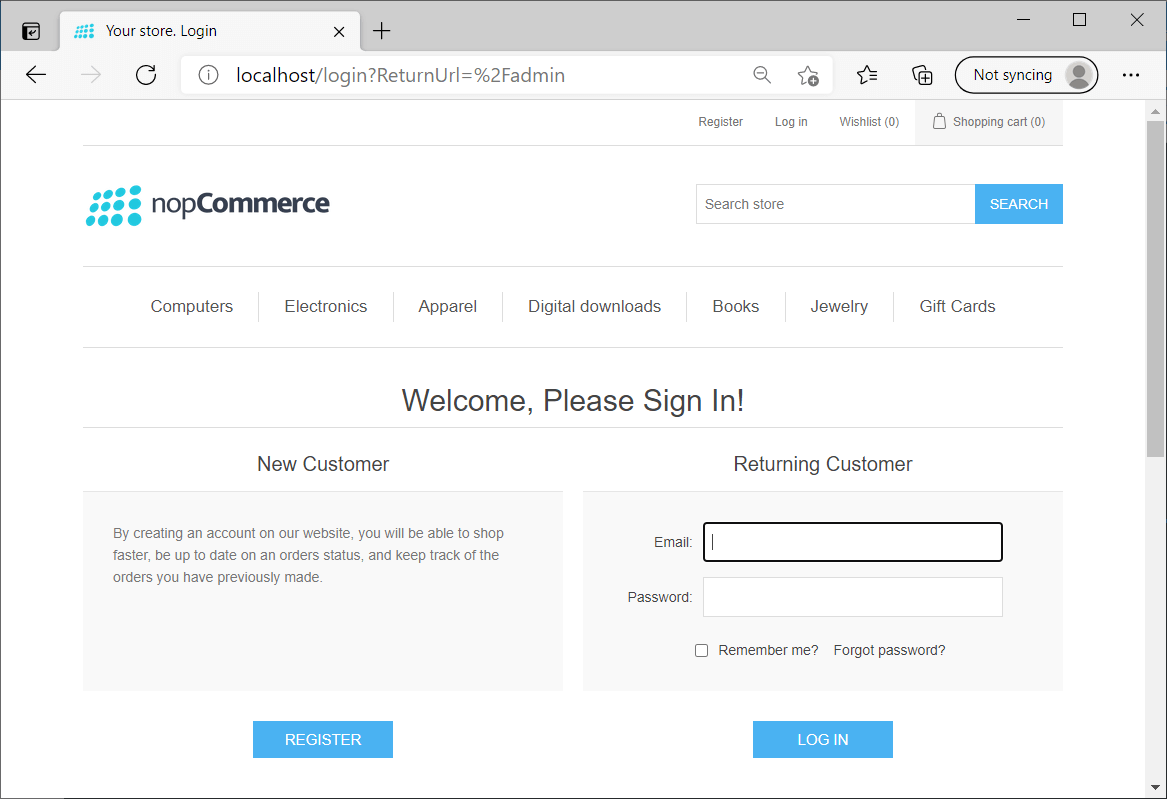
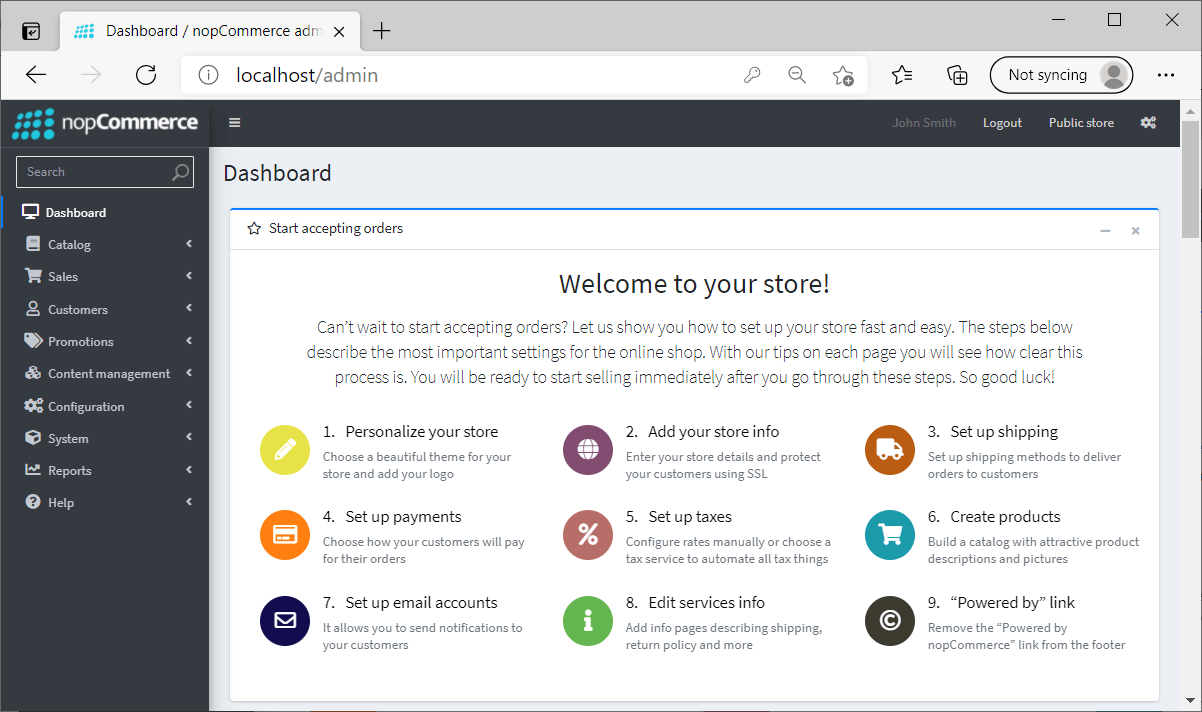
Login with the admin username and password you provided on install, and you'll be taken to the admin panel. Here you can update products, update stock, change settings, customise a whole variety of settings, as well as view dashboards about sales:
Don't be put off if you're not a fan of the default nopCommerce styling. One of the key features of nopCommerce is the ability to customise each page, but I won't get into it in this post. For now, if you have an ecommerce project I strongly suggest giving nopCommerce a try!
Summary
In this post I showed how to get started with nopCommerce, the open-source eCommerce play form built on ASP.NET Core 5.0. I showed how to run the application locally using docker-compose and PostgreSQL, and how to bootstrap the app. Finally I showed a quick tour of the app, demonstrating an example product page and the admin dashboard.