
In this post I describe how metadata works for "fallback" endpoints in ASP.NET Core. First I briefly discuss the routing infrastructure of ASP.NET Core, and how you can add metadata to endpoints to drive other functionality. Next I describe what fallback endpoints are and why they are useful. Finally, I describe how adding metadata works for fallback endpoints, and why this might not work as you first expect for MVC and Razor Pages apps.
Background: the routing infrastructure in ASP.NET Core
The routing infrastructure in ASP.NET Core is a fundamental component that sits as part of the middleware pipeline, it is the primary way that incoming URLs are mapped to "handlers" which are responsible for executing code and generating a response. For example, the following hello world app maps a single route / to a handler (the lambda method) which returns a string "Hello World!":
var builder = WebApplication.CreateBuilder(args);
var app = builder.Build();

app.MapGet("/", () => "Hello World!");

app.Run();
It's not apparent from this simple example, but routing in ASP.NET Core is driven by two main pieces of middleware:
EndpointRoutingMiddleware—This middleware chooses which registered endpoint to execute for a given request at runtime. It's sometimes referred to asRoutingMiddleware(which is the name I use in this post).EndpointMiddleware—This middleware is typically placed at the end of the middleware pipeline. The middleware executes the endpoint selected by theRoutingMiddlewarefor a given request.
Prior to .NET 6, you would typically add these middleware to your pipeline explicitly by calling
UseRouting()andUseEndpoints(). HoweverWebApplicationadds these for your automatically, so the explicit calls generally aren't required. I described in more detail howWebApplicationworks and how it compares to the "traditional"Startupapproach in previous posts.
You might wonder why ASP.NET Core uses two pieces of middleware instead of just one. Separating the selection of an endpoint from the execution of an endpoint gives a specific advantage—you can execute middleware between these two events. This middleware can change its behaviour based on metadata associated with the endpoint that is going to be executed, before that endpoint executes.
Adding metadata to endpoints to control functionality
As already described, endpoint routing is a core feature of ASP.NET Core. Adding metadata to specific endpoints is important for controlling the behaviour of different endpoints.
There are several features that rely on metadata to work correctly. The most common examples are the AuthorizationMiddleware and CorsMiddleware, which must be placed between the RoutingMiddleware and EndpointMiddleware so that they know which policies to apply for the selected endpoint.

For example, you might have a global authorization requirement policy which applies to all endpoints in your application. You would then apply specific "Allow anonymous access" policies to the "login" and "forgotten password" endpoints so they can be accessed when you're not logged in.
For this functionality to work, you need to apply metadata to the login and forgot password policies. You typically apply metadata in one of two ways:
- Adding attributes, e.g.
[AllowAnonymous]or[Authorize], to an MVC action or Razor Page. - Using an extension method, e.g.
AllowAnonymous()orRequireAuthorization()to a minimal API or other endpoint.
When the RoutingMiddleware endpoint executes, it selects the endpoint that will execute. Subsequent middleware can then inspect the endpoint details to see if there's any attached middleware and act accordingly.
Let's look at the authorization case again. Calling the AllowAnonymous() method, for example, adds an instance of the AllowAnonymousAttribute as metadata to the endpoint:
public static class AuthorizationEndpointConventionBuilderExtensions
{
    private static readonly IAllowAnonymous _allowAnonymousMetadata = new AllowAnonymousAttribute();

    public static TBuilder AllowAnonymous<TBuilder>(this TBuilder builder) where TBuilder : IEndpointConventionBuilder
    {
        builder.Add(endpointBuilder =>
        {
            endpointBuilder.Metadata.Add(_allowAnonymousMetadata);
        });
        return builder;
    }
}
Similarly, calling RequireAuthorization() adds an instance of the AuthorizeAttribute as metadata:
public static class AuthorizationEndpointConventionBuilderExtensions
{
    public static TBuilder RequireAuthorization<TBuilder>(this TBuilder builder) where TBuilder : IEndpointConventionBuilder
    {
        return builder.RequireAuthorization(new AuthorizeAttribute());
    }
}
The AuthorizationMiddleware, which runs after the RoutingMiddleware and before the EndpointMiddleware, can inspect the selected endpoint and read this metadata to decide what authorization policies to apply to the selected endpoint.
Trying it out in a sample app
We can try this all out in a simple minimal API app that just shows the basics:
using Microsoft.AspNetCore.Authorization;

var builder = WebApplication.CreateBuilder(args);

// Configure basic cookie authentication (so that authorization works)
builder.Services.AddAuthentication().AddCookie();
builder.Services.AddAuthorization(opt =>
{
    // Unless specified, you must be logged in to be authorized
    opt.FallbackPolicy = new AuthorizationPolicyBuilder()
                            .RequireAuthenticatedUser()
                            .Build();
});

var app = builder.Build();

app.MapGet("/", () => "Hello World!"); // You can't view this unless logged in
app.MapGet("/Account/Login", () => "Login page").AllowAnonymous(); // You can always view this
app.Run();
This is a simple minimal API that has two endpoints:
/the home page/Account/Loginwhich is the login page
For this app I added rudimentary authentication and authorization. I've not added any way to actually sign in or anything, literally I've just configured the minimum requirements. We then configure a global policy that says "unless otherwise specified, you must be logged in to be authorized to view the page".
The result is that if we try to run the app, and navigate to /, We're automatically redirected to the /Account/Login page, because we're not (and can't be) logged in. However, we can view the /Account/Login page, because it's decorated with AllowAnonymous() metadata.

Many cross-cutting features which are implemented in middleware but which must behave differently for specific endpoints use this metadata approach. Authorization is the canonical example, but CORS policies, OpenAPI documentation, or my security headers library work in similar ways.
Fallback routing in ASP.NET Core
Routing is a core component of ASP.NET Core, and consists of many distinct concepts. For example:
- Route patterns—This is the URL path pattern that should be matched to an incoming request.
- Handlers—Every route pattern has an associated handler which is is the code that runs to generate a response when the pattern matches an incoming request.
- Route parameters—These are variable sections in a route pattern that can be extracted and automatically converted to types for use in your handlers.
- Binding—You can automatically extract details from an incoming request for use in your handlers
and many more! These features manifest to greater or lesser extent whichever part of ASP.NET Core you're using, whether it's MVC, Razor Pages, Blazor, or minimal APIs.
The fundamental first step of routing is deciding which route pattern the incoming URL matches. This is done by building a graph of the registered endpoints and then finding the correct match for the incoming URL:
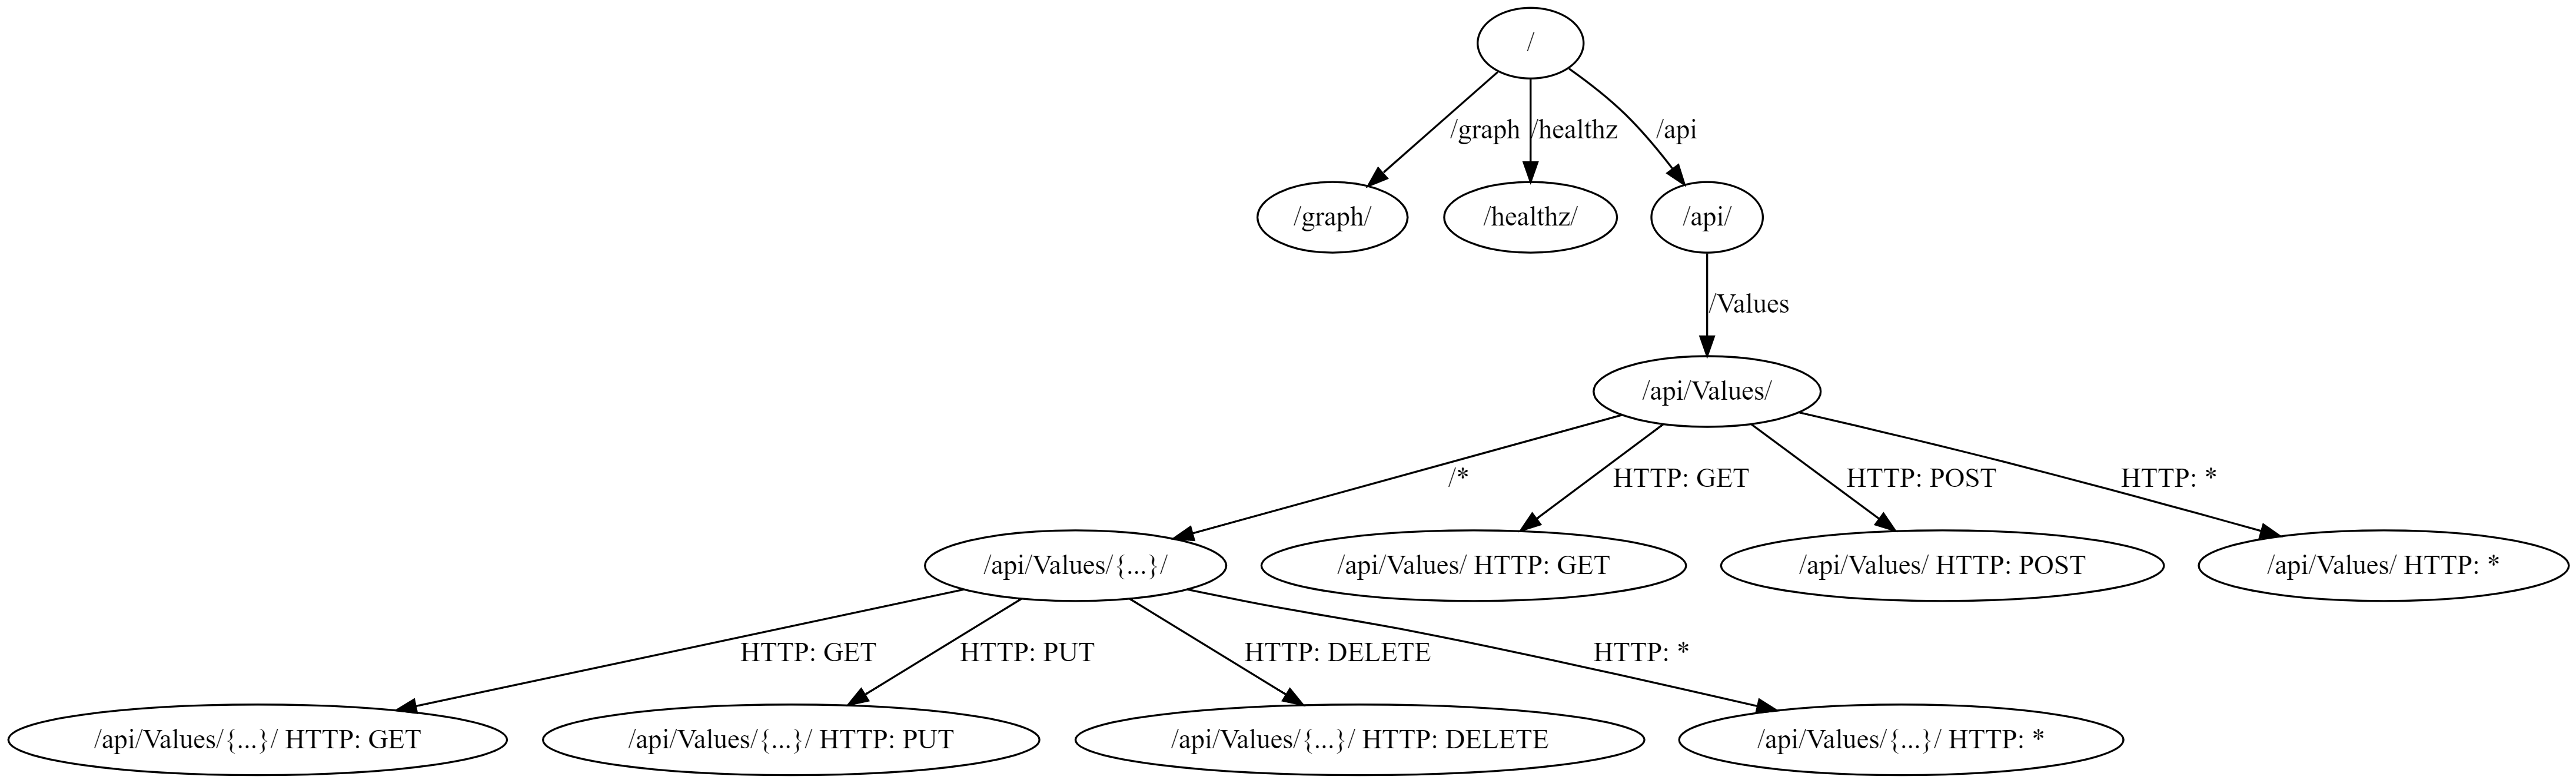
I discussed how ASP.NET Core creates an endpoint graph and how you can visualize that graph in my series Visualizing ASP.NET Core 3.0 endpoints using GraphvizOnline.
Each route is associated with a handler, but there's also the concept of a fallback route. This route matches any incoming request, as long as the request is not matched by any other route, and it invokes the provided handler.
There are many different ways to add a fallback route to your app, and in general it will depend which part of ASP.NET Core you're using; minimal APIs, MVC, Razor Pages etc. The simplest approach is to call the MapFallback() method, and provide a handler to execute directly. For example, we could add a fallback endpoint to my previous sample:
var app = builder.Build();

app.MapGet("/", () => "Hello World!");
app.MapGet("/Account/Login", () => "Login page").AllowAnonymous();
app.MapFallback(() => "Fallback"); // 👈 Add this
app.Run();
Now, if we run the app and hit any random URL, we're redirected to the /Account/Login page. That's because our fallback "you must be logged in" authorization policy kicks in, and redirects us. In the image below you can see that /random-url was matched, but redirected automatically to our login page:

It's probably more common to have your fallback route redirect to an existing endpoint, whether that's a file, an MVC controller, or a Razor Page. The most common reason for using a fallback route like this is for handling SPA applications. Many SPA applications handle "routing" on the client-side and generate nice, normal looking routes. However, if the client refreshes the page then the "incorrect" path is sent as a request to ASP.NET Core.
For example, the client side SPA app might send a request to /something/customers/123, but that doesn't necessarily mean anything to your application. Instead, in that scenario, you often need to return your "home page", have the SPA app run its boot up code and then do the routing on the client-side.
Exactly what "return your 'home page'" means will depend on your app, but there's probably a MapFallback* overload for you: For example:
MapFallbackToFile(string filepath)returns a file e.g.Index.htmlwhen there's no match for a route.MapFallbackToPath(string page)executes the given Razor Page as the fallback.MapFallbackToController(string action, string controller)executes the indicated MVC controller and action as the fallback.
All these MapFallback() overloads seem similar, but they actually behave somewhat differently when it comes to metadata, as we'll look at in the next section.
Fallback routing and metadata for simple endpoints
We can explore the differences in metadata handling by thinking about the same simple authorization app we've been looking at so far. To test how metadata works, we can simply add an AllowAnonymous() call to our MapFallback() methods. For example, taking our initial MapFallback() example:
using Microsoft.AspNetCore.Authorization;

var builder = WebApplication.CreateBuilder(args);

builder.Services.AddAuthentication().AddCookie();
builder.Services.AddAuthorization(opt =>
{
    opt.FallbackPolicy = new AuthorizationPolicyBuilder()
                            .RequireAuthenticatedUser()
                            .Build();
});

var app = builder.Build();

app.MapGet("/", () => "Hello World!");
app.MapGet("/Account/Login", () => "Login page").AllowAnonymous();
app.MapFallback(() => "Fallback").AllowAnonymous();
                                 // 👆 Add this
app.Run();
All I've added in this case is the AllowAnonymous() call to the MapFallback() configuration. Prior to adding the AllowAnonymous(), call, hitting a random URL would result in an unauthorized request, and we would be redirected to the /Account/Login endpoint. However, by adding AllowAnonymous(), we've added metadata to the fallback endpoint which means that the endpoint is authorized, and executes for a random URL:

Similarly, with the MapFallbackToFile() method, adding AllowAnonymous() attaches metadata to this fallback endpoint. Changing the above MapFallback() call to MapFallbackToFile("index.html") (and adding an index.html file to the application in the wwwroot folder) gives the same result; hitting any unknown URL returns the index.html file:
app.MapFallbackToFile("index.html").AllowAnonymous();

You would be forgiven for thinking that the Razor Page and MVC based fallback methods behaved in a similar way, but somewhat surprisingly, they don't!
Fallback routing and metadata for Razor Pages and MVC
To show this in action, I created a tiny Razor Pages app, and added three very simple Razor Pages, which are somewhat equivalent to the minimal API version above:
/Index.chstml:
@page
<h1>Index</h1>
/Account/Login.chstml - note the [AllowAnonymous] attribute here to allow anonymous access
@page
@attribute [Microsoft.AspNetCore.Authorization.AllowAnonymous]
<h1>Login</h1>
And finally /Fallback.cshtml:
@page
<h1>Fallback</h1>
I then added the same authentication and authorization services as before to the Razor pages app, and added a fallback mapping using MapFallbackToPage("/Fallback"), and marked that fallback route with AllowAnonymous():
using Microsoft.AspNetCore.Authorization;

var builder = WebApplication.CreateBuilder(args);

builder.Services.AddRazorPages();

// same authentication and authorization services as before
builder.Services.AddAuthentication().AddCookie();
builder.Services.AddAuthorization(opt =>
{
    opt.FallbackPolicy = new AuthorizationPolicyBuilder().RequireAuthenticatedUser().Build();
});


var app = builder.Build();

// Standard Razor Pages stuff
app.UseRouting();
app.UseAuthorization();
app.MapStaticAssets();
app.MapRazorPages().WithStaticAssets();

// Add a fallback page and try to mark it as allow anonymous
app.MapFallbackToPage("/Fallback").AllowAnonymous();
app.Run();
Overall this is essentially the Razor Pages equivalent of the minimal API app from before. Consequently, if we navigate to /Index, the authorization policy means we get redirected to the /Account/Login page. That page has the [AllowAnonymous] attribute, so we can view that page:

Now let's try hitting the fallback route by trying a random URL. Seeing as we marked the fallback route as AllowAnonymous() then we should see the /Fallback page, right?

Hmmm… that's not right 🤔 It seems like the AllowAnonymous() call on the MapFallbackToPage() definition isn't working?!
The explanation is a little more nuanced…
Why doesn't AllowAnonymous() work on MapFallbackToPage()?
The MapFallback() and MapFallbackToFile() calls are actually registering new endpoints; they have a catch-all route pattern and a handler, and the metadata gets associated to this new endpoint.
MapFallbackToPage() and MapFallbackToController() work slightly differently. These do add an extra endpoint, but the endpoint is added with additional DynamicPageMetadata metadata (for Razor Pages) or DynamicControllerMetadata metadata (for MVC). The Razor Pages/MVC infrastructure then finds this metadata and uses it to select a different endpoint to execute. That's the endpoint selected by the routing infrastructure, not the "original" fallback endpoint.
This all means that the "fallback" endpoint is essentially replaced by the real page it points to. Which also means that any metadata you add to that fallback endpoint is lost when it's actually invoked, which includes the AllowAnonymous() call! In other words, calling AllowAnonymous() (or adding any other metadata) on a MapFallbackToPage() or MapFallbackToController() call does nothing.
To make our fallback page behave like we want it to, we have to add the [AllowAnonymous] attribute to the destination page instead, to the /Fallback page:
@page
@attribute [Microsoft.AspNetCore.Authorization.AllowAnonymous]
<h1>Fallback</h1>
After making that change, now if we hit a random URL we can access the page, because the destination has the required metadata:

And that pretty much covers it. Just remember that if you need to add metadata to a fallback Razor Page or MVC controller, then you must add it to the destination endpoint, not the "fallback" endpoint itself.
Summary
In this post I briefly described the routing infrastructure of ASP.NET Core, and how you can add metadata to endpoints to drive other functionality. Next I describe what fallback endpoints are and why they are useful. Finally, I showed how adding metadata works differently when creating fallback endpoints using MapFallbackToPage() and MapFallbackToController().
For these cases, the fallback endpoint is replaced by the real destination endpoint. Consequently, if you want to add metadata to these endpoints, you must add it to the destination endpoint not the fallback endpoint.