In this post I show how I added Azure DevOps CI to one of the .NET Standard library I have on GitHub. I'll walk through the various steps I took to get CI/CD working for pull requests and the master branch of an open source library. All of my current libraries are built using AppVeyor,using Linux and Windows, but I wanted to give the new Azure Pipelines service a test, just to try it out.
This isn't meant to be a definitive post, just my experience and the steps I went through. For more details, see the documentation, or the presentation from .NET Conf.
I'm not going to go into Azure DevOps/Pipelines itself much in this post - if you've not heard already, Azure DevOps is the new name for Visual Studio Online (née Visual Studio Team Services). VSO has been split into multiple Azure DevOps services, you only have to use the specific features you need. In my case, I don't need code hosting (I'm using GitHub), issue tracking (GitHub), artefact hosting (nuget.org/MyGet), or exploratory testing. All I wanted to try was the CI/CD service.
One of the interesting features of Azure Pipelines is that they offer hosted builds for Windows, Linux, and Mac. That last one is the most interesting - AppVeyor allows both Windows and Linux builds, but adding Mac builds requires adding in Travis or something else. With Azure Pipelines you could potentially consolidate on a single CI system, which is quite appealing. It's also completely free for open source projects (just as AppVeyor and Travis are).
Note, I didn't go all-in with Azure Pipelines - I'm still using AppVeyor as the canonical CI server that pushes to NuGet feeds etc; I'm just building with two CI providers for now. But that's mostly due to laziness as I already have a process in place for pushing NuGet packages!
In this post I assume you already have a library you want to build on GitHub, and a build script in place for it, but that you don't have an Azure DevOps account. I'm only going to show up to the point where we have our library being built. I'm not going to look at how to publish NuGet packages, or how to do releases in general.
1. Create your Azure DevOps account
The first step is to head to the Azure pipelines website and click "Start free with pipelines"

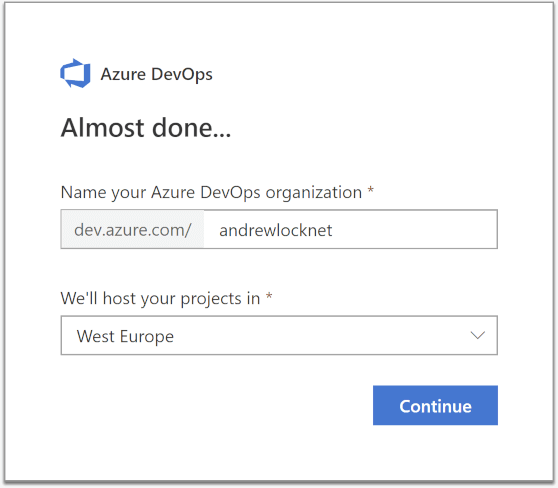
You'll be prompted to sign in to your Microsoft account, or to create a new one, until eventually you'll be prompted to choose an organisation name, and where your project will be hosted. Organisation names are globally unique, so you may need to do a bit of hunting.
After a little wait…
You'll be presented with the Azure DevOps dashboard!
2. Create a new project
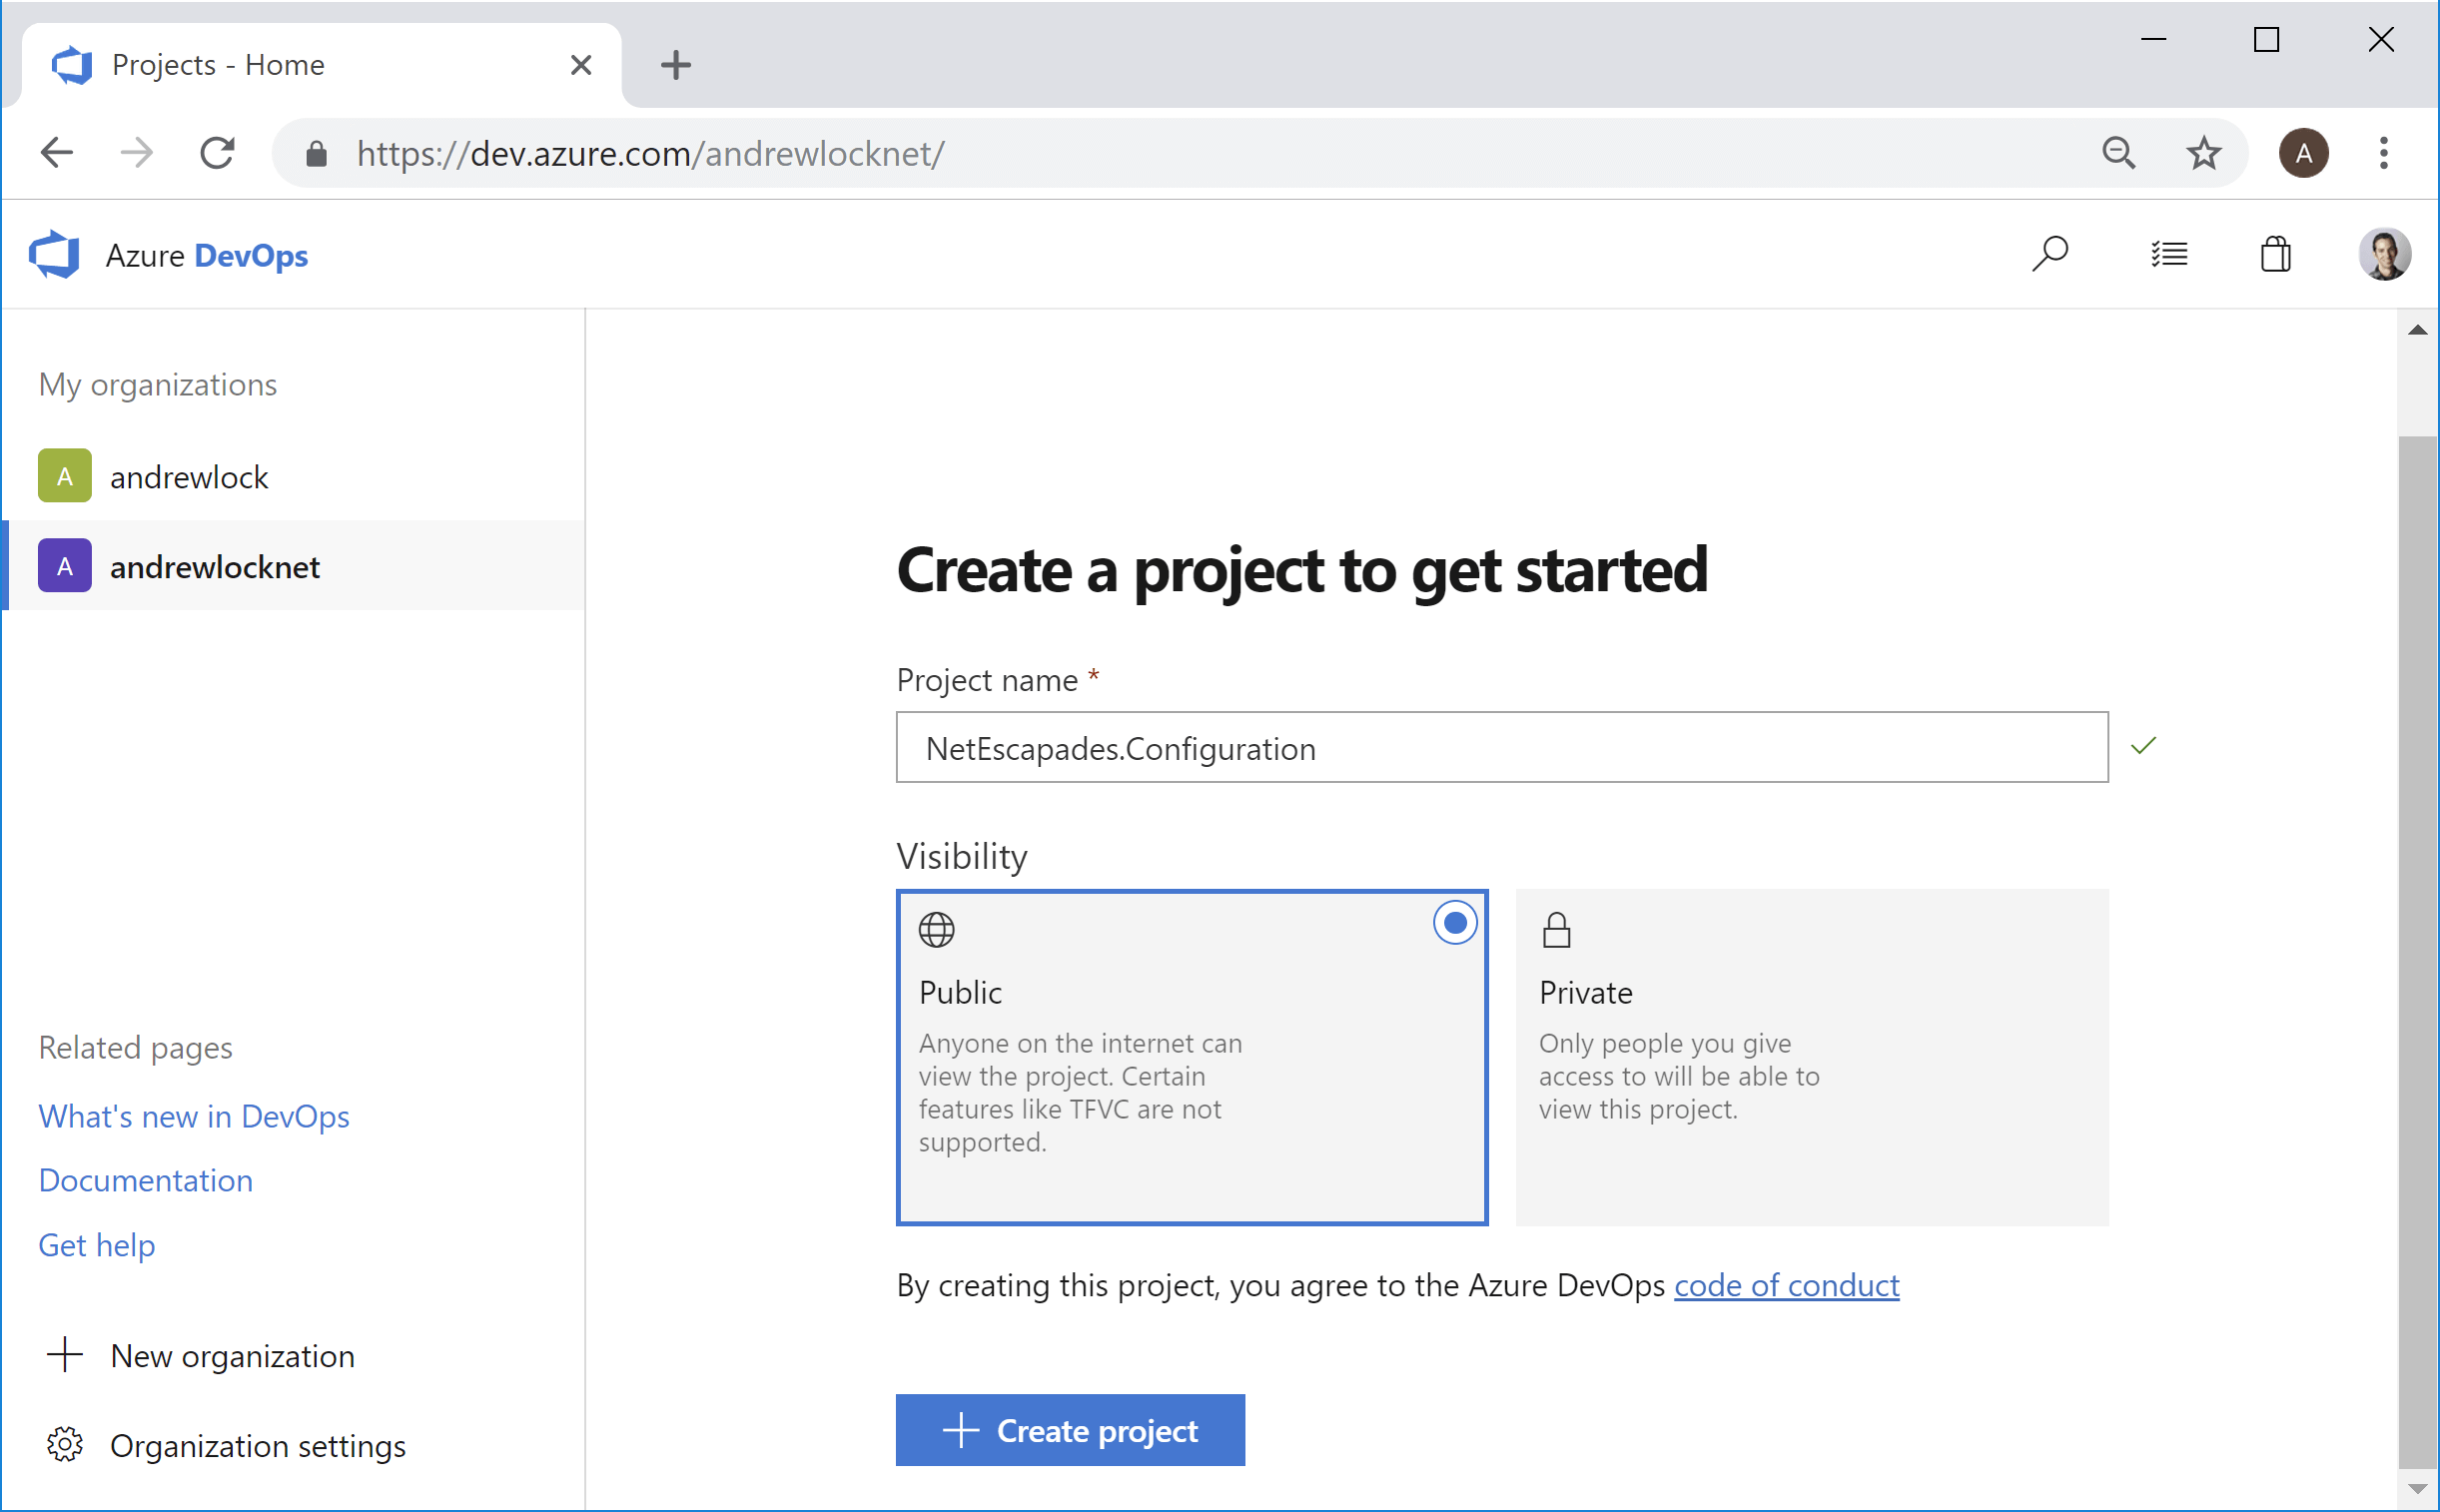
Azure DevOps uses the concept of projects for organising your work. You could have a single project that contains multiple repositories and build pipelines, or you could use separate projects for each. I decided the latter probably makes the most sense for me - one project per GitHub project.
Azure DevOps prompts you to enter a name for your project (I used the name of my GitHub project, NetEscapades.Configuration). As you're linking to a public GitHub project, you can leave the project public.
3. Create a new build pipeline
After clicking "Create project" you'll be taken to the build pipeline configuration page:
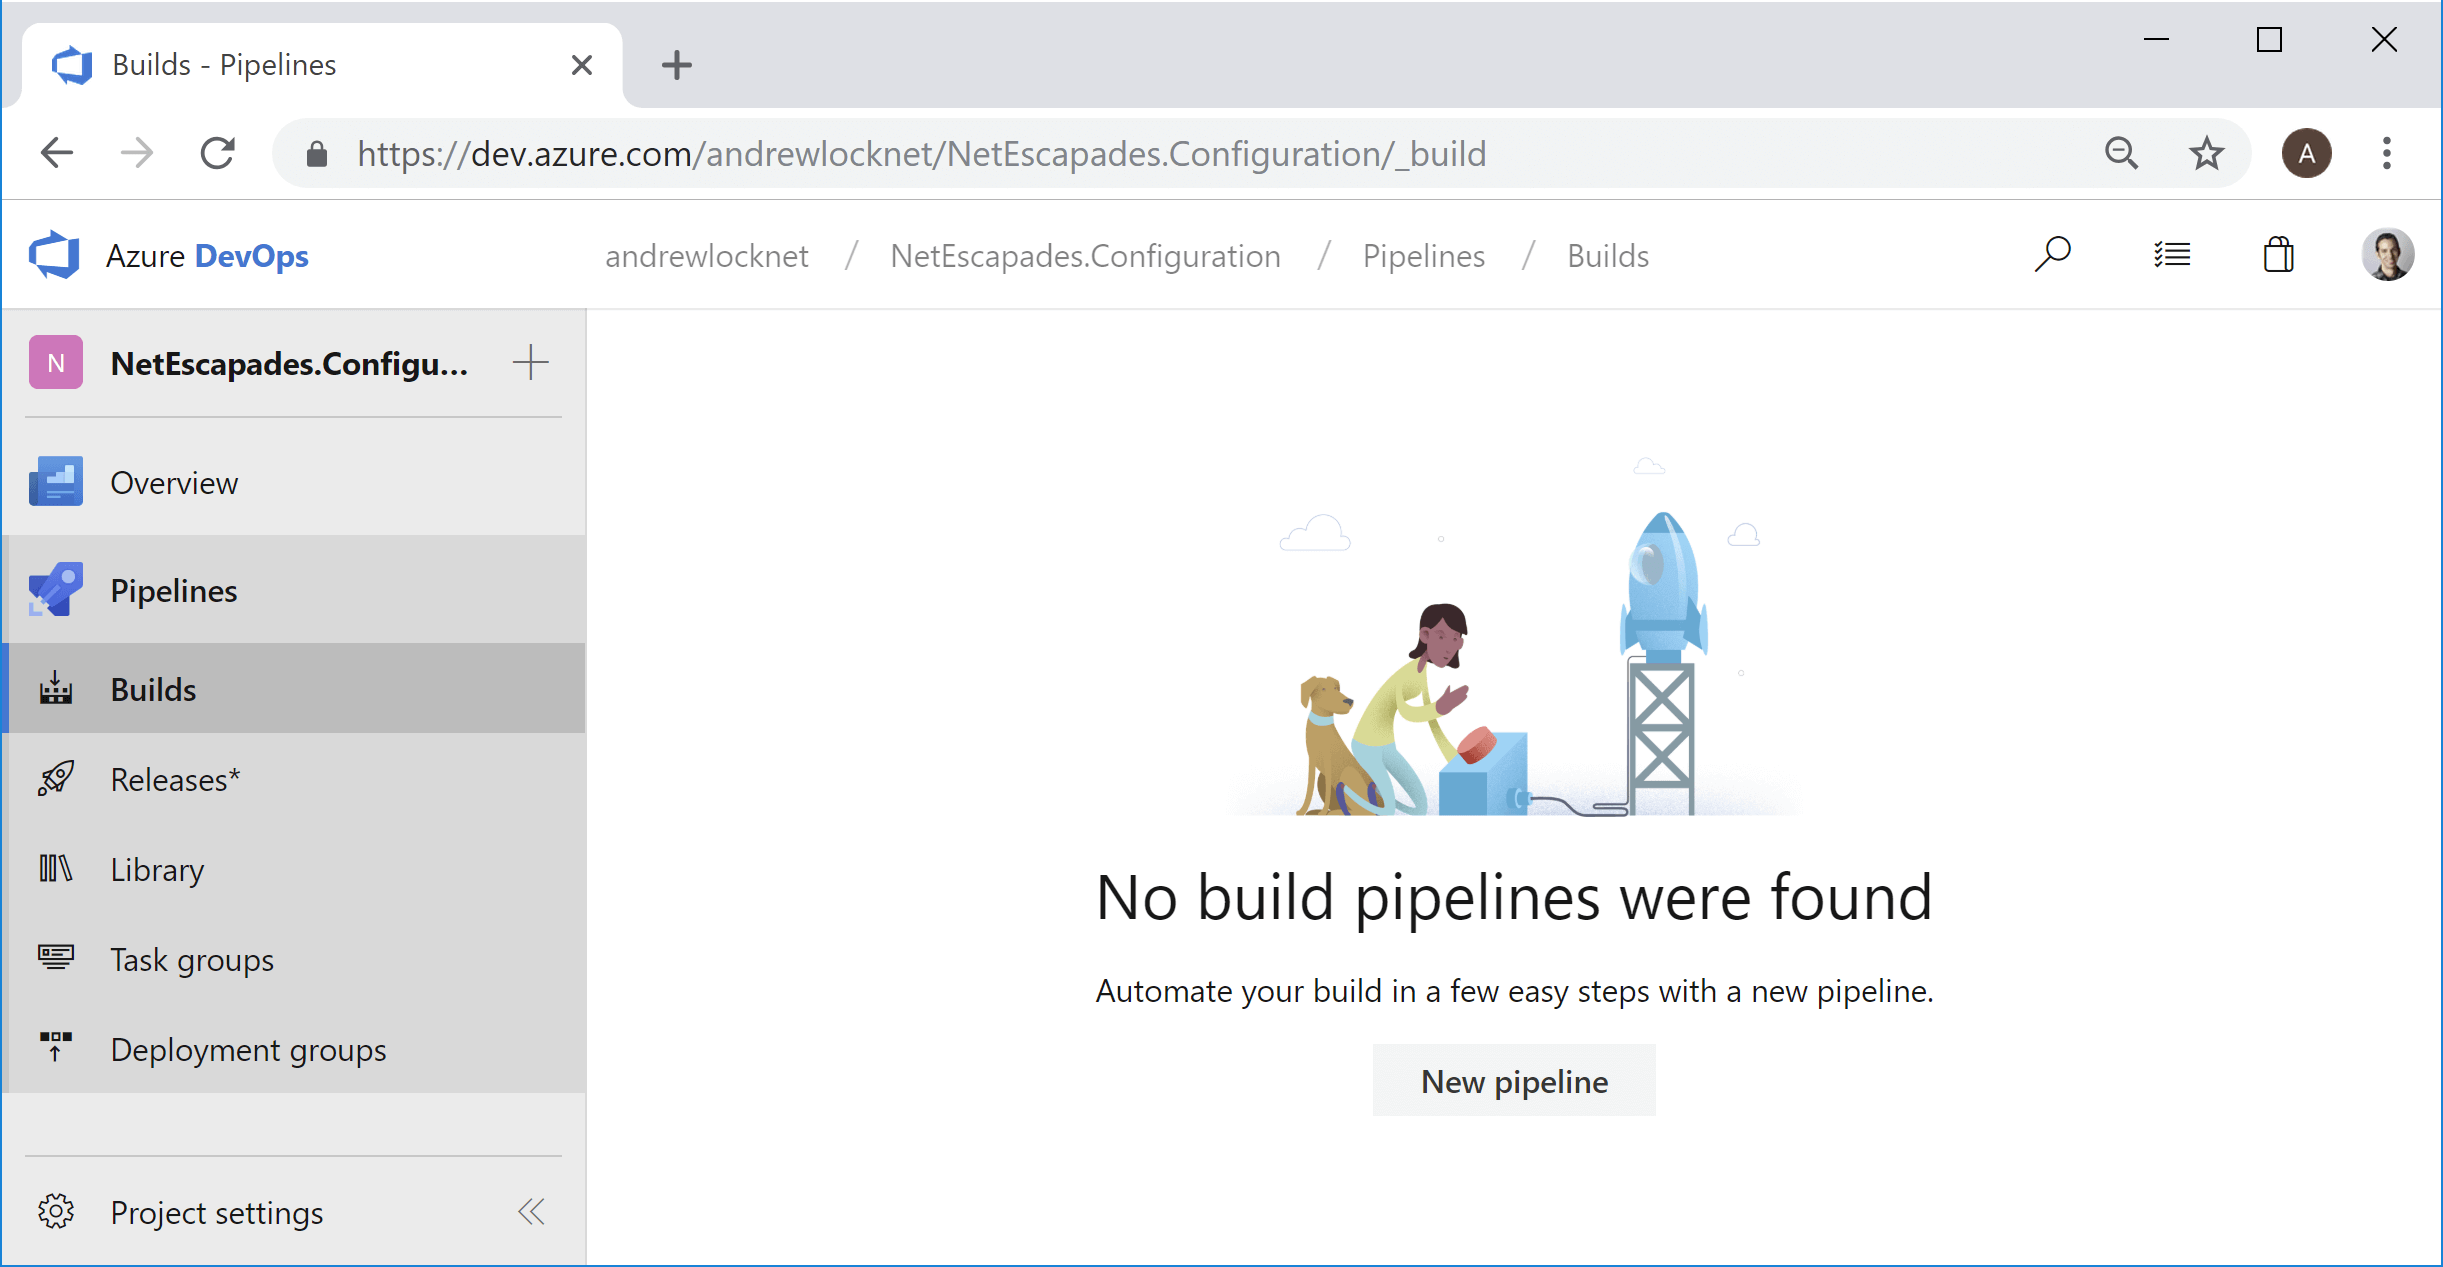
When you click "New pipeline" you'll be presented with a wizard for getting your build up and running. This makes it easy to connect your GitHub repository to the Azure DevOps project.
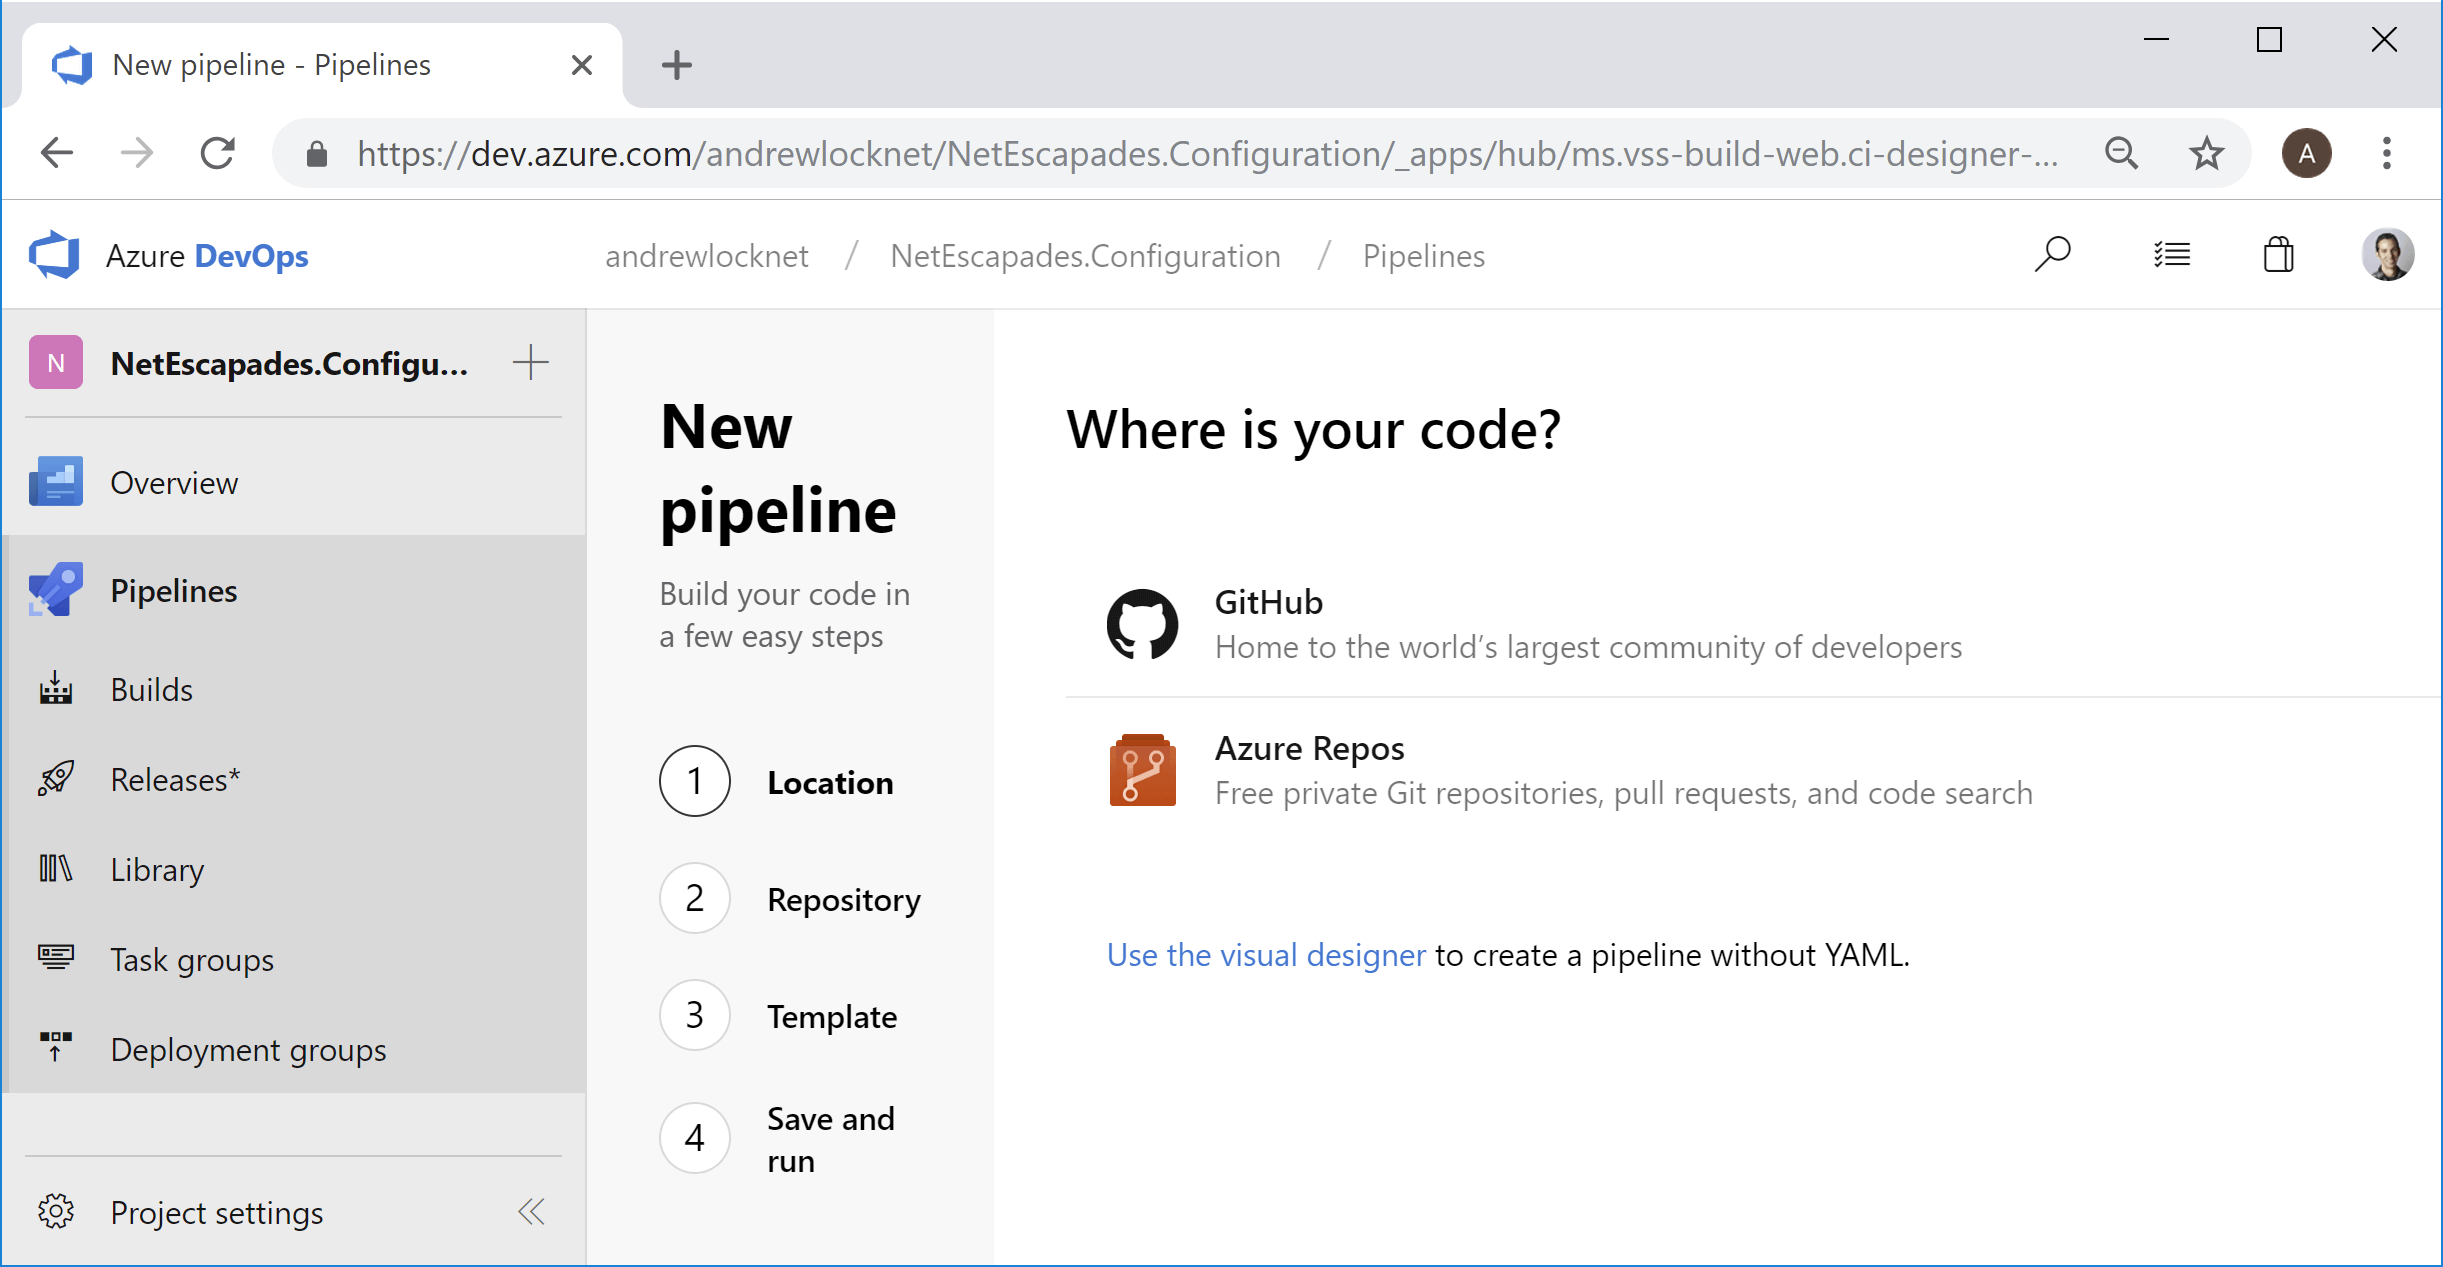
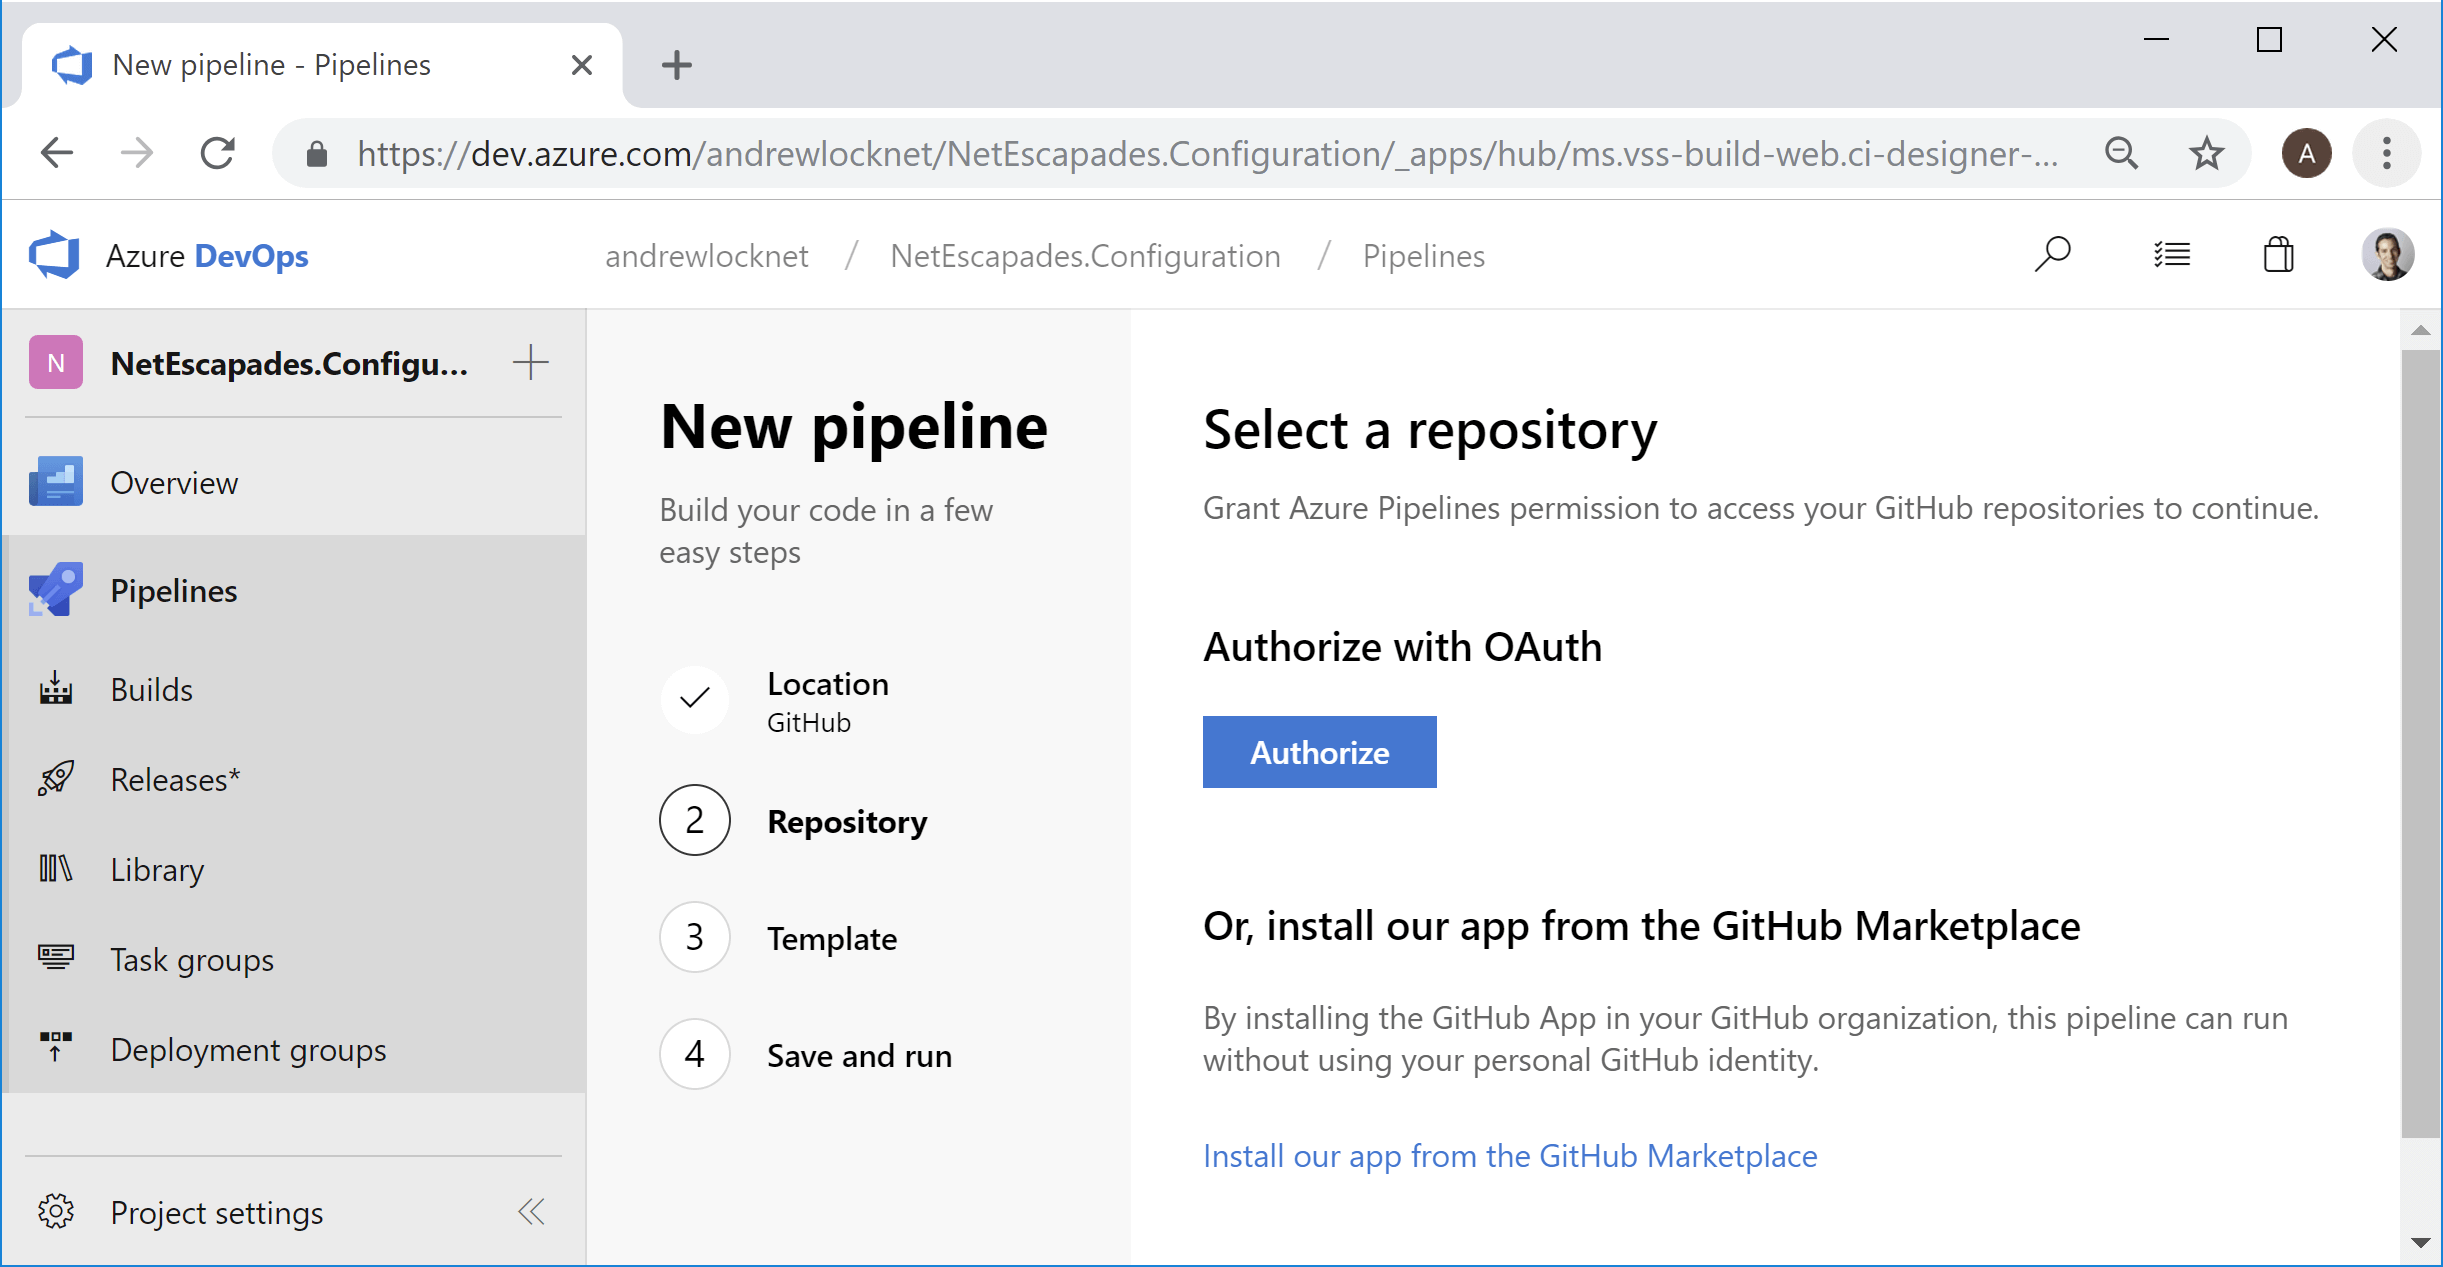
After selecting "GitHub", you'll have to authorise Azure DevOps to have access to your repositories. At this point, the easiest way is to just click the Authorize with OAuth button:
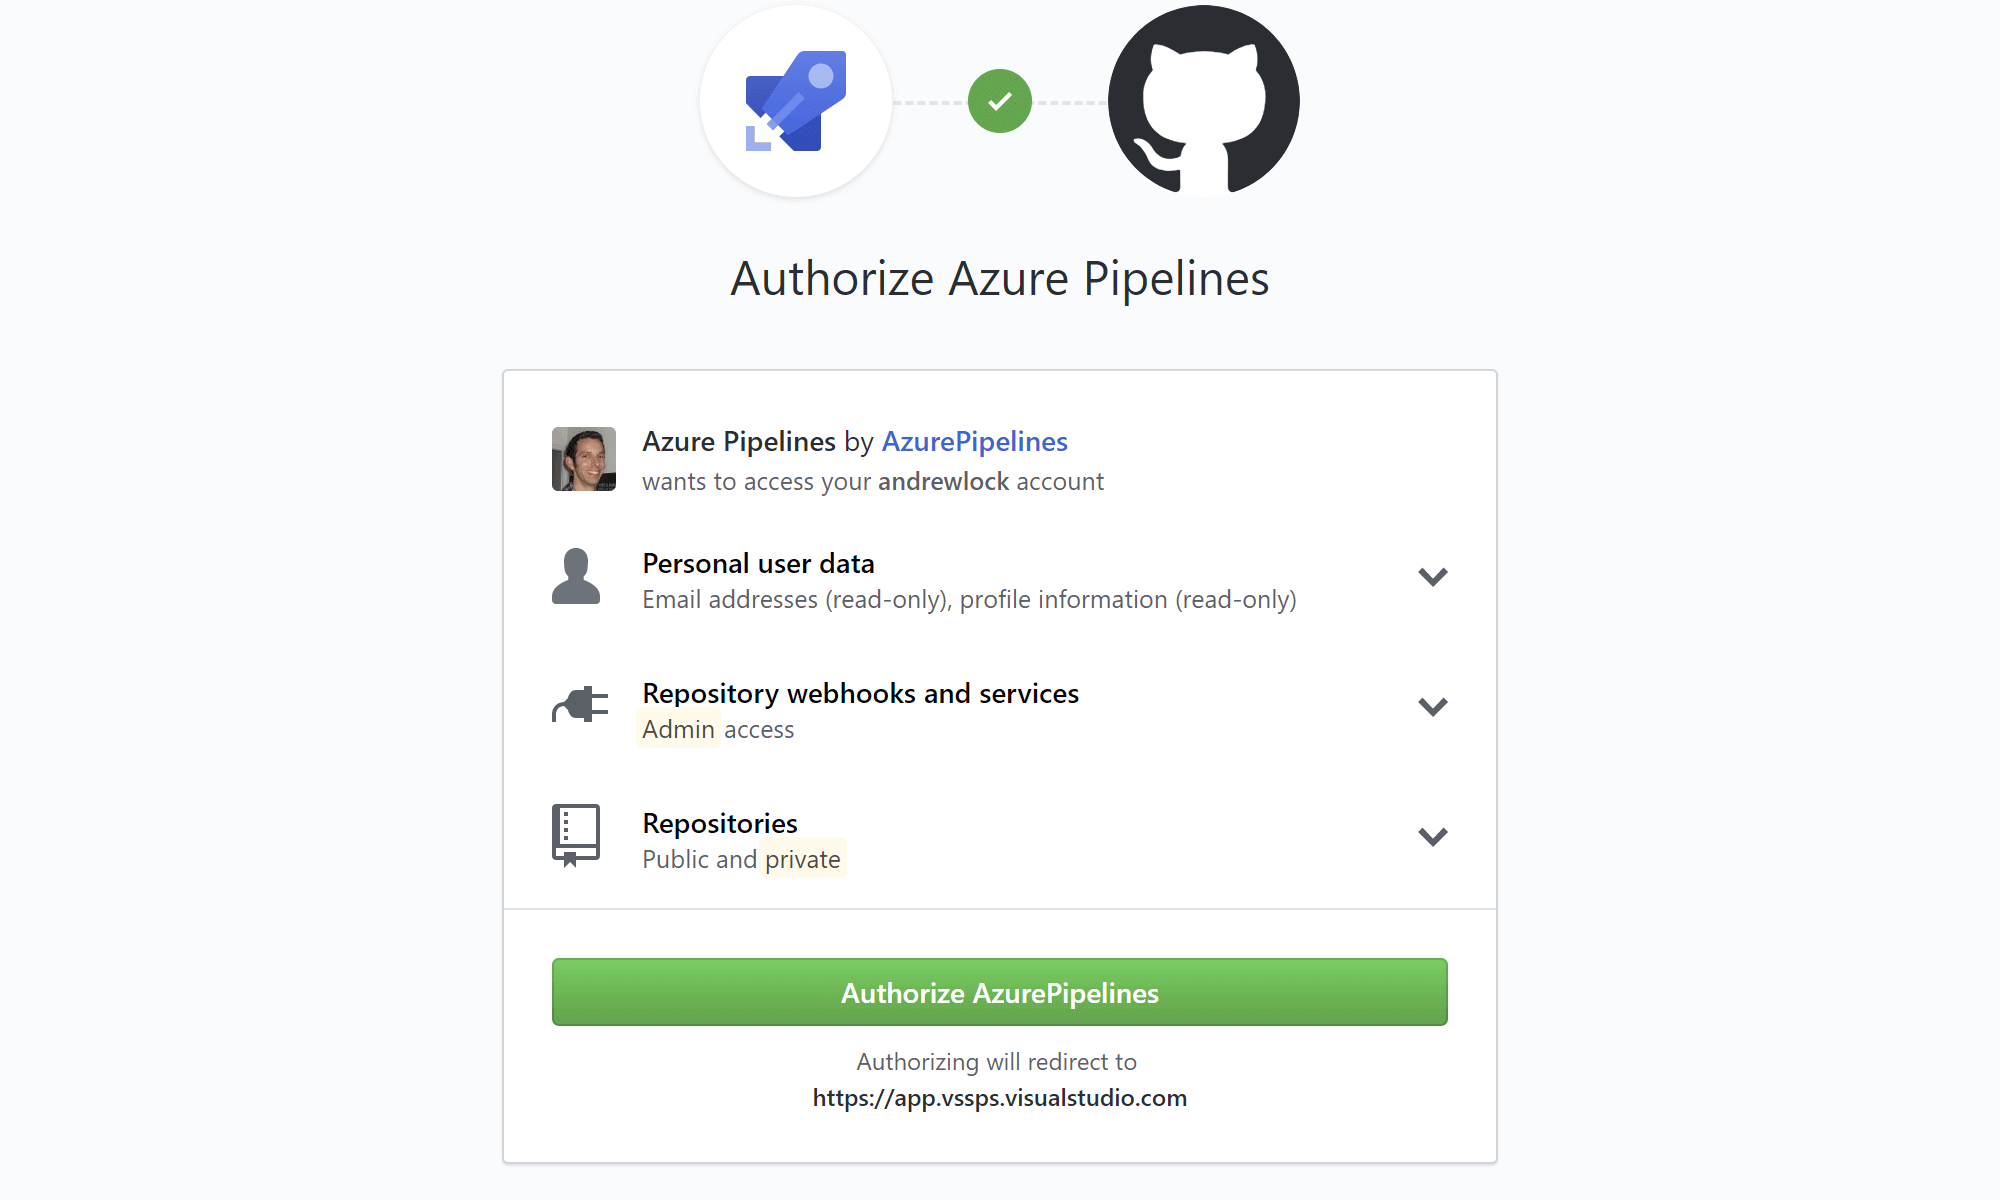
Grant the necessary permissions to the Azure pipelines app:
and choose the repository you want to build.
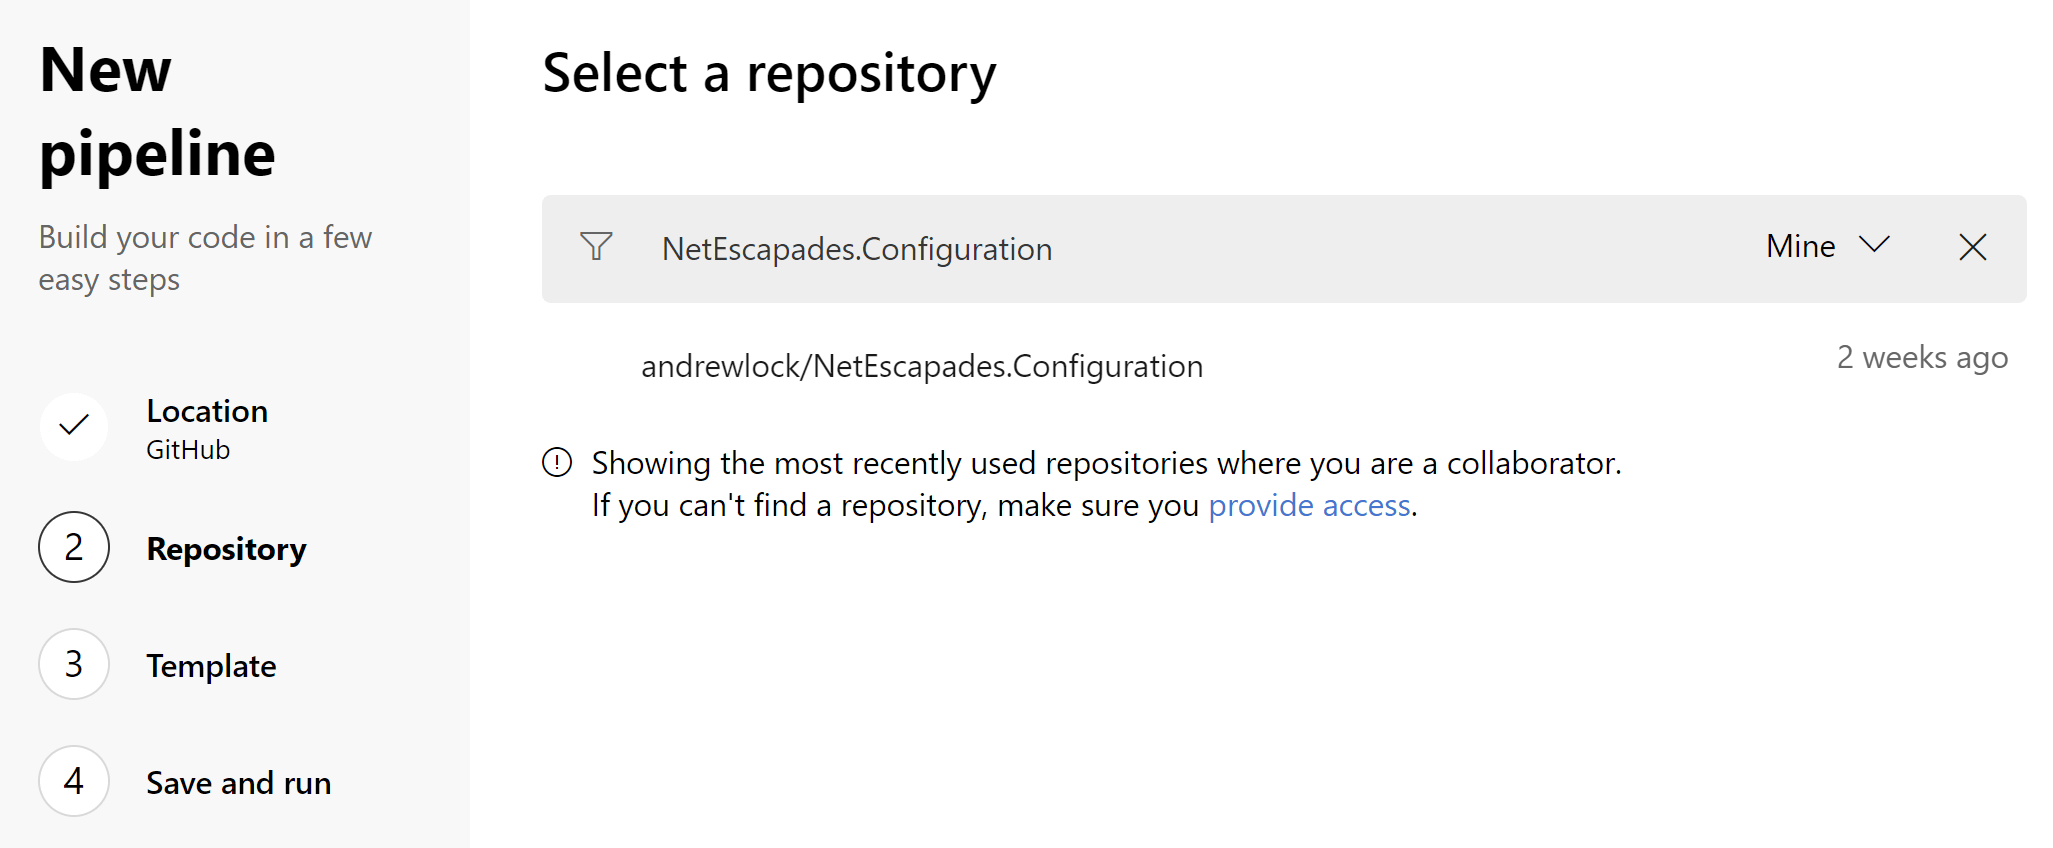
After selecting a repository, you're encouraged to choose a pre-built template for the build pipeline. You can choose anything at this point, it just changes the YAML that's generated, and we're going to change that anyway.
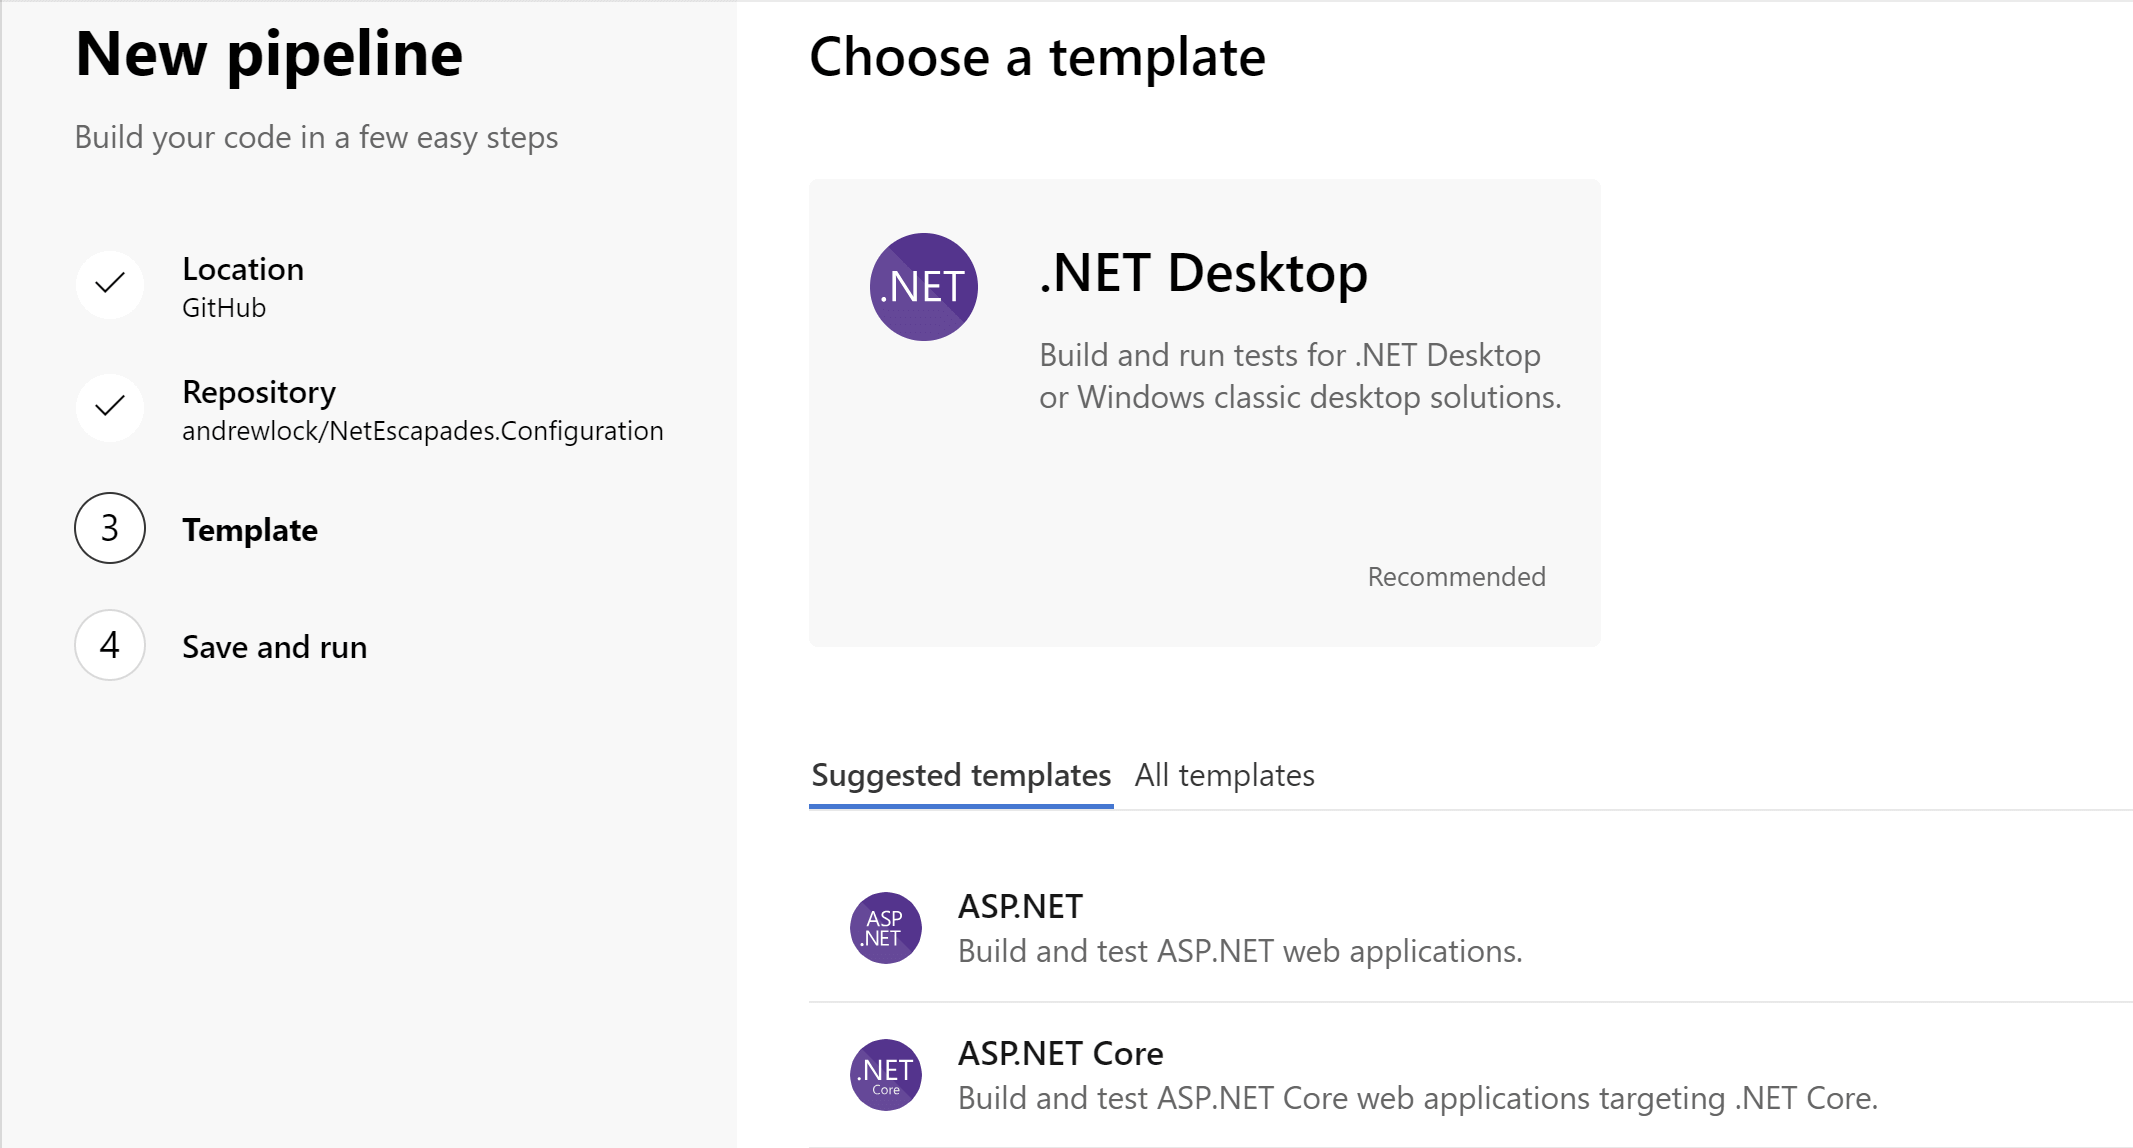
If you select the ASP.NET Core template, you'll be presented with a template like the one below:

Azure pipelines uses a YAML file azure-pipelines.yml in the root of your repository to control the build process. When you click "Save and run", Azure DevOps will commit the azure-pipelines.yml file to your repo (you can choose either to commit directly to master, or to a branch) and start your first build. I believe you can configure a build without using a YAML file, but I wouldn't recommend that. Much better to keep the build specification versioned in your source code repository.
4. Customise the build process
Before we take a look at the builds themselves, lets take a quick look at the azure-pipelines.yml file itself. Rather than show the initial example file, I'll show the version I'm currently using with my NetEscapades.Configuration project. I've added comments throughout to explain the format and what it means.
Tip: Remember, YAML is whitespace and case sensitive, so take care!
# Only trigger CI builds for the master branch, instead
# of every branch. You'll automatically be configured to
# build PRs, but you can't currently control that from the YAML directly
# For details, see https://docs.microsoft.com/en-us/azure/devops/pipelines/build/triggers
trigger:
- master

# We can run multiple jobs in parallel. For this project
# I'm running Linux, Windows, and macOS jobs. For syntac details
# see https://docs.microsoft.com/en-us/azure/devops/pipelines/process/phases
jobs:

# Provide a name for the job
- job: Linux

  # The VM image to use for the hosted agent. For a list of possible agents
  # see https://docs.microsoft.com/en-us/azure/devops/pipelines/agents/hosted
  # You can see the software installed on each agent at the same link.
  pool:
    vmImage: 'ubuntu-16.04'

  # The steps to run to execute the build. I'm using
  # Cake, and so I execute a bash script on Linx and macOS
  steps:
  - bash: ./build.sh
    # You can set environment variables for the build. These
    # aren't really necessary, but they're here as an example
    env:
      COREHOST_TRACE: 0
      DOTNET_SKIP_FIRST_TIME_EXPERIENCE: 1
      DOTNET_CLI_TELEMETRY_OPTOUT: 1

# Run a build on macOS at the same time
- job: macOS
  pool:
    vmImage: 'xcode9-macos10.13'
  steps:
  - bash: ./build.sh
    env:
      COREHOST_TRACE: 0
      DOTNET_SKIP_FIRST_TIME_EXPERIENCE: 1
      DOTNET_CLI_TELEMETRY_OPTOUT: 1

# Run a build on Windows at the same time
- job: Windows
  pool:
    vmImage: 'vs2017-win2016'
  # The Windows build involves running a powershell script
  # to execute the Cake build script
  steps:
  - powershell: .\build.ps1
    env:
      COREHOST_TRACE: 0
      DOTNET_SKIP_FIRST_TIME_EXPERIENCE: 1
      DOTNET_CLI_TELEMETRY_OPTOUT: 1
In my case, the YAML file to get three parallel builds is pretty short, primarily due to the use of Cake for my build script. The ability to easily switch between various machines, whether local, or different CI systems, and just have to run a single build script is one of the big reasons I enjoy using a build system like Cake.
It's worth noting that you can't currently configure everything using the YAML file. One notable aspect was the ability to control under exactly which circumstances a build runs. For example, you can't yet control (from YAML) whether PRs are built by Azure DevOps. As it's common, this functionality is added automatically, but if you wish to disable or customise it, you have to play around in the UI (Builds > Edit > Triggers > Pull Request Validation).
5. Viewing your builds
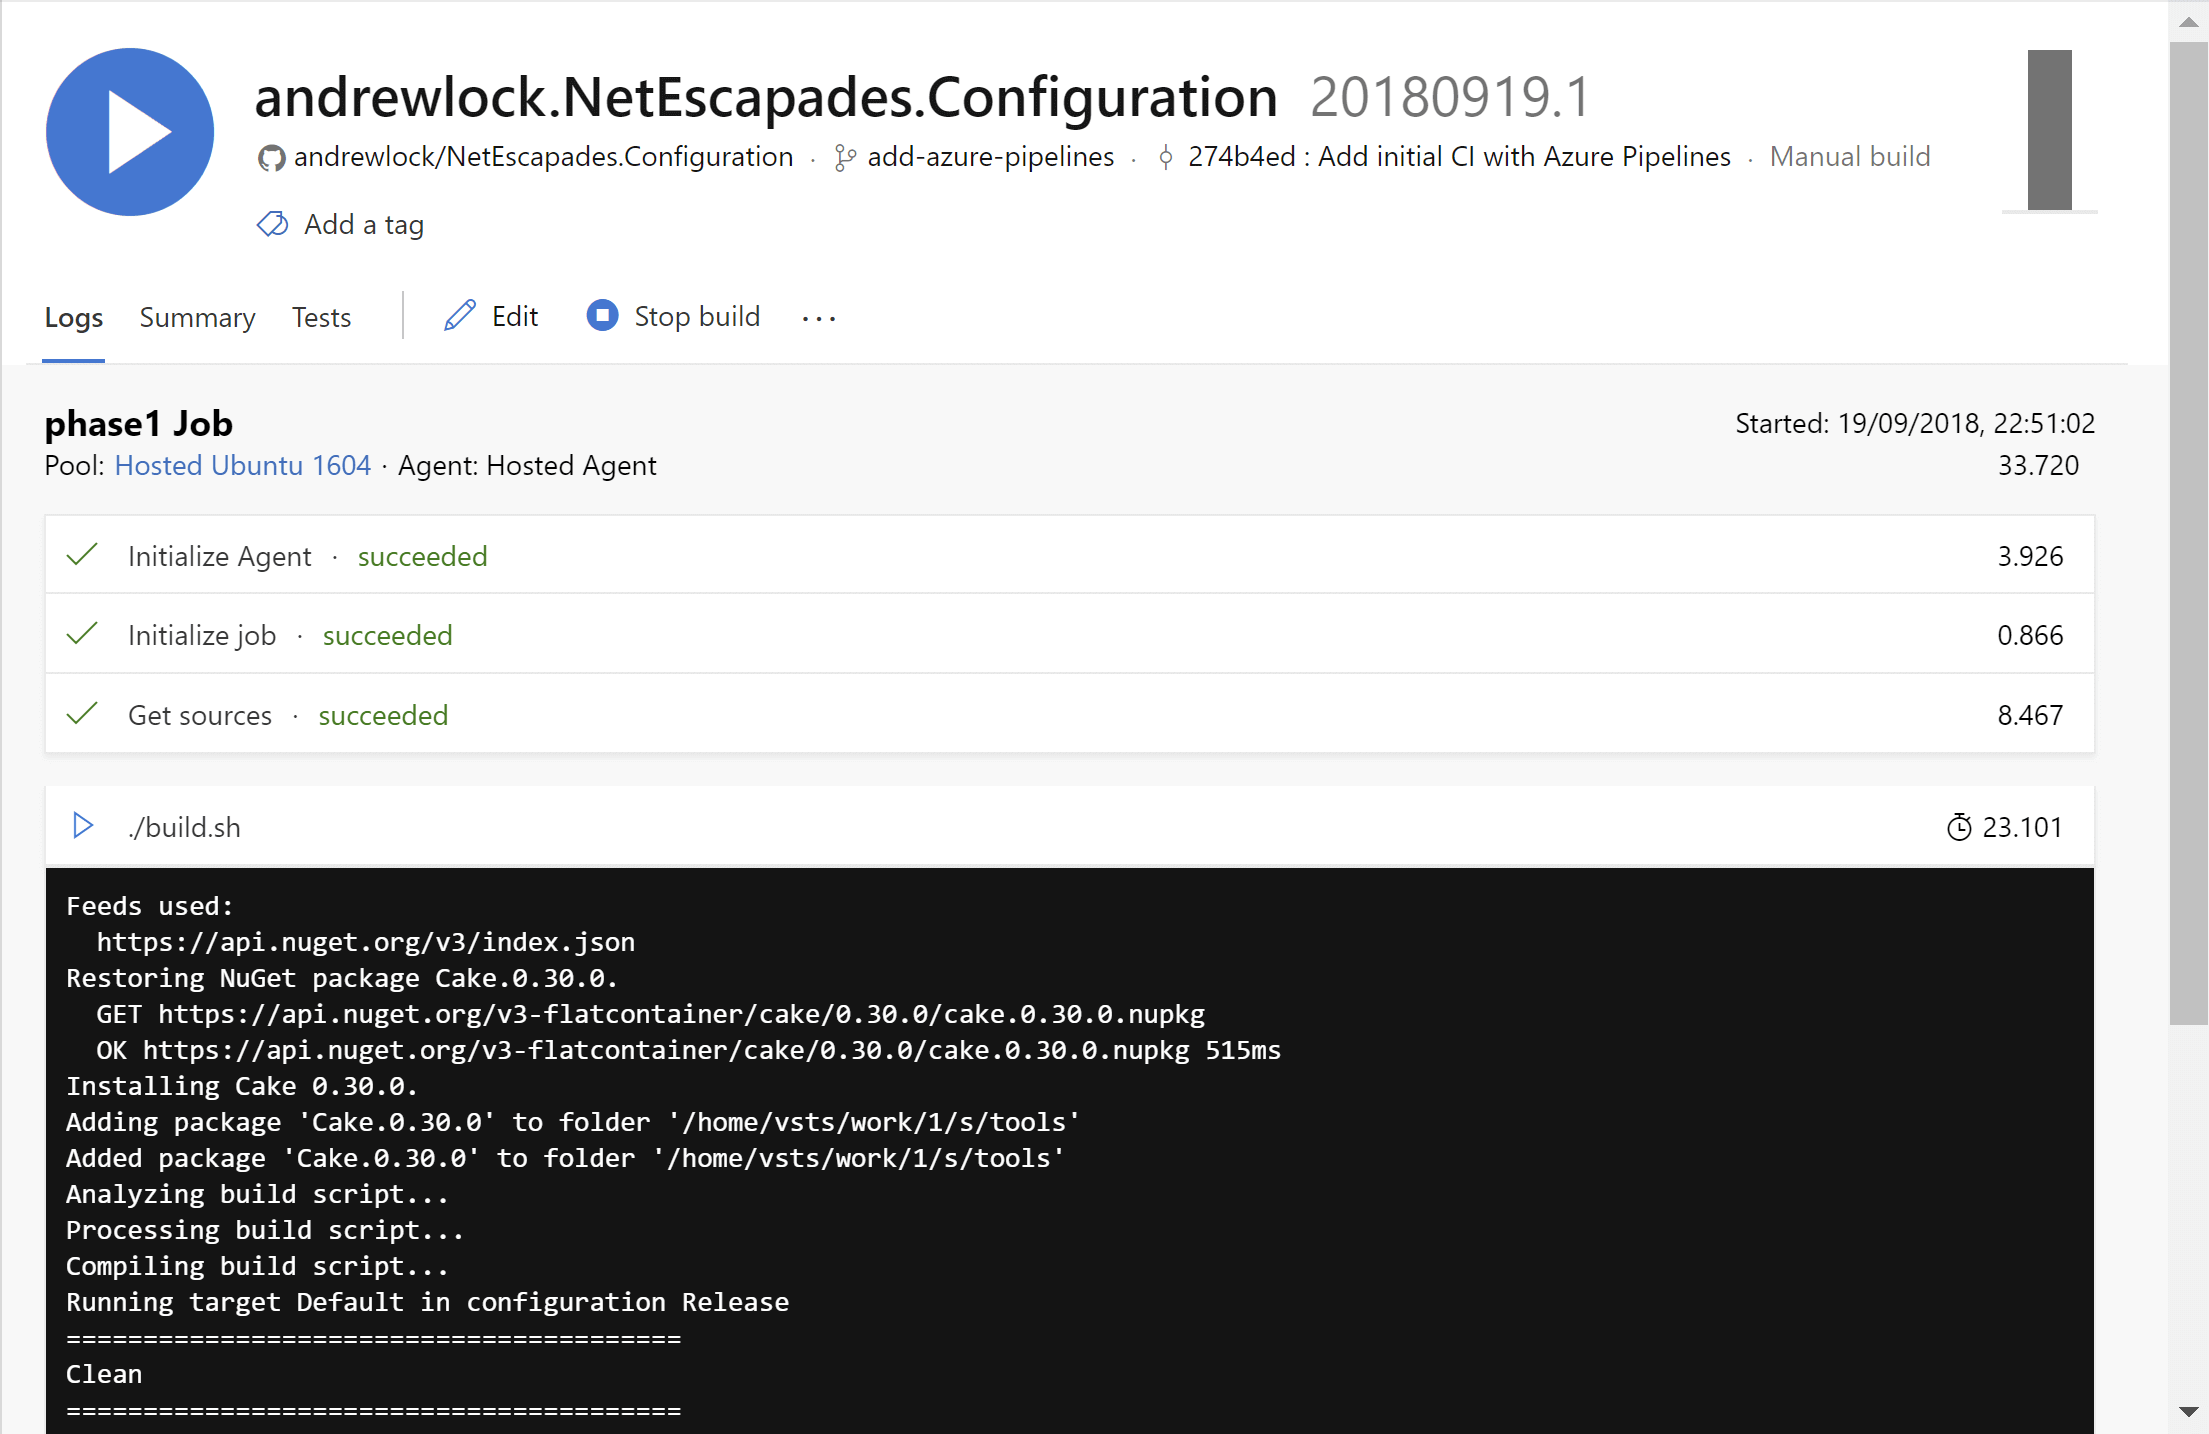
When you click "Save And Run" after customising your build template, you'll be taken to your building project! Here you'll be able to see the various steps as your app progresses, and see the streaming build logs.
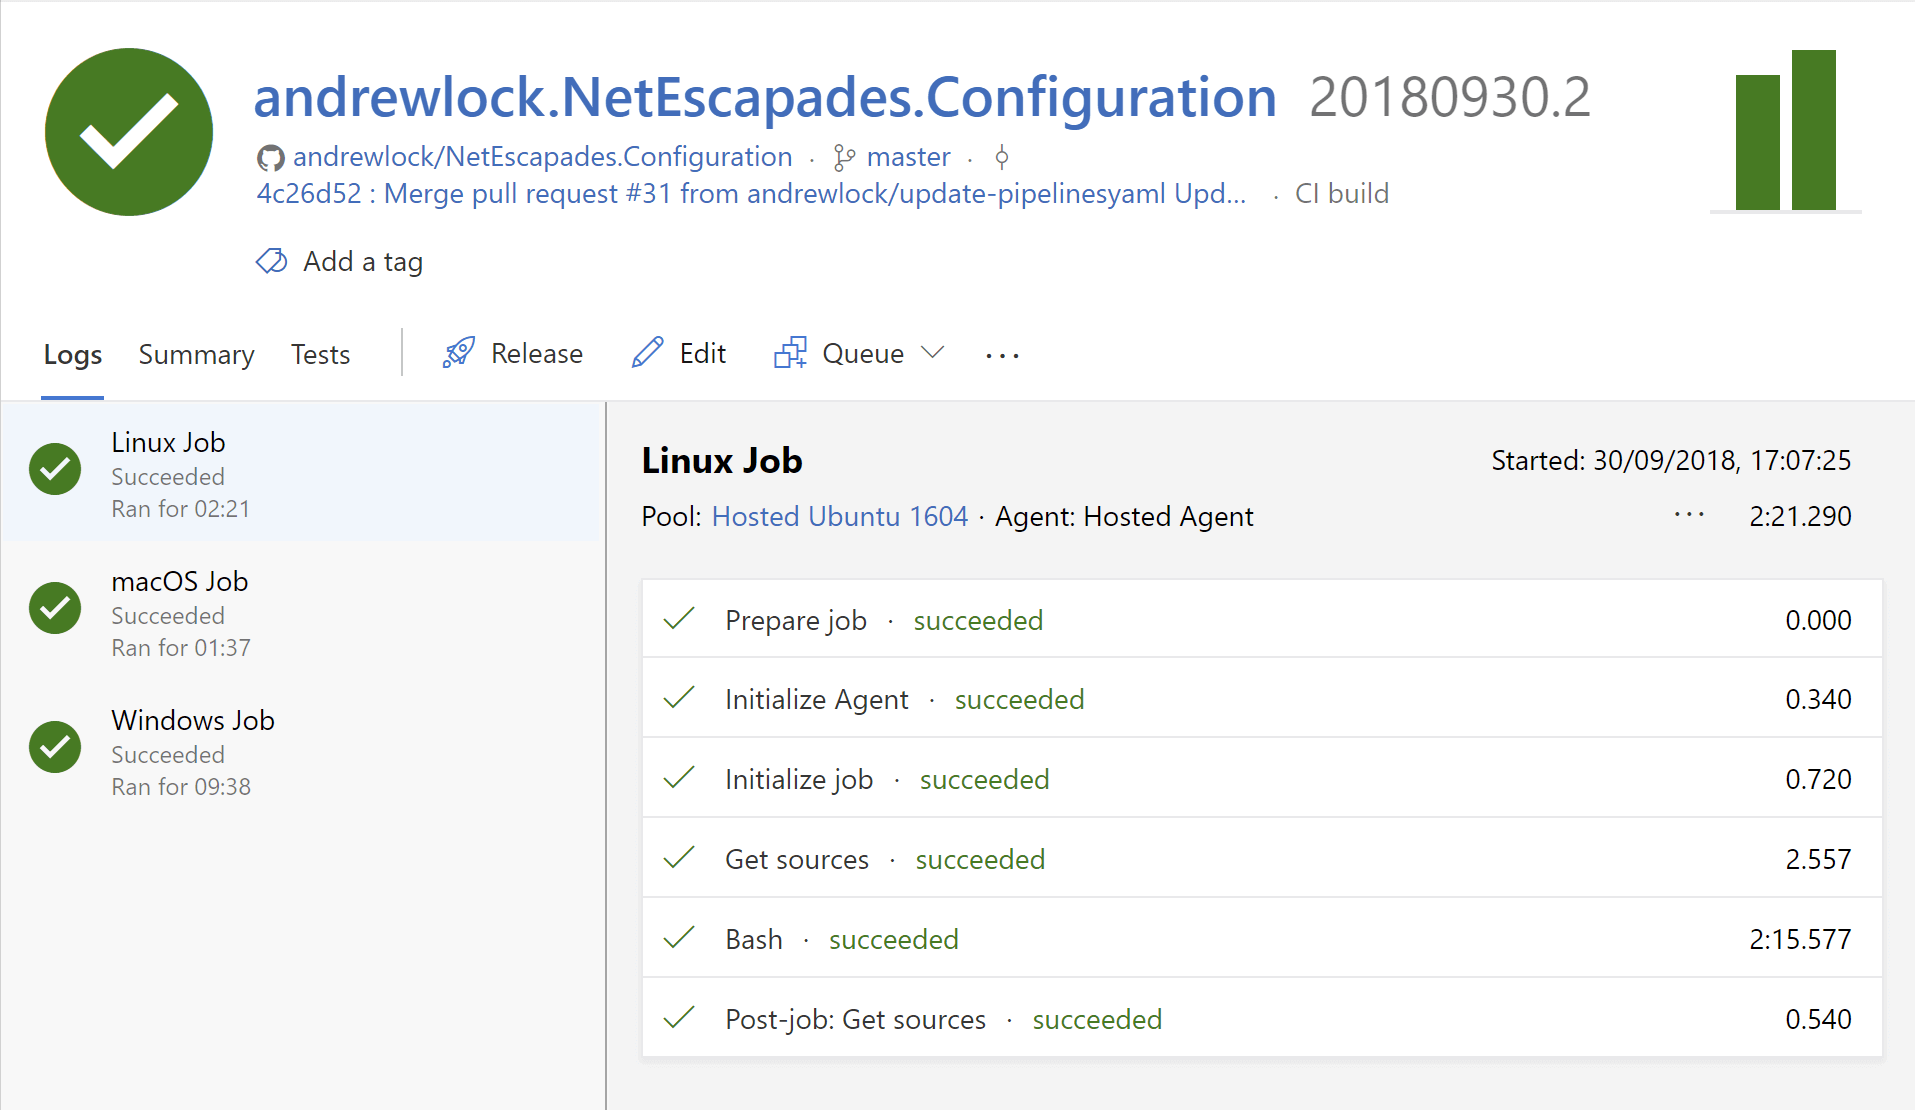
If you've configured multiple jobs to run in parallel, you'll be able to switch between them and see how the build is progressing. After the build is complete you can go back and look through logs, view the test results, add tags etc. Hopefully everything goes smoothly and you get lots of big green ticks!
Support when things go wrong
When I first went through this process, I had some issues getting my builds to pass. The Windows builds were working fine but the Linux builds were very unreliable, failing with a variety of different errors. I was surprised (and impressed) when out of the blue I got this message on my PR branch, offering to help troubleshoot the issue:

After a bit of head-scratching, some trial-and-error, and help from various people on the Azure Pipelines team, we established that there were some issues with some of the hosted agents. A day later, everything was fixed, and the builds were passing. Obviously it wasn't fun trying to figure out why my app wouldn't build, but I can't fault the customer service, especially on a free service!
Bonus: Adding build badges to your README.md
Once you've got your build set up, and lots of green ticks, no doubt you'll want to show it off by adding a build status badge to your GitHub project's README.md page:

Luckily, Azure Pipelines includes a handy markdown generator you can use, the hardest part is finding it! Navigate to your build pipeline and click the "overflow" menu (the three dots next to "Queue"). There you'll find the "Status badge" page:
![]()
This pops out an overlay which gives you two possible URLs for the badge, as well as some sample markdown to use in your README.md.
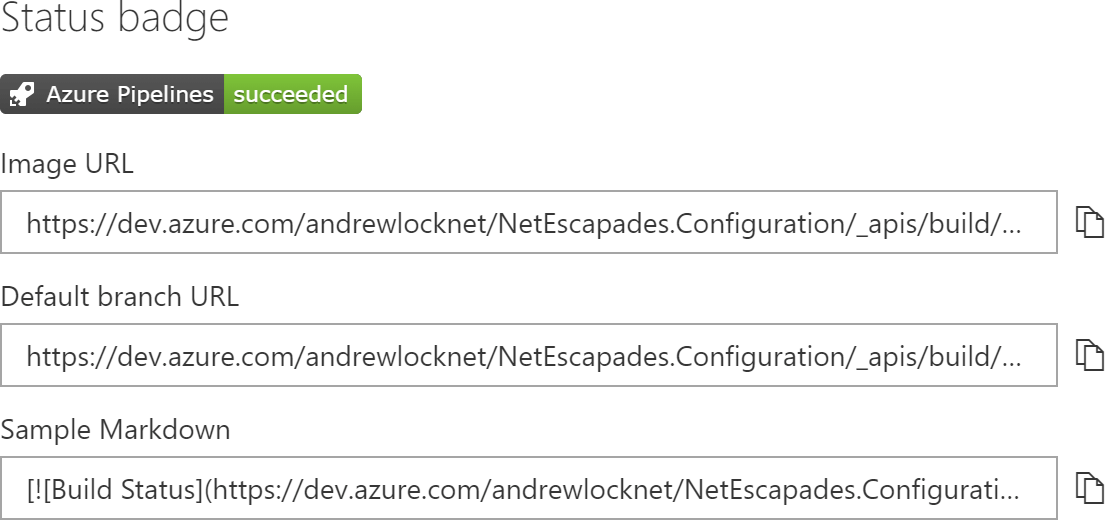
The flyout gives you three things:
- Image URL: As far as I can tell, this is the build statuse badge image for the latest build, whether that's the
masterbranch, a PR branch, or some other branch if you haven't restricted tomasteronly. - Default branch URL: This is the build status badge image for the latest build of the
masterbranch - Sample Markdown: Markdown for a linked image you can drop directly into your README.md. Note: this uses the "all branches" Image, not the Default branch image.
The image URL is actually pretty hackable - based on the URLs generated for my project, you can just replace your organisation (andrewlocknet), project (NetEscapades.Configuration), and pipeline name (andrewlock.NetEscapades.Configuration) in the template below. The ?branchName=master querystring is what restricts the build status to the master branch.
https://dev.azure.com/{ORGANISATION}/{PROJECT}/_apis/build/status/{PIPELINE}?branchName=master
It's worth noting that by default, the generated sample Markdown uses the "all builds" image, not the master branch image. It also includes a link to the latest build:
[](https://dev.azure.com/andrewlocknet/NetEscapades.Configuration/_build/latest?definitionId=1)
For my project, I want to display the latest build status for the master branch only - I don't want to present the build status of random branches on my projects "homepage". All you need to do is add the ?branchName=master suffix to the markdown image URL, and you're good to go:
[](https://dev.azure.com/andrewlocknet/NetEscapades.Configuration/_build/latest?definitionId=1)
Beautiful:

Conclusion
That's as far as I went with Azure DevOps. My project is building on Windows, macOS and Linux with Azure DevOps, and Linux and Windows with AppVeyor, and AppVeyor is managing my NuGet package releases. The release management features of Azure DevOps look top notch too, but I don't have any reason to give them a try yet when I already have a working process.
Overall, I'm impressed with the service, the UI certainly looks nice, and is generally pretty easy to navigate around, even to a newcomer. Having said that there are a lot of knobs and buttons you could play with, and I don't have a clue what they do! I hope they continue to improve the power of the YAML files so I can just control everything in there, whether it's the build process or release management.