
In a recent post I looked at whether you should consider using Razor Components in places where you would previously have used View Components. The answer was an emphatic no, but that doesn't mean you shouldn't use Razor Components, just don't use them like View Components!
In this post I look at a different use case, one that is suited to Razor Components, and add some client-side functionality that otherwise would have required rather more effort.
The scenario: cascading dropdowns
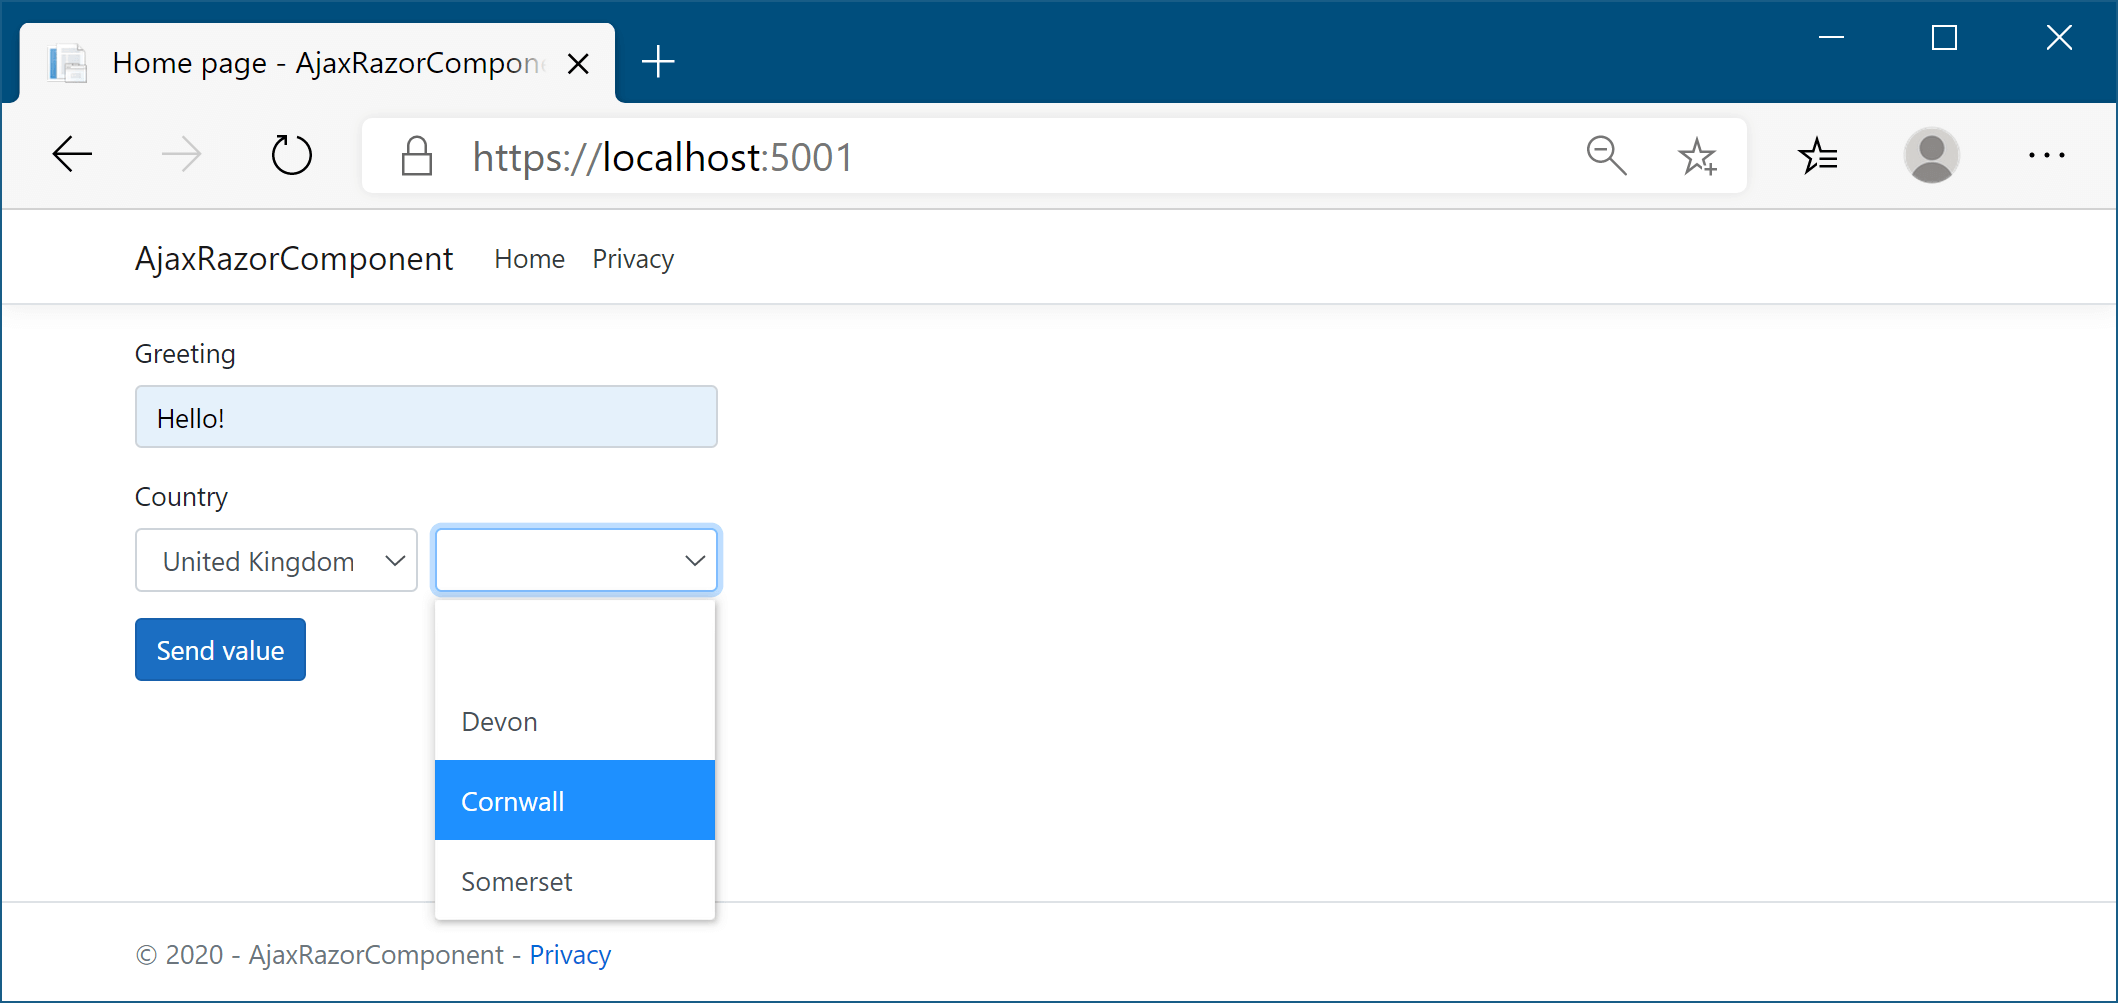
The scenario I'm going to use in this post is probably familiar: cascading dropdowns. That is where you have two dropdowns (<select> elements), where changing a value in the first drop down changes the values in the second. In the example below, selecting a country from the drop down changes the states that you can choose from in the second:
Please don't be offended USA, I know you have more than 2 states, I'm just lazy 😉
I chose this scenario for a couple of reasons. First, it's a very common scenario. I've personally built similar cascading dropdowns on numerous occasions. Second, it's a common scenario for demonstrating how to use AJAX with Razor Pages:
- Mike Brind's website Learn Razor Pages describes exactly this scenario.
- Jon P Smith (author of EF Core in Action) describes a similar scenario in his popular blog post..
These posts both explore multiple options for achieving the dynamic client-side behaviour, which inevitably involve some JavaScript (JS) on the client-side (either JQuery or native fetch APIs) along with either additional MVC actions, dedicated Razor Pages, or additional Razor Page handlers for generating the response. Up to now those were pretty much the only options for Razor Pages apps.
Razor Components provide an intriguing alternative. Now you can write C#/Razor code to add an island of interactivity into an otherwise server-side rendered app.
The JS examples in those posts aren't obsolete just because Razor Components exist. They're perfectly valid options, and potentially easier, depending on your perspective and requirements. The approach I show in this post just shows an alternative.
⚠ Disclaimer - you're using Blazor ⚠
Using Razor Components (if they're not statically rendered as in my last post) implies you're using Blazor. Blazor is all the rage in .NET at the moment, and Blazor Server was officially released with .NET Core 3.0 in 2019. Blazor WebAssembly (client side) is planned for release in the first half of 2020.
It's important to realise what you're signing up for when you use Blazor. If you use Blazor Server, you're getting:
- A stateful web application that communicates between your clients and server via SignalR/web sockets.
- A small client-side download size.
- Primarily execution on the server not the client.
- Clients need a permanent connection to the server to interact. Offline mode is not supported, and latencies will be higher than for client-side frameworks.
- Applications can directly access resources (e.g. a database, the filesystem) as though they're running on the server (because they are!)
In contrast, with Blazor WebAssembly, you're getting:
- A (potentially) client-side only application. Essentially equivalent to other JavaScript client-side frameworks like Angular, React, or Vue, so you only need a simple file server to serve the static files.
- A large client-side download size. Trying to reduce this size is one of the primary focuses for the .NET teams in Microsoft at the moment.
- Execution occurs on the client, not the server.
- Clients don't need a connection to the server, and can support offline mode (by using a service worker).
- Application must access resources via traditional web APIs (the same way other client-side frameworks do today).
Whichever approach you go for, there are trade offs to be made. I've only played with Blazor a little, and there's plenty of more in-depth opinion pieces out, but my gut feeling is:
Blazor Server will be a great choice for enterprise/line of business apps, where a good web connection is practically guaranteed. The biggest gotcha from an operations perspective is that apps are stateful, and you need to consider how to manage the SignalR connections.
On the other hand:
Blazor WebAssembly will be a very interesting "drop in replacement" to current JS client-side frameworks for "consumer" apps (once they tackle technical hurdles like performance). My biggest concern is the fact we either have to reinvent the wheel to match the existing JS library ecosystem, or you're stuck doing JS interop, and in doing so are giving up some of the benefits Blazor promises.
Anyway, that's rather more of a digression than I intended initially, the important thing is that you're aware the samples in this post use Blazor Server, and as such have all the associated operational challenges that come with that.
Time to look at some code.
Adding Blazor to a Razor Pages application.
The first thing we need is a Razor Pages application. I created the default Razor Pages application (without authentication) by running dotnet new webapp. Next, I ran through the steps from the documentation to add Blazor to a Razor Pages app:
- Add a
<base href="~/">tag just before the closing</head>in Pages/Shared/_Layout.cshtml. - In the same file, add the following
<script>tag, just before the closing</body>. This is the script that bootstraps Blazor on the client side. If you're only running Razor Components on a sub-set of pages, you could conditionally include this in the"Scripts"section, in the same way validation scripts are only included on pages that need them:
<script src="_framework/blazor.server.js"></script>
- Add an _Imports.razor file in the project root directory containing the following (and updating the last namespace to match the project name):
@using System.Net.Http
@using Microsoft.AspNetCore.Authorization
@using Microsoft.AspNetCore.Components.Authorization
@using Microsoft.AspNetCore.Components.Forms
@using Microsoft.AspNetCore.Components.Routing
@using Microsoft.AspNetCore.Components.Web
@using Microsoft.JSInterop
@using AjaxRazorComponent // <- update to match your project's namespace
- In
Startup.ConfigureServices(), add the Blazor services:
public void ConfigureServices(IServiceCollection services)
{
    // .. other configuration
    services.AddRazorPages();
    services.AddServerSideBlazor(); // <-- Add this line
}
- Map the Blazor SignalR hub in
Startup.Configure():
public void Configure(IApplicationBuilder app, IWebHostEnvironment env)
{
    // .. other configuration

    app.UseEndpoints(endpoints =>
    {
        endpoints.MapRazorPages();
        endpoints.MapBlazorHub(); // <-- Add this line
    });
}
With these steps complete, we now have a Razor Pages/Blazor hybrid application. Hooray!
Now it's time to actually make use of the Blazor features.
Building the form
As this is for demonstration purposes, I'm going to start by creating a very basic form on the home page of the application, Pages/Index.cshtml. This form consists of a single field (currently) and a submit button. Whatever is entered and POSTed to the server is echoed back in the alert (safely).
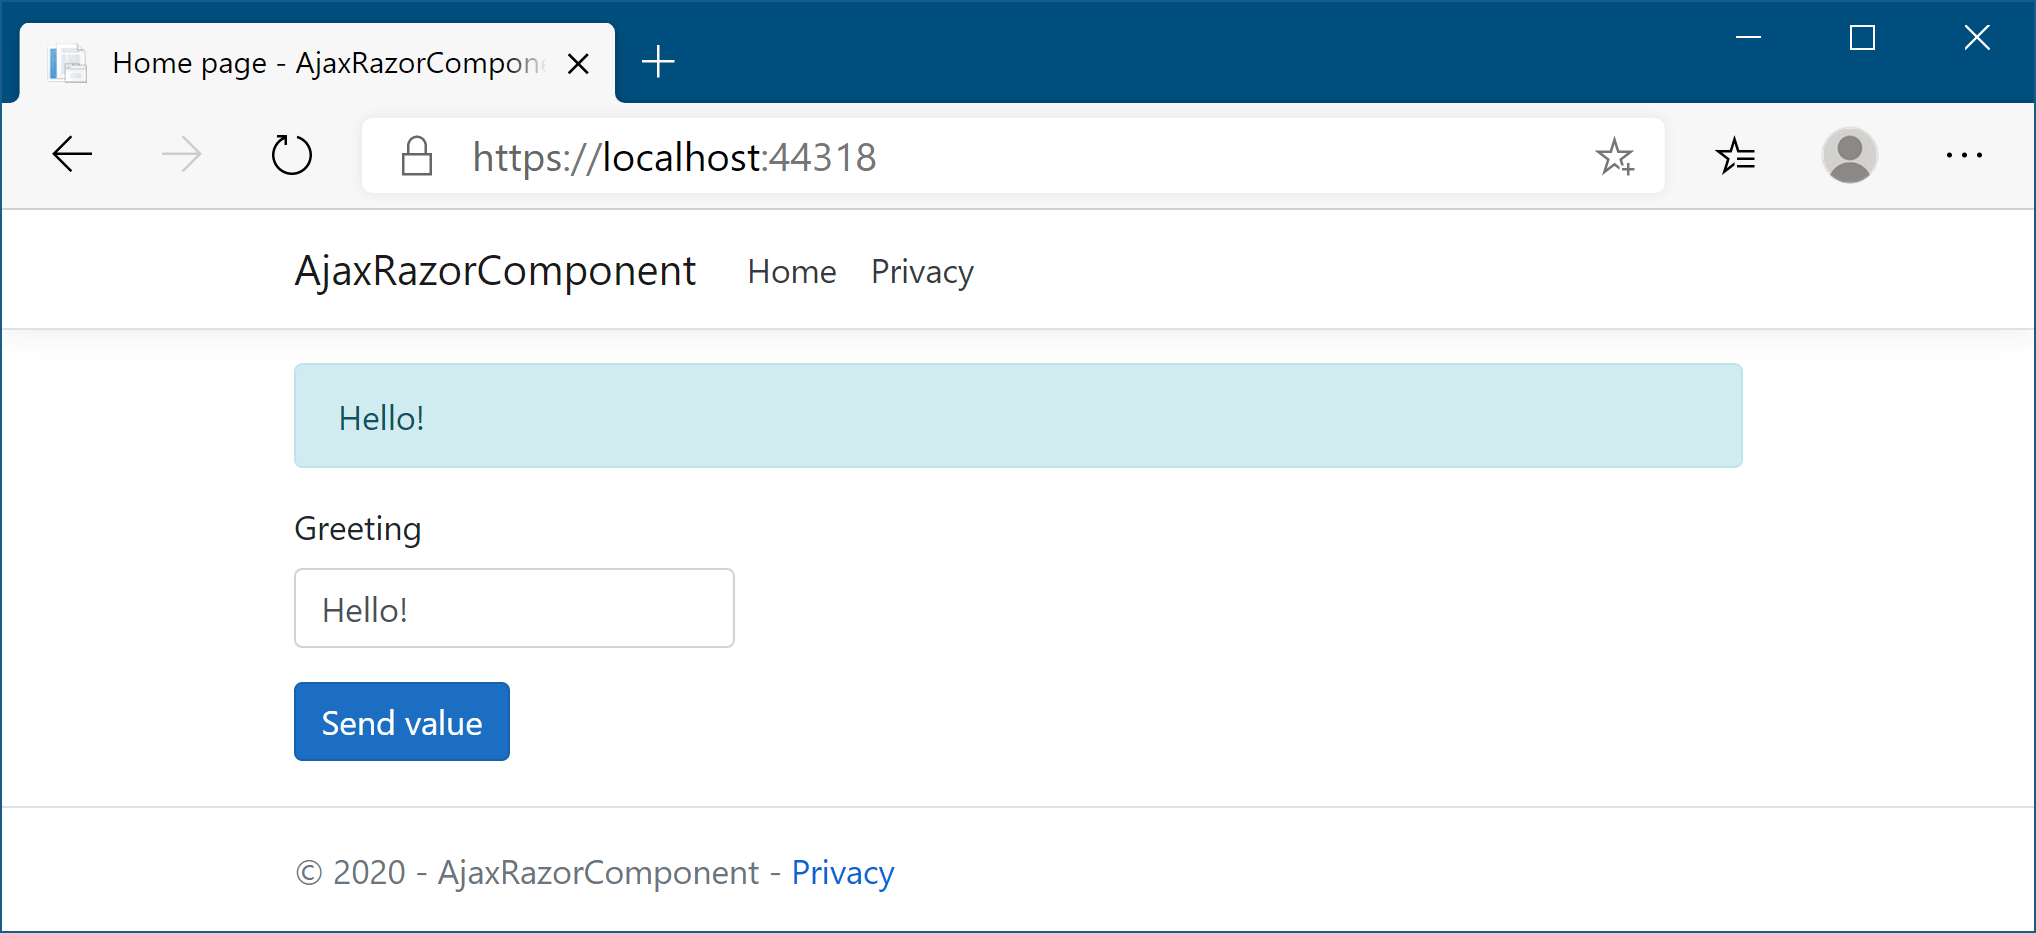
There's nothing particularly special in the Razor markup. We use the standard Razor Page form Tag Helpers (asp-page, asp-validation-summary, asp-for etc) to build the form that contains a single Greeting field:
@page
@model IndexModel

@if (!string.IsNullOrEmpty(Model.Message))
{
    <div class="alert alert-info">
      @Model.Message
    </div>
}

<div class="row">
    <div class="col-md-4">
        <form asp-page="/Index" method="post">
            <div asp-validation-summary="ModelOnly" class="text-danger"></div>
            <div class="form-group">
                <label asp-for="Greeting"></label>
                <input asp-for="Greeting" class="form-control" />
                <span asp-validation-for="Greeting" class="text-danger"></span>
            </div>

            <button id="registerSubmit" type="submit" class="btn btn-primary">Send value</button>
        </form>
    </div>
</div>
The code-behind is similarly uneventful. For now the OnPost handler just copies the model-bound Greeting field to the Message property for display:
public class IndexModel : PageModel
{
    [BindProperty, Required] public string Greeting { get; set; } // Required
    public string Message { get; set; } // Not model bound

    public void OnGet() { }

    public void OnPost()
    {
        if (ModelState.IsValid)
        {
            Message = Greeting; // Only show the message if validation succeeded
        }
    }
}
Now we can start integrating our Razor Components.
Building a Razor components cascading dropdown
The goal of this section is to build a simple cascading drop-down component, where the value selected in the first component changes the values available in the second. Finally, we want the selected values to be POSTed in the Razor Page, just as though we'd used normal drop-downs and traditional AJAX to retrieve the possible values.
Start by adding a new file, CountryDropdown.razor. For simplicity I added it to the Pages folder, but you will probably want to organise your files more carefully than that!
Inside this file add the following:
<div class="form-row">
    <div class="col">
        <select @onchange="CountrySelectionChanged" name="@CountryFieldName" class="form-control">
            <option></option>
            @foreach (var country in Countries)
            {
                <option selected="@(country==SelectedCountry)" value="@country">@country</option>
            }
        </select>
    </div>
    <div class="col">
        @if (!string.IsNullOrEmpty(SelectedCountry))
        {
            <select name="@StateFieldName" class="form-control">
                <option></option>
                @foreach (var state in States[SelectedCountry])
                {
                    <option selected="@(state==SelectedState)" value="@state">@state</option>
                }
            </select>
        }
    </div>
</div>

@code {

    [Parameter] public string SelectedCountry { get; set; }
    [Parameter] public string SelectedState { get; set; }

    [Parameter] public string CountryFieldName { get; set; }
    [Parameter] public string StateFieldName { get; set; }

    private static readonly List<string> Countries = new List<string> {"United Kingdom", "USA" };
    private static readonly Dictionary<string, List<string>> States = new Dictionary<string, List<string>>
    {
        {"United Kingdom", new List<string>{"Devon", "Cornwall", "Somerset" } },
        {"USA", new List<string>{"New York", "Texas" } },
    };

    public void CountrySelectionChanged(ChangeEventArgs args)
    {
        var country = args.Value as string;

        if (!string.IsNullOrEmpty(country) && Countries.Contains(country))
        {
            SelectedCountry = country;
        }
        else
        {
            SelectedCountry = null;
        }
    }
}
That's quite a lot of code in one go (and the code hightlighting for Razor isn't brilliant on my blog), so I'll break it down piece by piece, starting from the bottom @code section.
@code {
    [Parameter] public string SelectedCountry { get; set; }
    [Parameter] public string SelectedState { get; set; }

    [Parameter] public string CountryFieldName { get; set; }
    [Parameter] public string StateFieldName { get; set; }

    // ...
}
First we have the parameters that are passed in from a parent component (which will be our Razor Page). These specify the currently selected values (SelectedCountry and SelectedState) and the names to use for the controls.
We need to provide the names for the controls so that they are bound correctly to our Razor Page model when we POST back to the server. The SelectedCountry and SelectedState are provided so that we can preserve the values across POSTs, or to set an initial value
// ...
private static readonly List<string> Countries = new List<string> {"United Kingdom", "USA" };
private static readonly Dictionary<string, List<string>> States = new Dictionary<string, List<string>>
{
    {"United Kingdom", new List<string>{"Devon", "Cornwall", "Somerset" } },
    {"USA", new List<string>{"New York", "Texas" } },
};

// ...
The next static properties serve as dummy implementations of a country/state lookup. In practice you would probably load these from a service or the database, but that's not important to this implementation. Remember we're using Blazor Server here, so the code is running on the Server, and you can directly access anything you need, rather than having to use a Web API or similar.
public void CountrySelectionChanged(ChangeEventArgs args)
{
    var country = args.Value as string;

    if (!string.IsNullOrEmpty(country) && Countries.Contains(country))
    {
        SelectedCountry = country;
    }
    else
    {
        SelectedCountry = null;
    }
}
Next we have the CountrySelectionChanged function which is invoked every time the Country drop-down changes. We do some basic validation in there to make sure the selected country is actually one that we're allowed and set or clear the SelectedCountry as appropriate.
If we now look at the Razor markup itself, we can see how all these properties hook together. The <select> elements contain all the behaviour. For the first drop down we list out the available Countries, marking the appropriate <option> as selected, and hooking up the onchange handler. The second drop down is only rendered if we have a selected country, and if we do, renders all the States. Note that both <select> elements are using the name attribute values that were passed as [Parameter] values.
<div class="form-row">
    <div class="col">
        <select @onchange="CountrySelectionChanged" name="@CountryFieldName" class="form-control">
            <option></option>
            @foreach (var country in Countries)
            {
                <option selected="@(country==SelectedCountry)" value="@country">@country</option>
            }
        </select>
    </div>
    <div class="col">
        @if (!string.IsNullOrEmpty(SelectedCountry))
        {
            <select name="@StateFieldName" class="form-control">
                <option></option>
                @foreach (var state in States[SelectedCountry])
                {
                    <option selected="@(state==SelectedState)" value="@state">@state</option>
                }
            </select>
        }
    </div>
</div>
As I said, this is a very rudimentary implementation, but it does the basics. In practice you would want to be more careful that the provided SelectedCountry and SelectedState are valid values, and you would probably use different values for the text/key of the drop down; I'm just using the full name for both.
Using the Razor Component from a Razor Page
With the basic component complete, we can drop it into our Razor Pages form. I'll start by adding the extra fields to the IndexModel that we want to be POSTed back when the Submit button is clicked, and adjusting the message displayed in the "OnPost" handler.
public class IndexModel : PageModel
{
    [BindProperty, Required] public string Greeting { get; set; }
    [BindProperty, Required] public string Country { get; set; } // <-- Add this
    [BindProperty, Required] public string State { get; set; } // <-- Add this
    public string Message { get; set; }

    public void OnGet() { }

    public void OnPost()
    {
        if (ModelState.IsValid)
        {
            Message = $"{Greeting} from {State}, {Country}"; // <-- Updated
        }
    }
}
Note that I've marked the Country and State fields as [Required] as well, so we'll only display the message if all three fields have a value.
Next we'll update the Index.cshtml file to render the component. I've only shown the <form> element for simplicity, the rest of the page stays the same:
<form asp-page="/Index" method="post">
    <div asp-validation-summary="ModelOnly" class="text-danger"></div>
    <div class="form-group">
        <label asp-for="Greeting"></label>
        <input asp-for="Greeting" class="form-control" />
        <span asp-validation-for="Greeting" class="text-danger"></span>
    </div>

    <!-- START: New Razor Component -->
    <div class="form-group">
        <label asp-for="Country"></label>
        <component type="typeof(CountryDropdown)"
                    render-mode="ServerPrerendered"
                    param-CountryFieldName="Html.NameFor(x=>x.Country)"
                    param-SelectedCountry="Model.Country"
                    param-StateFieldName="Html.NameFor(x=>x.State)"
                    param-SelectedState="Model.State" />

        <span asp-validation-for="Country" class="text-danger"></span>
        <span asp-validation-for="State" class="text-danger"></span>
    </div>
    <!-- END: New Razor Component -->

    <button id="registerSubmit" type="submit" class="btn btn-primary">Send value</button>
</form>
There's a couple of things to note here
- I'm using the
<label>and validation Tag Helpers inside the Razor Page to render the appropriate HTML. You can't use Tag Helpers from inside Razor Components, so this is the easiest place to use them. - To get the correct name for model-binding, I used the
Html.NameFor()helper methods. - The Razor Component is only used to set the correct values in the
<select>element - the actual POST back is done using a standard Razor Page form post.
That's all there is to it. You can now run the application, and you'll have a cascading dropdown, no JavaScript required!
Of course, nothing's ever as simple as that…
Limitations and alternatives
One thing that's not entirely obvious in the video above is that although we added the [Required] validation attributes to our model, we're only doing validation on the server currently. That means we POST the values, check validation, and display the validation errors if there were any.
Server validation is always required for security reasons, but you can add client-side validation for an improved user experience - don't let users post something you know is going to fail! Normally you can add the client-side validation scripts to Index.cshtml by adding the following to the bottom of the page:
@section Scripts {
    <partial name="_ValidationScriptsPartial" />
}
Unfortunately, this doesn't work for our Razor Components! The server-side validation works correctly, but there's no client-side validation for the Country/State drop downs (although there is for the Greeting text box). Unfortunately the two approaches are just not compatible as far as I can see, so that's a limitation you'd have to live with.
There is an alternative of course: instead of only making the cascading drop-downs a Razor Component, you could make the whole form a Razor component instead! Razor Components built like this support full client-side and server-side validation using DataAnnotations. The question then is whether you want to go that far or not.
Arguably, if you're using any server-side Blazor, then you may as well expand your usage like this whenever you hit rough edges. You're not really losing anything by doing so, as you've already tied yourself to the stateful application and connection requirements!
In many ways the Blazor development experience is really nice. You get to use a build toolchain that you're already familiar with, the speed of development is refreshing, and you can integrate it with existing solutions like Razor Pages. That's not to say Blazor is a panacea by any means, but it's definitely worth keeping in your back pocket for those occasions where the trade-offs make it worth while.
Summary
In this post I showed how you can easily create cascading dropdowns using Razor Components and Blazor Server, where the selection in the first dropdown changes the options available in the second.
Rather than building a standalone Blazor app, I showed how you can embed this behaviour inside Razor Pages, to avoid having to write AJAX queries for simple enhancements like this. I also showed how to make sure the form elements interoperate properly with your Razor Pages during post back, by setting the correct form names.
The technique isn't completely perfect, you can't easily use client-side validation with this approach. If that's a problem you may want to consider building the whole form using Blazor. If you do try this approach, just be sure you understand the operational implications of using Blazor.