I was recently working on a side project that seemed like it would have lots of large, binary assets. Unfortunately, that's just the sort of thing Git struggles with. As an experiment, I decided to try out Git Large File Storage (LFS) as a solution to this problem. While I was trying new things, I decided to also look at Azure Repos for Git hosting.
In this post I talk through the process I took to create a new Azure Repo, how to install Git LFS locally, and how to enable Git LFS in your repository.
Git LFS
I like Git - I'm no master but I can interactively rebase with the best of them. Unfortunately, while Git works great for source control of code and other text files, it can be cumbersome for working with large binary files like audio or video samples. When you change a text file, Git only has to store the difference between the old and new file; for binary files, Git has to store the entire file again, even if only a single byte changed. For large, frequently changing files, that can bloat your repository making simple operations slow and cumbersome.
Git LFS tackles this problem by storing the binary files somewhere else and just storing a pointer to it in the Git repository. That all happens seamlessly behind the scenes - when you checkout you see the actual binary files in your repository, they just aren't stored in the usual Git file structure.
Note that Git LFS is different to Virtual File System (VFS) for Git. VFS is the technology used to allow Microsoft to store the Windows source code in Git. The two technologies aren't compatible as far as I can see.
There are lots of different Git LFS implementations. GitHub, BitBucket, and Azure Repos all support Git LFS, and there's a whole host of open-source options. I decided to give Azure Repos a try.
Creating a new Git repository with Azure Repos
Azure Repos is part of "Azure DevOps" services, so you'll need to signup with a Microsoft account if you haven't already. I described how to setup an account for Azure Pipelines in a previous post, so see that one for how to get started.
Creating a new project with Azure Repos
We'll start by creating a new project. Go to https://dev.azure.com, sign in with your Microsoft account and create a new project. I gave mine the imaginative name: TestRepo.
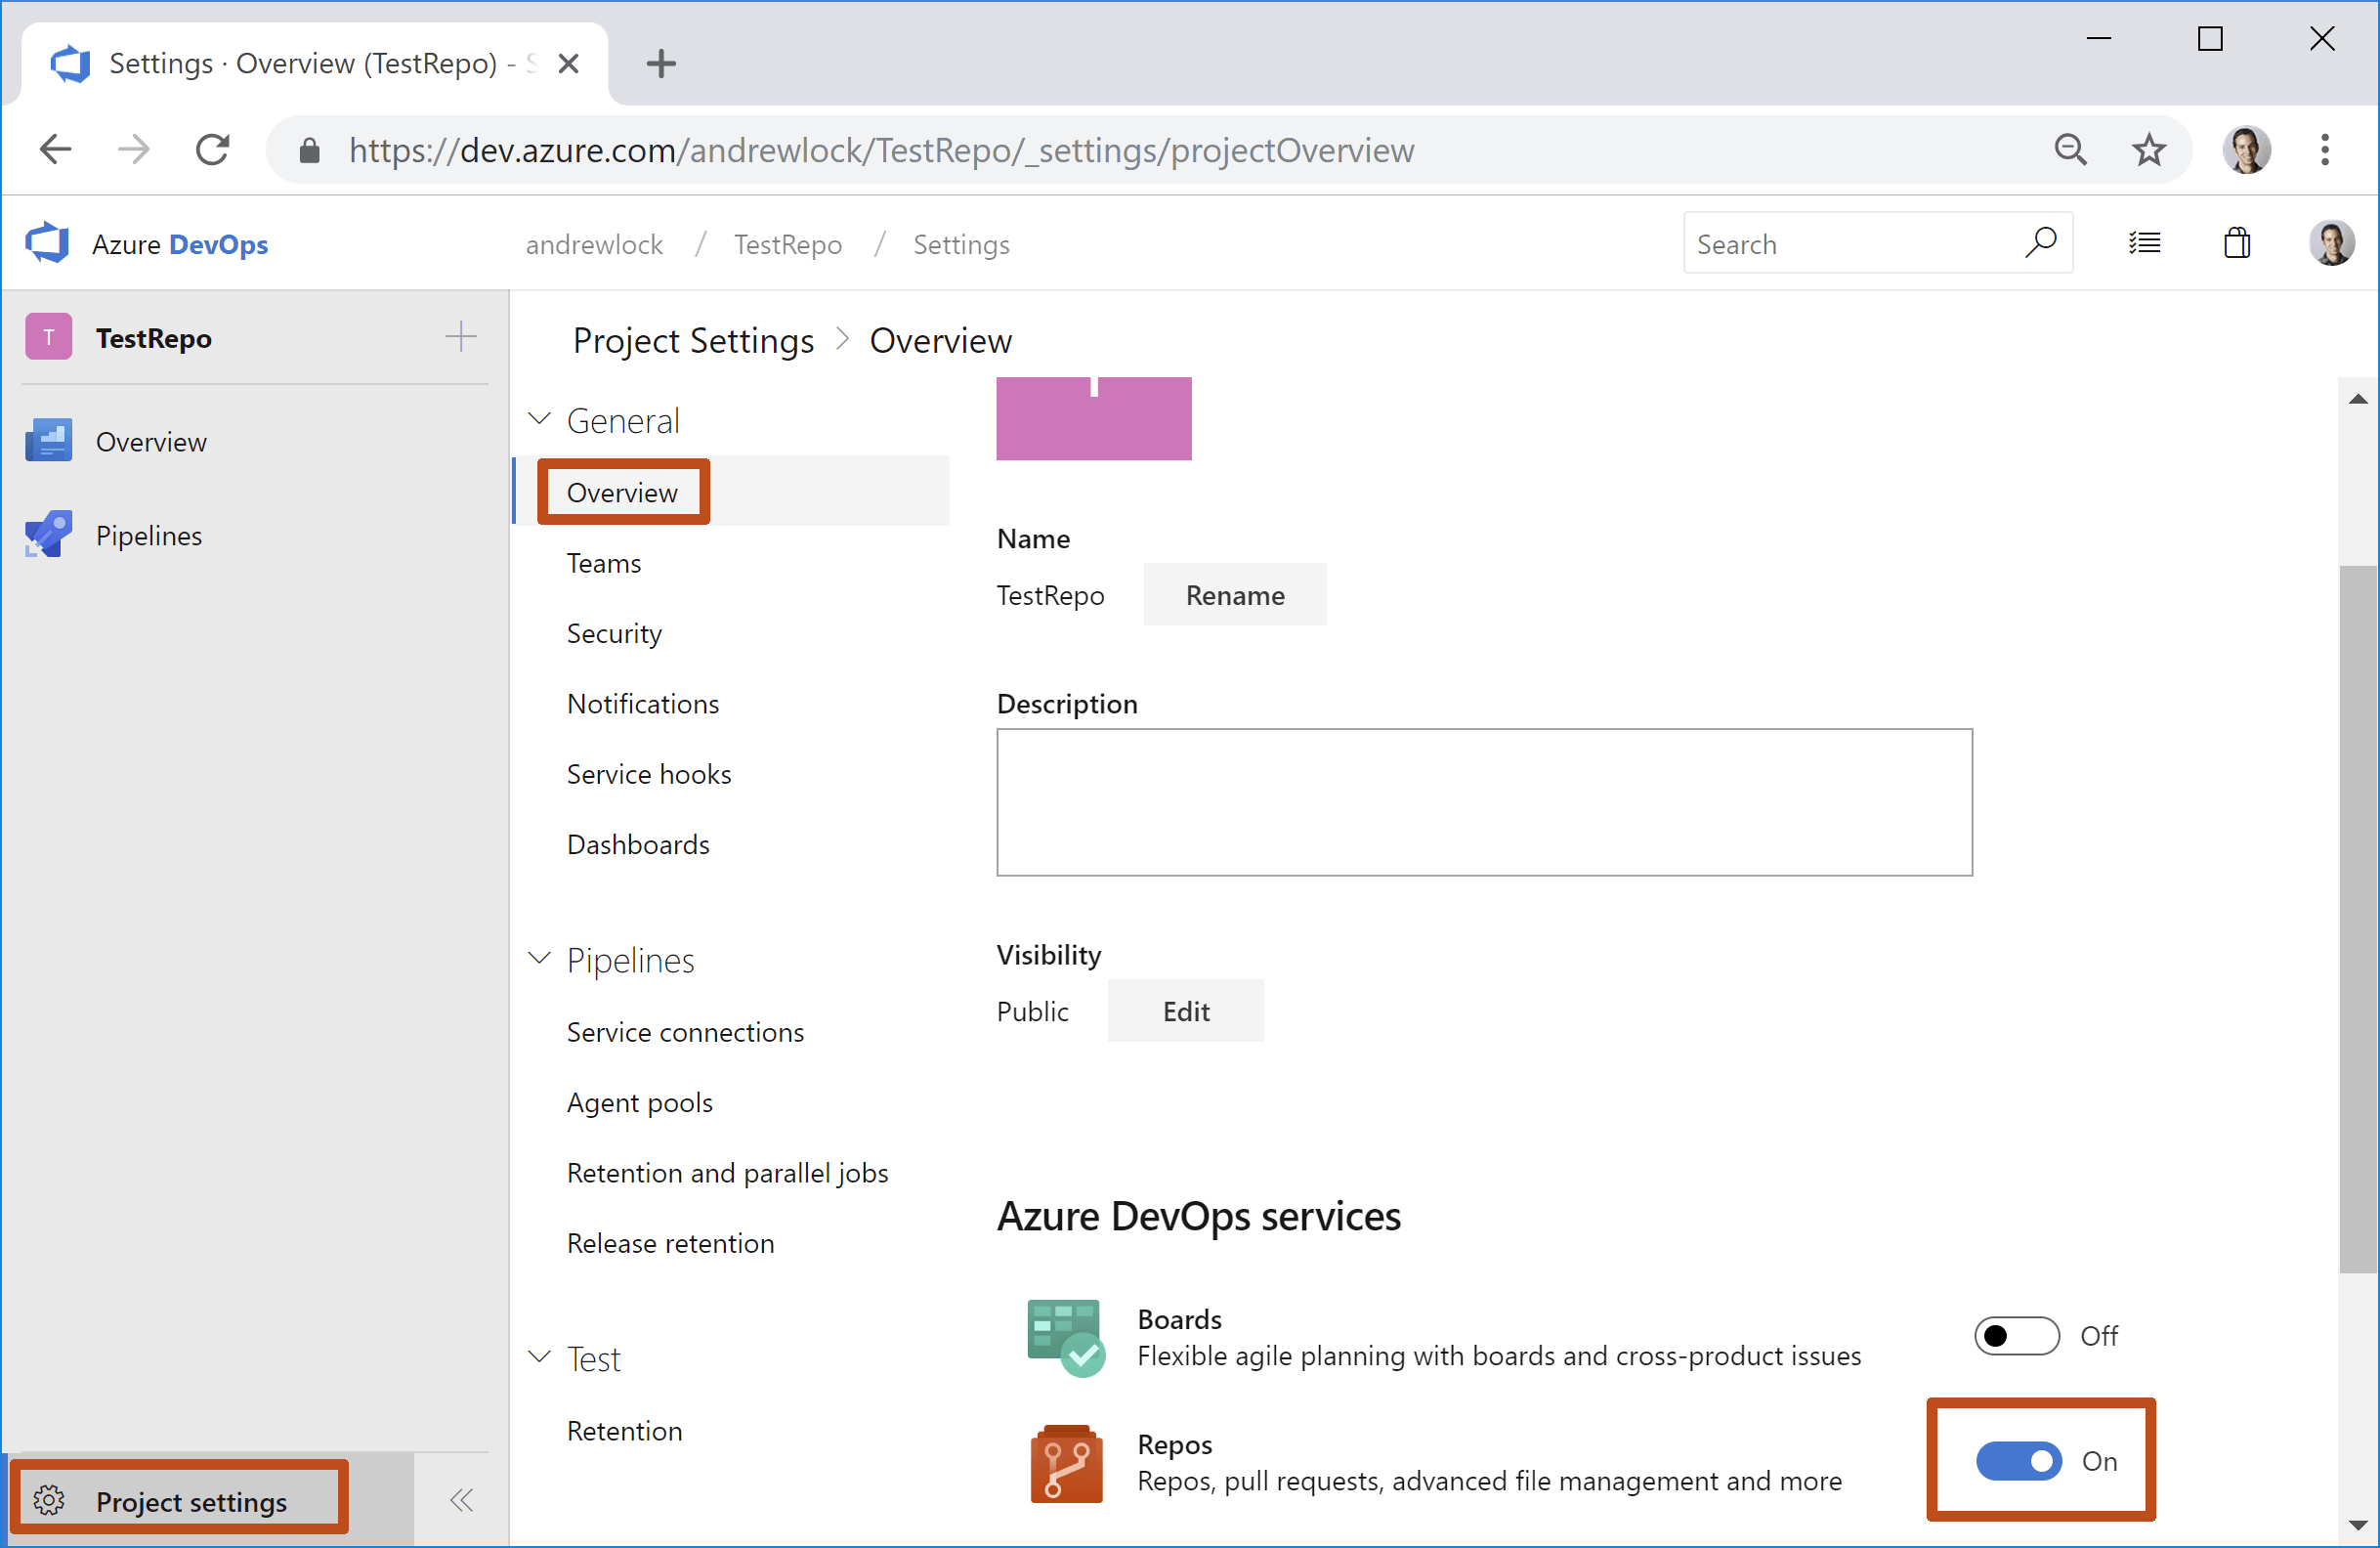
When I created my project, only Azure Pipelines was enabled (presumably as that's all I've used previously). To add Azure Repos, click Project settings > Overview and scroll to the bottom. Flick the switch, and Azure Repos is enabled for the project:
After refreshing the page, you'll see the Azure Repos symbol appear on the left. Click this link and you're presented with a plethora of options for how to connect a local Git repo to Azure Repos
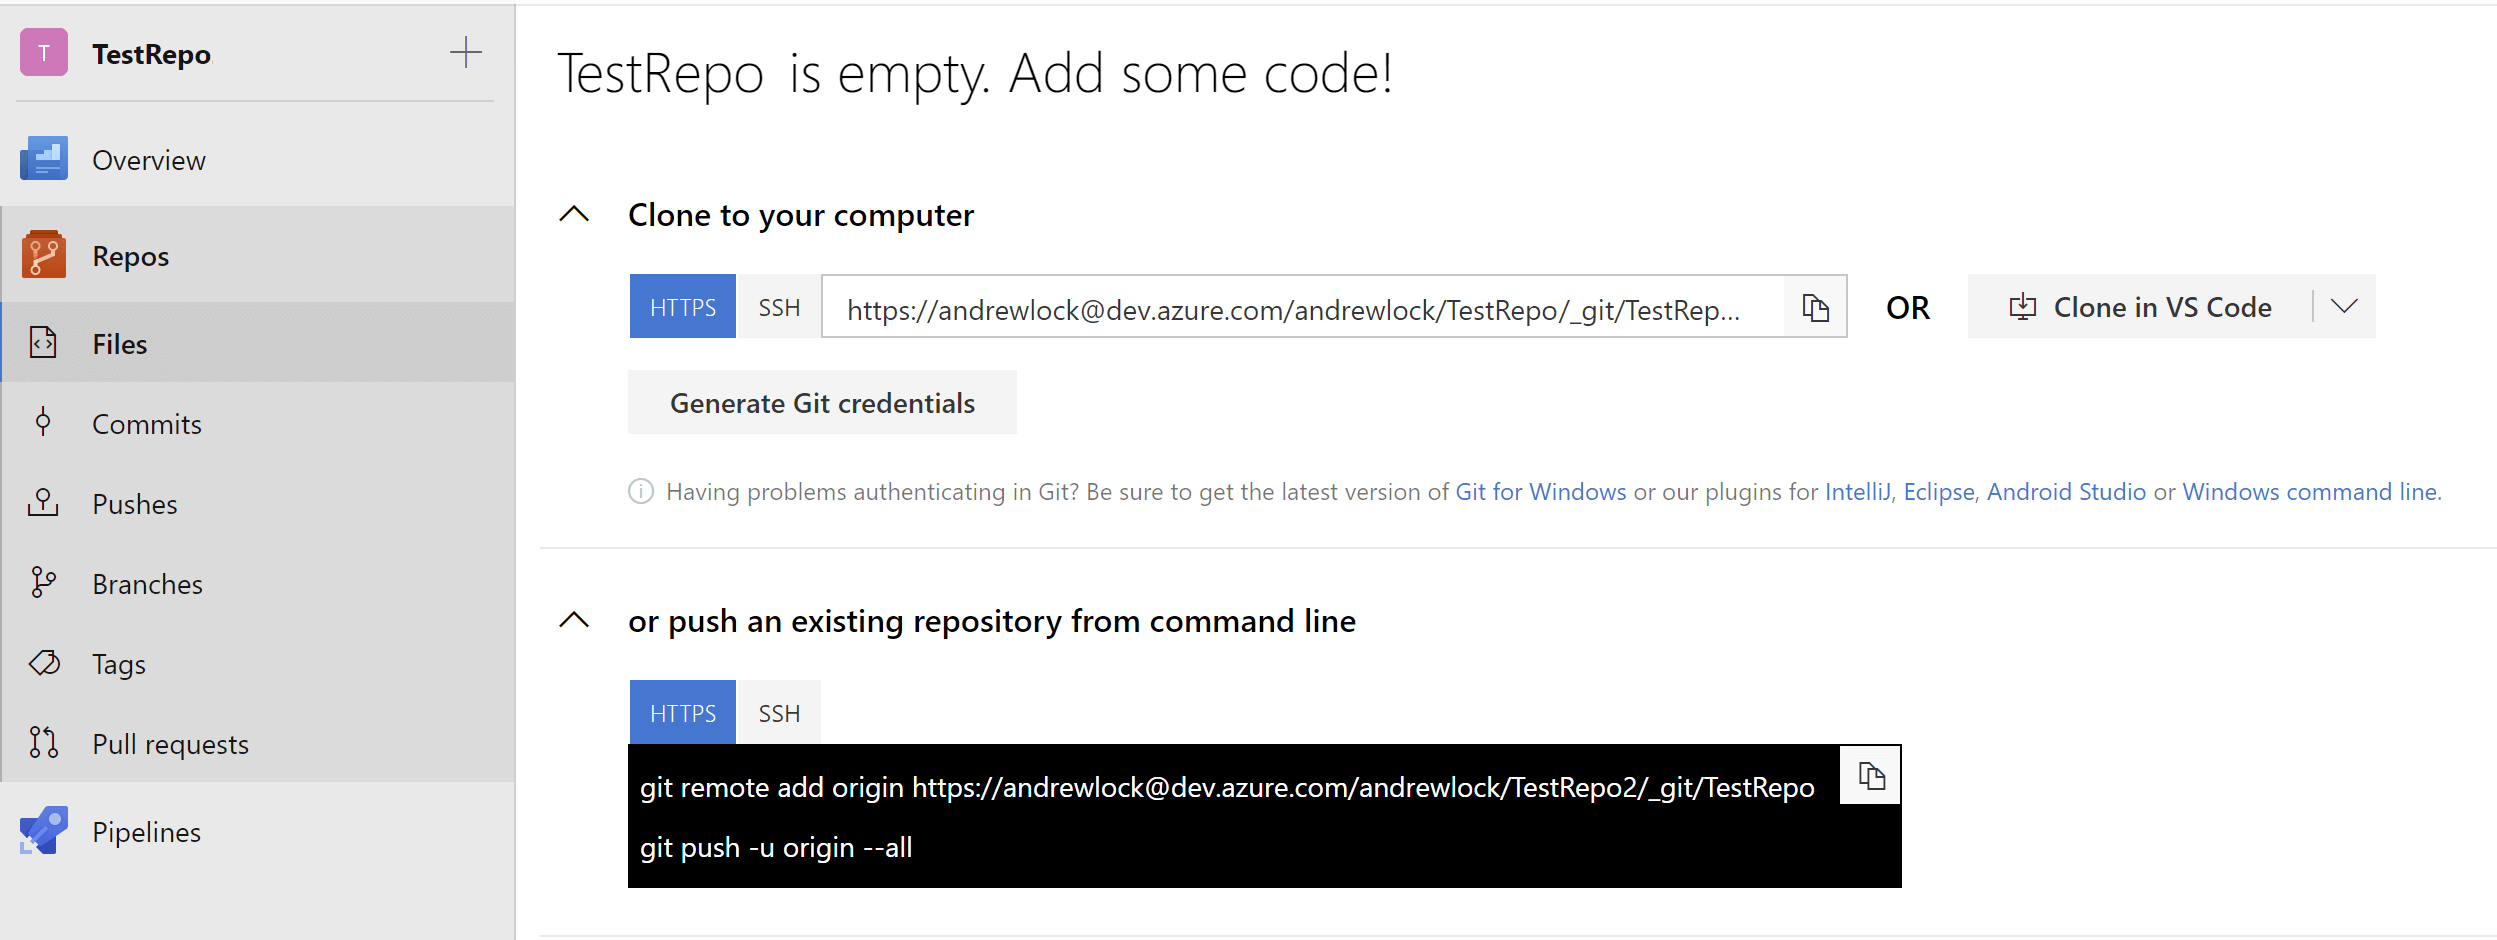
Connecting a local Git repository to Azure Repos
As it happens I'd already created a new empty Git repo locally, so I added the remote origin using the commands shown in the "push an existing repository from command line" to section:
> git init
Initialized empty Git repository in C:/repos/andrewlock/temp/.git/
> git remote add origin https://[email protected]/andrewlock/TestRepo2/_git/TestRepo
> git push -u origin --all
Password for 'https://[email protected]':
That last line rather confused me as the username/email isn't one I've seen before. The username is my organisation name (andrewlock), not an email address I have access to. Nevertheless, I tried the password for my Microsoft account, but that didn't work.
Generating Git Credentials for Azure Repos
The slightly confusing solution to this is the "Generate Git credentials button" nestled under the "Clone to your computer" section.
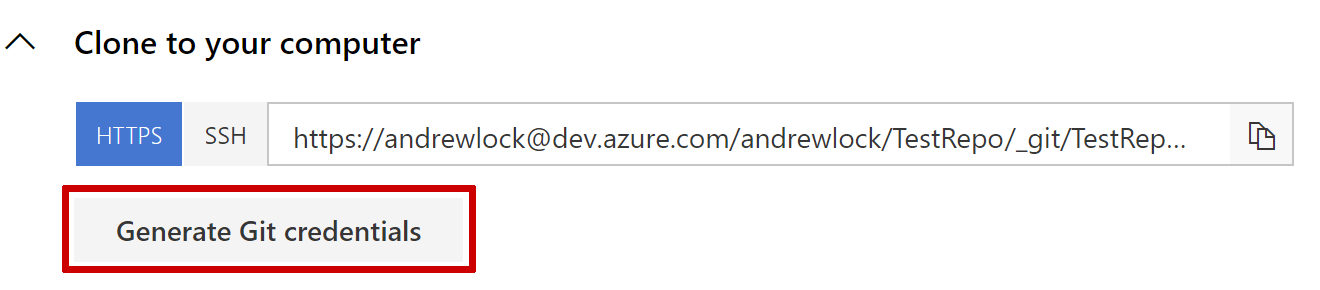
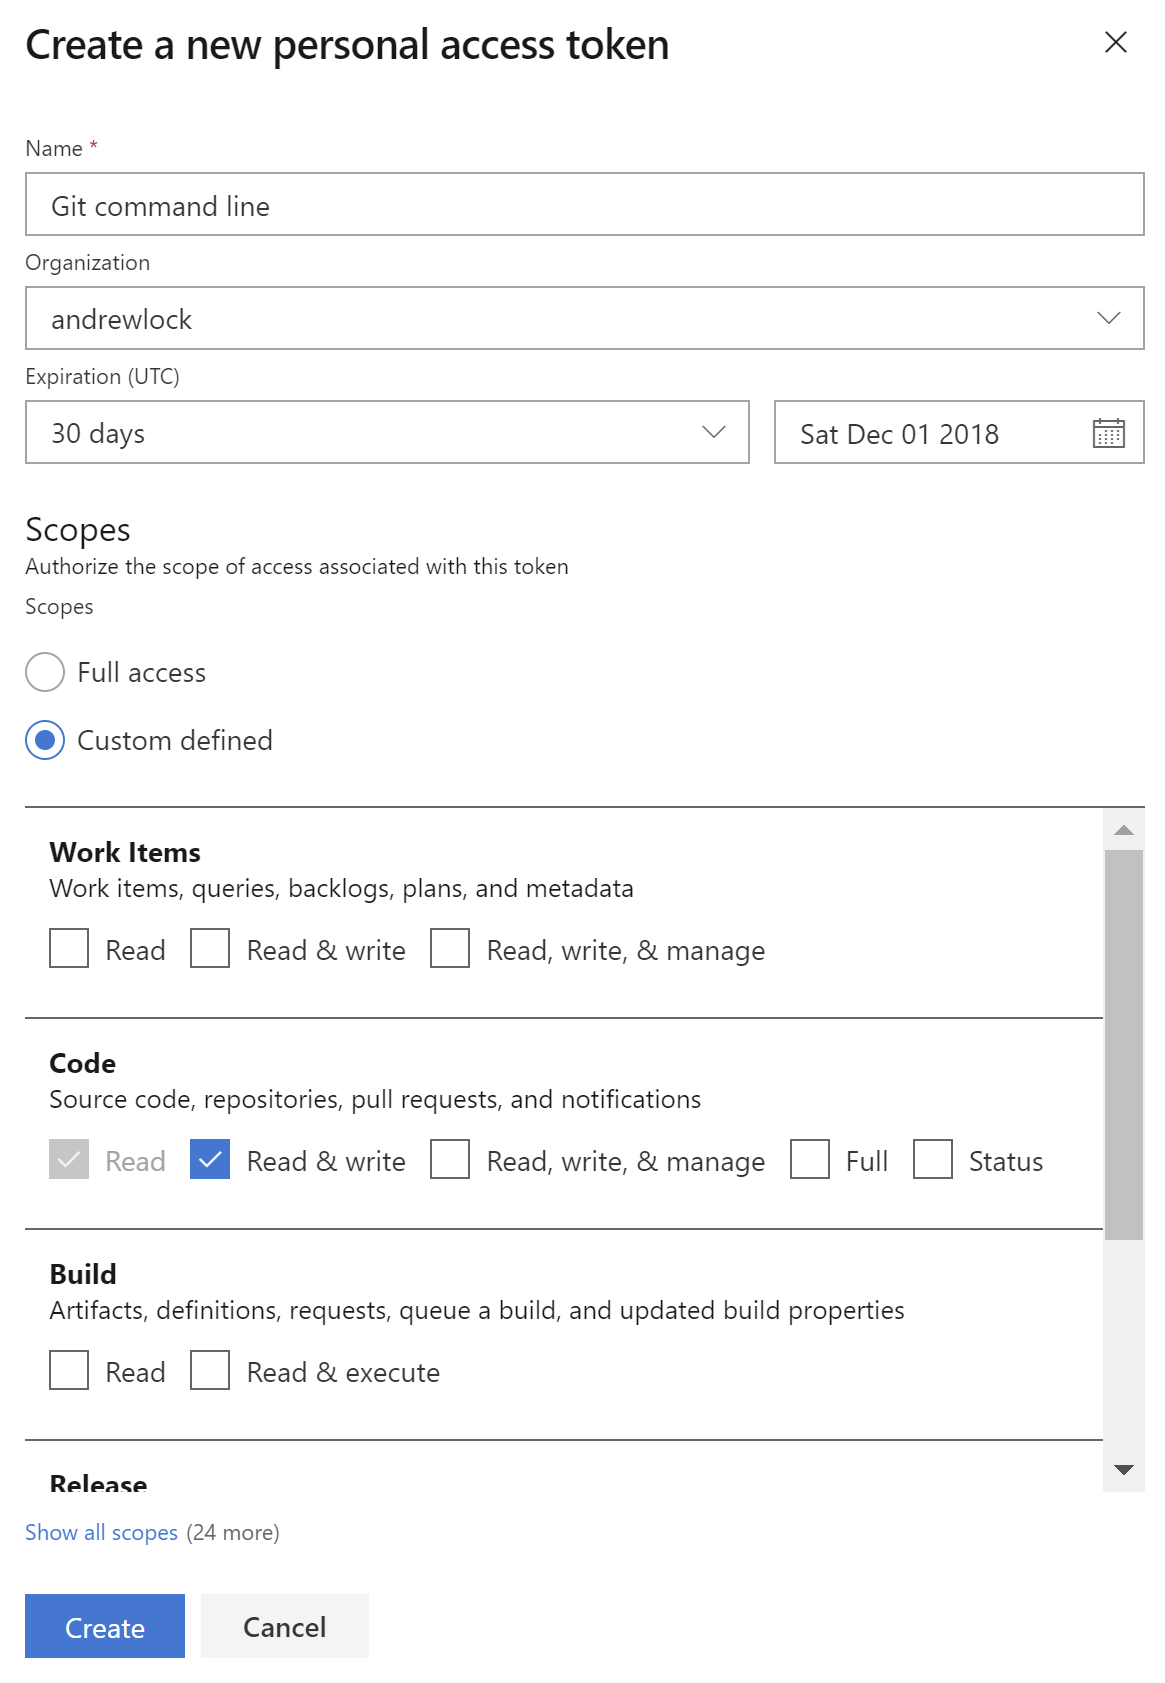
In order to push to your Azure Repos repository, you need to generate some new credentials. Clicking "Generate Git credentials" reveals the form shown below, which encourages you to set a password. But watch out, it's a trap!
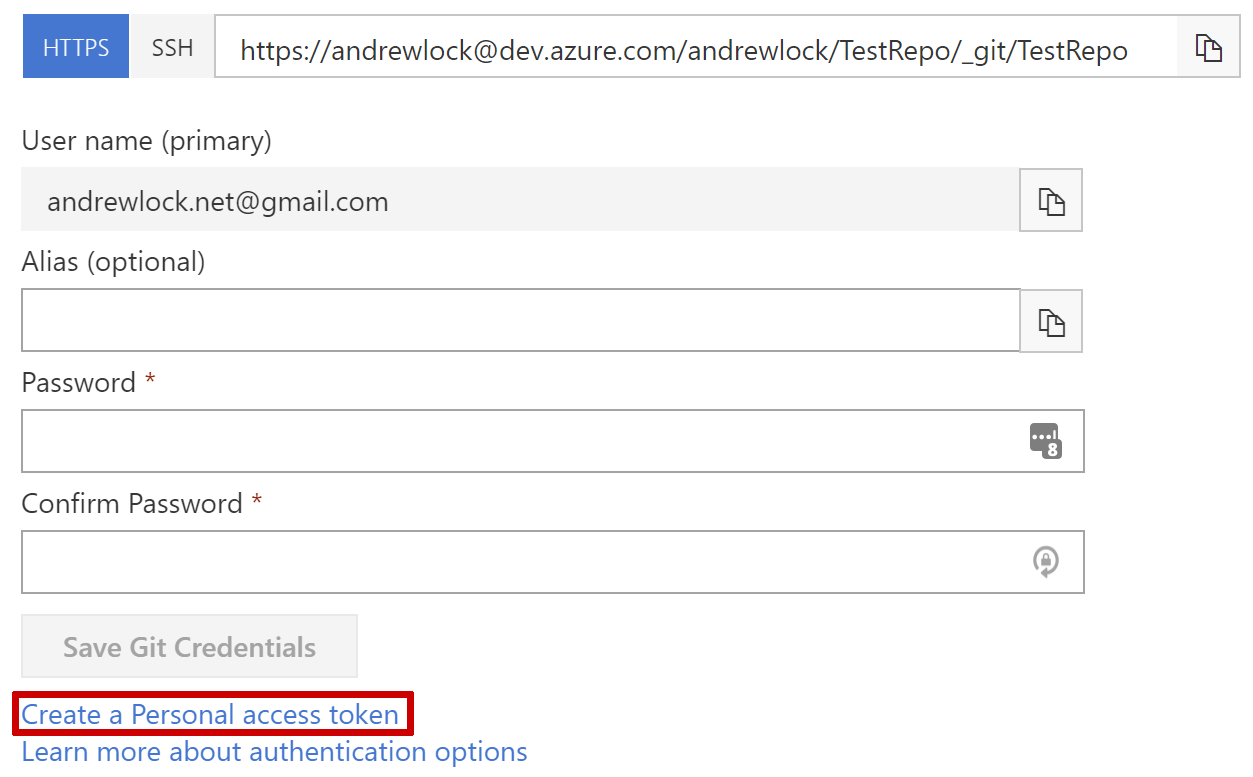
Instead of setting a simple password to use with Git, you should use a personal access token. They're the recommend approach in this case, even according to Azure's own documentation (below), so they should really make it more obvious:
Personal access tokens let you create a password for use with the command line or other Git client without using your Azure DevOps Services username and password directly. An expiration date is set on these tokens when they are created and you can restrict the scope of the data they can access. Use personal access tokens to authenticate if you don't already have SSH keys set up on your system or if you need to restrict the permissions granted by the credential.
You can't use SSH with Git LFS, so a personal access token is definitely the best choice here.
Clicking on "Create a Personal access token" takes you to the Personal Access Tokens section of your user account settings, where you can create and manage your access tokens. Create a new token by clicking the "New Token" button, and configure it with the minimum required scopes - just "Code Read & Write" is sufficient
Finally, you're provided a password! Enter this value at the command prompt for git push -u origin --all and you'll be authenticated. If you're using Windows, Git-credential manager should take care of renewing and managing the token for you, so you shouldn't have to worry about authenticating again.
After finally getting an Azure Repos Git repository configured, I set about installing Git LFS.
Installing Git LFS
Installing Git LFS took me a couple of goes to get right. I made the mistake first of going to the Git LFS home page and clicking the big "Download" button. After running the brief installer, I ran the initialisation function as instructed, and was presented with a pretty unhelpful error:
> git lfs install
Git: 'lfs' is not a Git command. See 'Git --help'.
First of all, I thought it might be to do with the hub alias I use for creating PRs from the command line, but that had nothing to do with it.
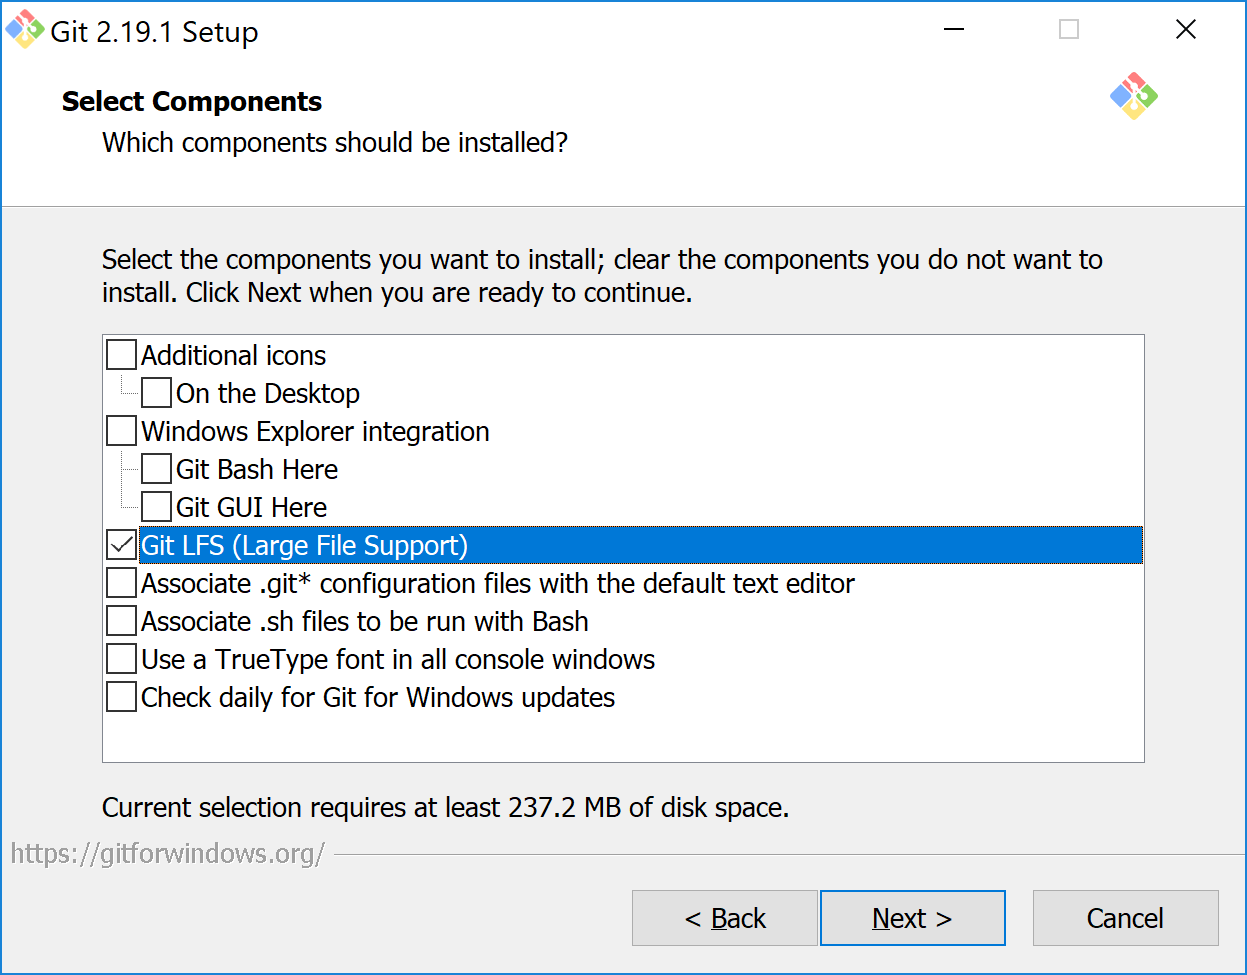
Eventually, I read on a Stack Overflow post that Git LFS is part of the Windows Installer, I'd just never noticed it. As I wasn't running the latest Git at that point, I downloaded the latest installer, and sure enough, there was a checkbox for Git LFS support:
Now, running the required git lfs install to initialize Git LFS gives a successful result:
> git lfs install
Updated Git hooks.
Git LFS initialized.
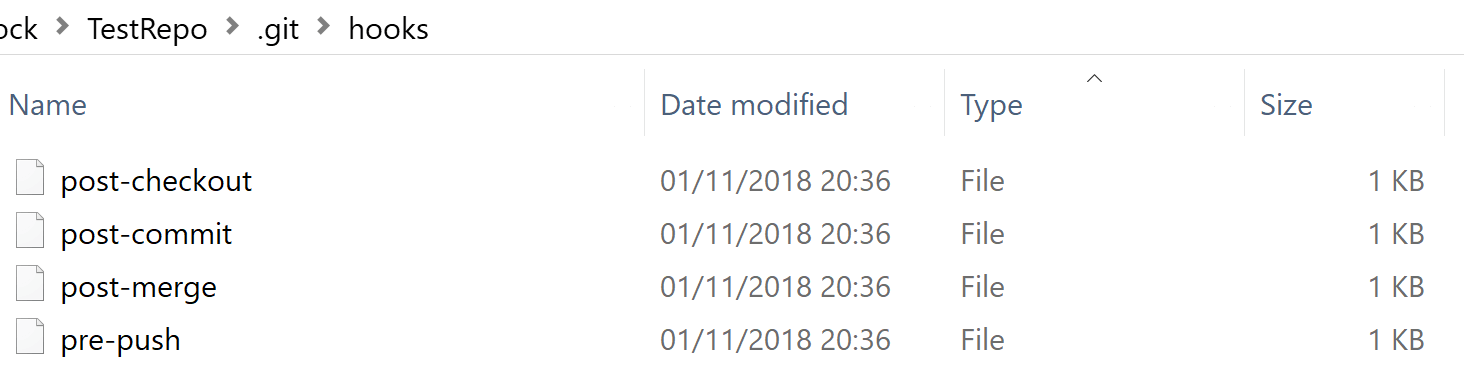
Running git lfs install enables Git LFS support by enabling various required smudge and clean filters in Git that intercept files on checkout and commit, replacing the placeholder and original files as necessary.
If you run git lfs install inside a Git repository (as I did), then it also adds additional hooks. Whenever you commit, checkout, merge, or push your repository, these hooks check that you have Git LFS installed, and will block the action if you don't.
Defining which files should be tracked in Git LFS
Once Git LFS is installed you need to specify which files should be tracked in LFS. You can do this by specifying an entire folder to be tracked:
git lfs track 'images'
or you could specify that all files of a particular type should be tracked:
git lfs track "*.psd"
or a combination:
git lfs track "design/*.psd"
When you set a path to be tracked by Git LFS, a line is added to the .gitattributes file, specifying that the path should be handled by Git LFS. For example, for the git lfs track "design/*.psd" command, the .gitattributes file below would be generated:
design/*.psd filter=lfs diff=lfs merge=lfs -text
In my repo, I set the assets folder to be tracked in Git LFS, and committed the generated .gitattributes file:
> git lfs track 'assets/**/*'
Tracking "assets/"
> git add .gitattributes
> git commit -m "Add Git-lfs tracking of assets folder"
Note I found I needed to add the wildcards to ensure all files in sub directories were added to Git LFS correctly.
Adding and committing files to Git LFS
Now you can add, and commit your files just as you normally would with git. I added a whole bunch of large files to the assets folder:
and committed them all as normal:
> git add .
> git commit -m "Add assets"
You can check that the files have been added to git LFS rather than the Git repo itself by running git lfs ls-files:
> git lfs ls-files
d009ed0e59 * assets/2016/05/AllSuccess-1.png
d009ed0e59 * assets/2016/05/AllSuccess.png
4d7879a936 * assets/2016/05/DSC01917.JPG
e05516c082 * assets/2016/05/DotNetCore.jpg
f4d6127dc9 * assets/2016/05/Middleware.png
... (truncated)
This lists all the files currently tracked by Git LFS. With everything committed, you can now push the files to Azure Repos:
> git push origin
fatal: NullReferenceException encountered.
   Object reference not set to an instance of an object.
fatal: NullReferenceException encountered.
   Object reference not set to an instance of an object.
Locking support detected on remote "origin". Consider enabling it with:
  $ Git config lfs.https://[email protected]/andrewlock/TestRepo/_Git/TestRepo.Git/info/lfs.locksverify true
Uploading LFS objects: 100% (595/595), 20 MB | 346 KB/s, done
Enumerating objects: 644, done.
Counting objects: 100% (644/644), done.
Delta compression using up to 8 threads
Compressing objects: 100% (633/633), done.
Writing objects: 100% (643/643), 90.75 KiB | 780.00 KiB/s, done.
Total 643 (delta 1), reused 0 (delta 0)
remote: Analyzing objects... (643/643) (103 ms)
remote: Storing packfile... done (43 ms)
remote: Storing index... done (43 ms)
To https://dev.azure.com/andrewlock/TestRepo/_Git/TestRepo
 * [new branch]      master -> master
Branch 'master' set up to track remote branch 'master' from 'origin'.
Note the
fatal: NullReferenceException encountered.at the top. Not sure what that's about. I seem to get two of them, every time I push…
Ignoring those slightly strange exceptions, by and large Git LFS just works! You can see that Git uploaded 20MB of files to Git LFS, and just 90.75KB to Git itself. One thing worth commenting on is that uploading to Git LFS was actually slower than uploading to Git. It's not a big deal, was just interesting to notice.
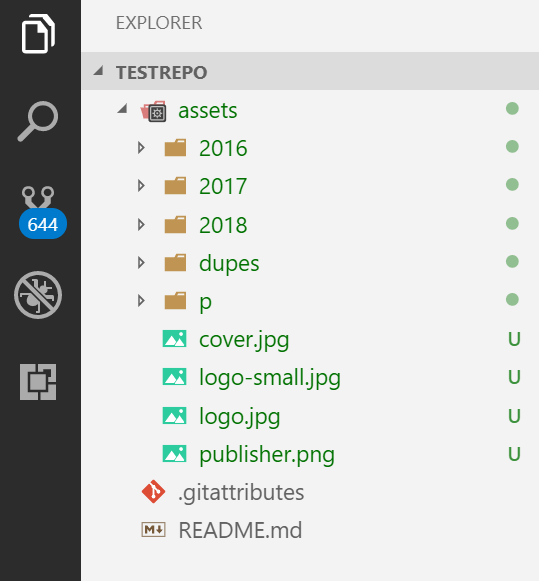
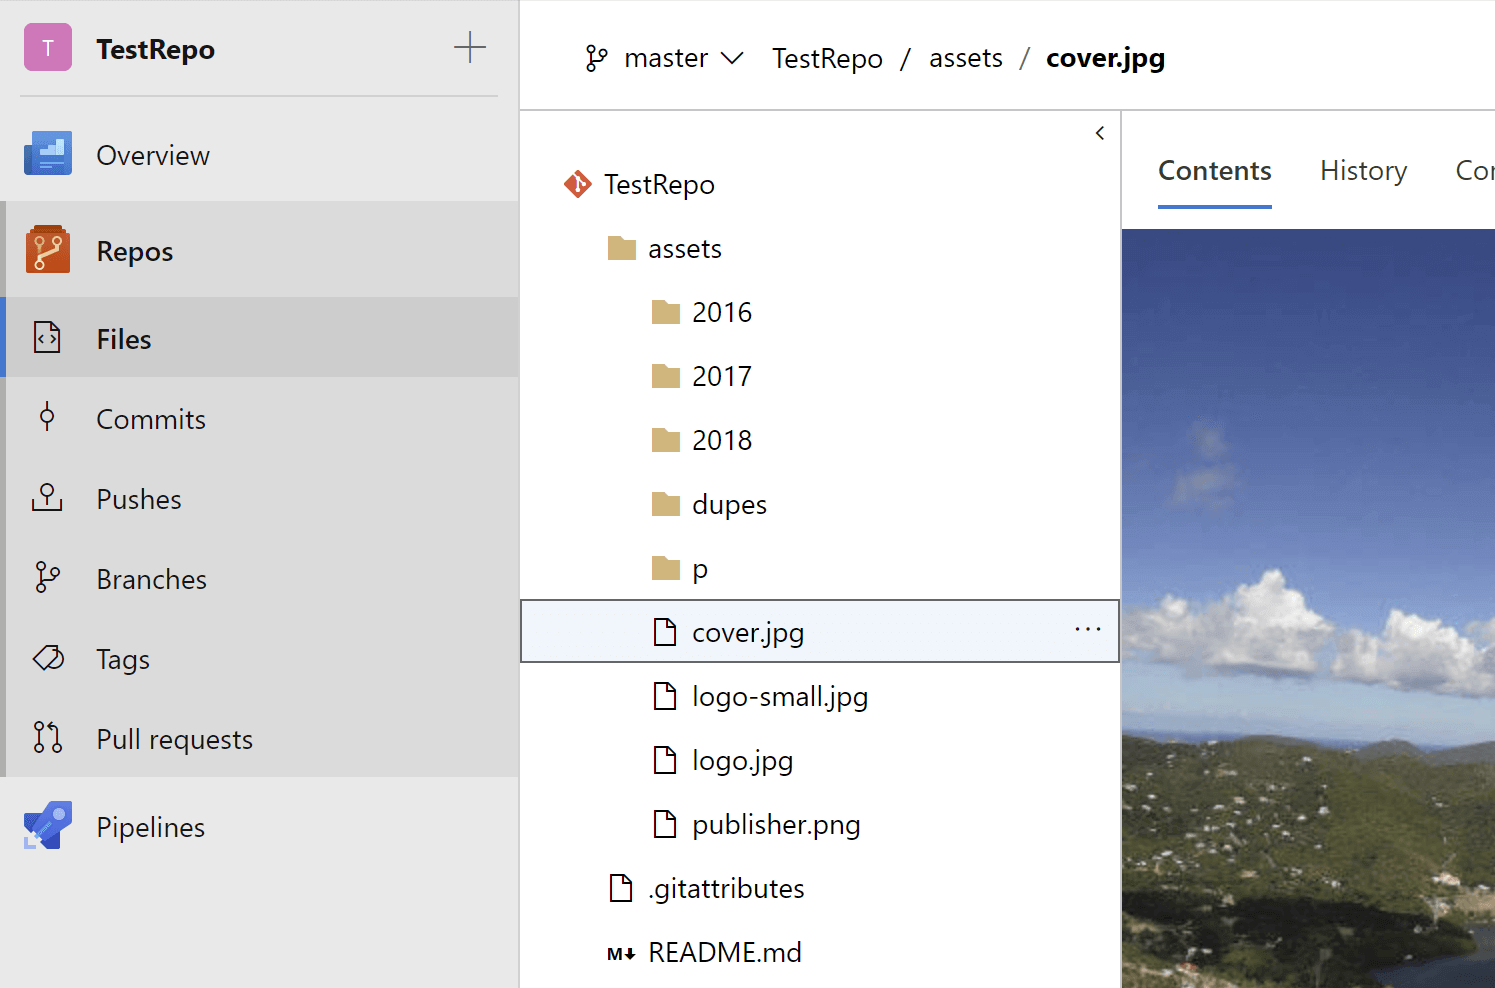
Exploring the files in Azure Repos
If you navigate to your repository in Azure Repos, you can browse the files in your repo just as though they were committed directly. You actually can't tell there's anything different - personally I think it would be nice to have some sort of icon indicating the file is tracked in Git LFS, but for the most part it doesn't really matter:
Taking Git LFS further
This post just scratches the surface of Git LFS. I was mostly just interested in the workflow and how it differs from normal git. With the exception of setting up the file paths to track, the answer seems to be - not much!
One issue I ran into initially was failing to set up the tracking properly for some files (by using the wrong combination of wildcards). I thought files were being committed to Git LFS, but they were actually being committed to Git. I strongly recommend running git lfs ls-files after setting up the initial tracking to ensure you're actually tracking the files you think you are.
Another way of checking this is to see what the files look like inside the .git folder. By using git show, you can view the LFS pointer files themselves:
> git show HEAD:assets/cover.jpg
version https://Git-lfs.Github.com/spec/v1
oid sha256:3dda8fd9eecbaf8be909b6d363d15ae66928a9a713f89bc30e6888a0f2192718
size 66825
If the file is not tracked by Git LIFS, then running git show will dump a mass of binary to the console - you'll definitely know when you've got your wildcards wrong!
Another interesting feature for teams (as opposed to solo developers) is the file locking support. Given that merge conflicts on binary files are a disaster, the centrally locked approach makes a lot of sense!
Finally, I'd be remiss if I didn't mention the great tutorial on the Git LFS Wiki page. Unfortunately I only discovered this after muddling my way through, so I strongly recommend reading that first. If you're looking to add Git LFS to a repository that already contains large files, the tutorial covers all that and more.
All in all, Git LFS looks interesting. I don't think I'll have much use for it personally, but I can certainly see the value for people working who like Git but are working with large binary files.
As for Azure Repos, you can't really argue with free private repositories! If you're considering buying into the other Azure DevOps services too, then it makes even more sense to consider them. For open source projects though, GitHub is definitely still the way to go.
Summary
In this post I showed how to create a Git repository with Azure Repos and how to create git credentials for accessing your repo from the command line. I also showed how to install Git LFS by installing Git for Windows, and how to enable LFS tracking in your repositories. Git LFS seems like a great solution if you know you'll get value from it. I don't see myself having to use it often, but it's good to know it's there if I need it!