In this post I show how you can use Docker Hub's GitHub integration to automatically build a Docker image when you push to your GitHub repository. I show how to register with Docker Hub, how to setup the GitHub integration, and how to configure automated builds.
Prerequistes
I've made a number of assumptions for this post. The first, is that you're familiar with Docker in general. If you're completely new to Docker, I recommend checking out Steve Gordon's excellent series of posts on Docker, the problems it solves, and how to get started.
Secondly, I assume you have a GitHub account that you're using to host an open source/public project. The instructions in this post are geared towards this scenario, though you can also host private repositories, or use a BitBucket account if your prefer.
Finally, I assume you already have a project with a Dockerfile for building your app. You can view the sample repository I used on GitHub, but this post just focuses on the process of connecting Docker Hub and GitHub, and getting Docker Hub to build your images for you.
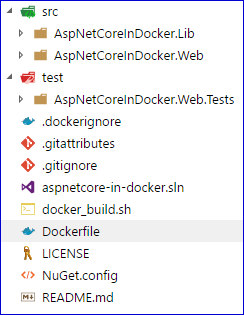
For this post I created a simple ASP.NET Core solution called AspNetCoreInDocker consisting of three projects:
AspNetCoreInDocker.Web- An ASP.NET Core 2.0 app, based on the basic templateAspNetCoreInDocker.Lib- A .NET Standard library projectAspNetCoreInDocker.Web.Tests- An xUnit test project
All of the projects were created with the default templates. The solution folder looks something like the following:
The Dockerfile for the solution uses a multistage build approach, to optimise the size of the final image. The DockerFile I'm currently using is as follows:
# Build image
FROM microsoft/dotnet:2.0.3-sdk AS builder
WORKDIR /sln
COPY ./aspnetcore-in-docker.sln ./NuGet.config ./
# Copy all the csproj files and restore to cache the layer for faster builds
# The dotnet_build.sh script does this anyway, so superfluous, but docker can
# cache the intermediate images so _much_ faster
COPY ./src/AspNetCoreInDocker.Lib/AspNetCoreInDocker.Lib.csproj ./src/AspNetCoreInDocker.Lib/AspNetCoreInDocker.Lib.csproj
COPY ./src/AspNetCoreInDocker.Web/AspNetCoreInDocker.Web.csproj ./src/AspNetCoreInDocker.Web/AspNetCoreInDocker.Web.csproj
COPY ./test/AspNetCoreInDocker.Web.Tests/AspNetCoreInDocker.Web.Tests.csproj ./test/AspNetCoreInDocker.Web.Tests/AspNetCoreInDocker.Web.Tests.csproj
RUN dotnet restore
COPY ./test ./test
COPY ./src ./src
RUN dotnet build -c Release --no-restore
RUN dotnet test "./test/AspNetCoreInDocker.Web.Tests/AspNetCoreInDocker.Web.Tests.csproj" -c Release --no-build --no-restore
RUN dotnet publish "./src/AspNetCoreInDocker.Web/AspNetCoreInDocker.Web.csproj" -c Release -o "../../dist" --no-restore
#Build the app image
FROM microsoft/aspnetcore:2.0.3
WORKDIR /app
ENV ASPNETCORE_ENVIRONMENT Local
ENTRYPOINT ["dotnet", "AspNetCoreInDocker.Web.dll"]
COPY /sln/dist .
This Dockerfile builds the solution, runs the tests, and publishes the app using the microsoft/dotnet:2.0.3-sdk base image. It then copies the published output to the microsoft/aspnetcore:2.0.3 base image, so the final image is much smaller, and optimised for running apps.
In the next section I'll walk through creating a Docker Hub account.
Create a Docker Hub account
Docker Hub lets you create private or public registries to host your Docker image repositories. These are the central storage location for your Docker images. If you think of your docker images like NuGet packages, then Docker Hub is the equivalent of https://www.nuget.org. You can create your own Docker registries, in the same way you can create your own NuGet feeds; Docker Hub is just the most common and public implementation.
Before you can create your own repositories on Docker Hub or use it to build Docker images, you must create a Docker Hub account. This a simple process, that I'll walk through here.
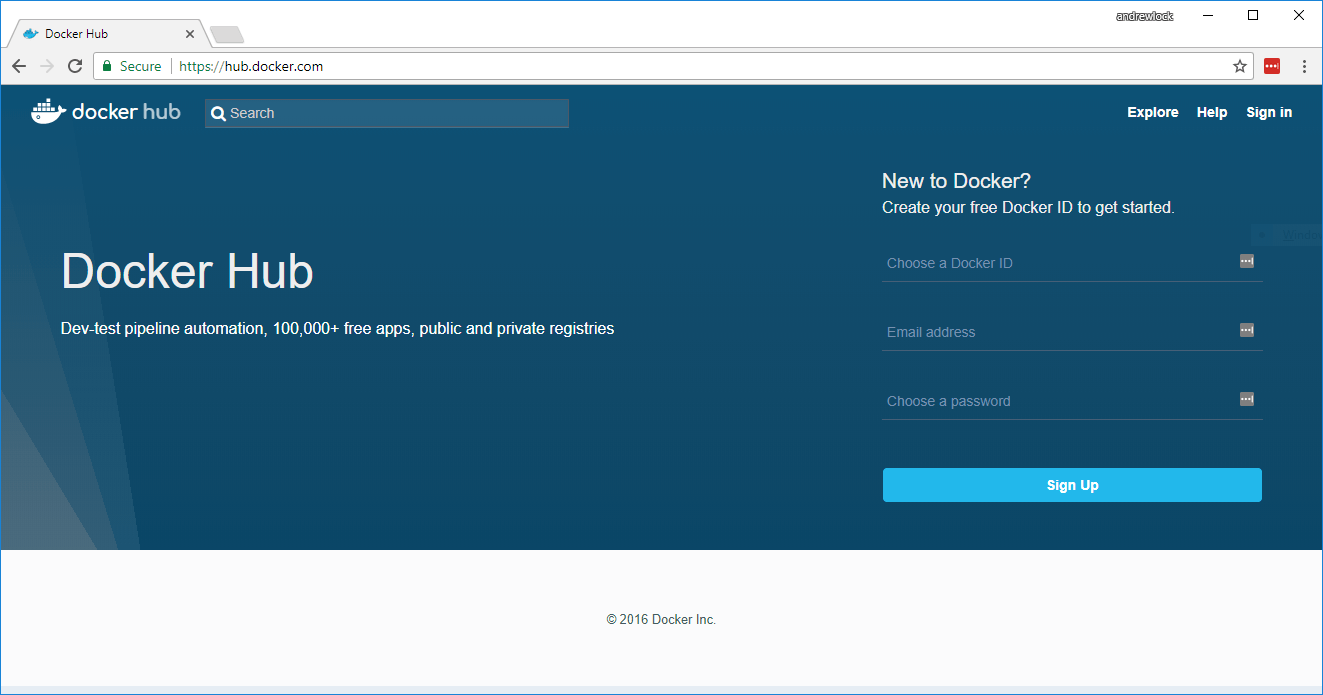
1. Browse to https://hub.docker.com/ and signup for a new account
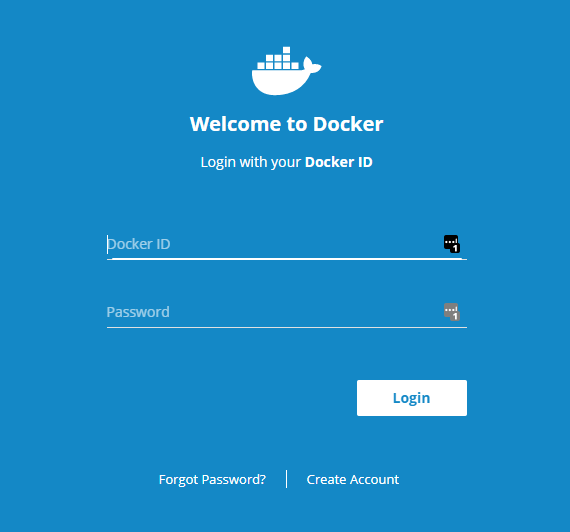
2. You'll receive an email with an activation link. Click on it, and login with your new account
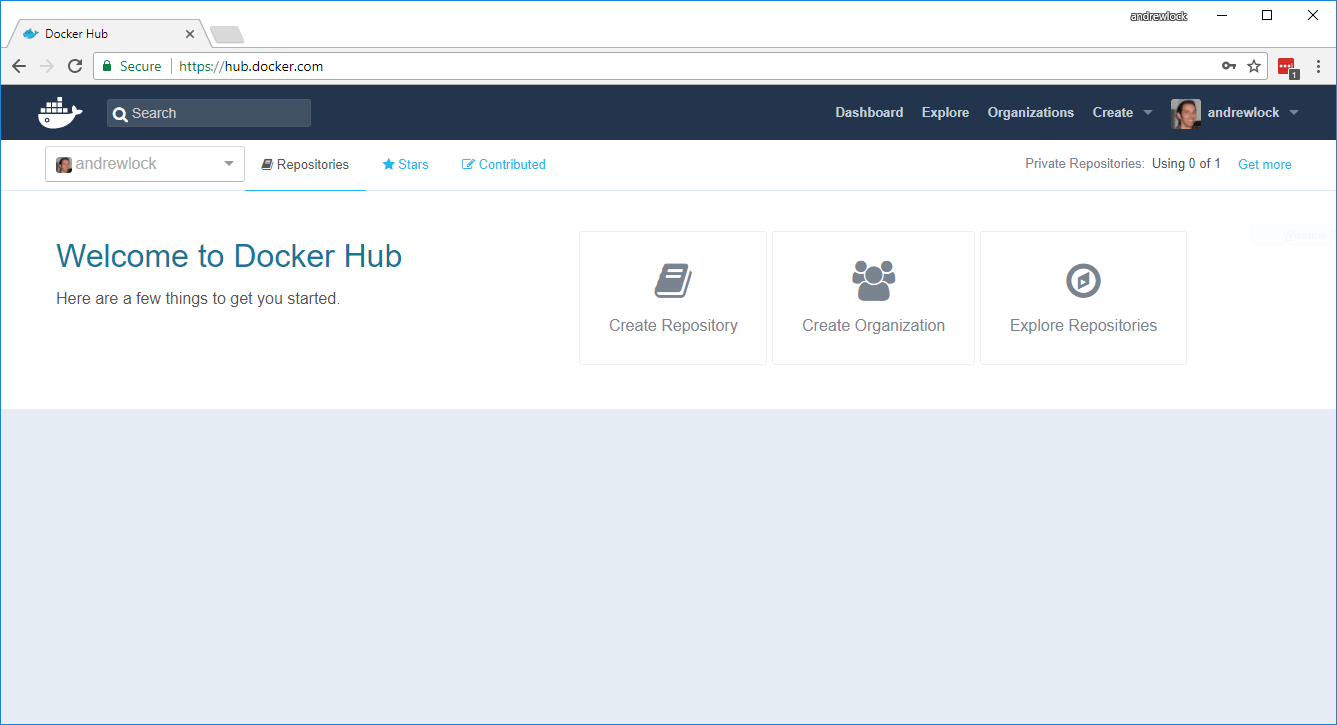
3. That's it, you now have a Docker Hub account! You'll find yourself dropped onto your Docker Hub dashboard. There's nothing there yet, but this will display details and the status of all your Docker repositories once you add them.
If you want Docker Hub to automatically build your projects from GitHub, you'll need to link your GitHub account, so Docker Hub can receive notifications when you push to your GitHub repository.
Connecting your Docker Hub account to your GitHub account
One of the services offered by Docker Hub is integration with GitHub. This lets you configure a Docker Hub repository to automatically build a new Docker image anytime you push to a source GitHub repository.
This has a a number of limitations and restrictions in order to work seamlessly. Most notably, by default you must have a single Dockerfile (called Dockerfile) that contains the whole build definition. If this is the case for you, then the automated builds make creating Docker images easy. If you have more complex requirements, you can always push to your Docker Hub repository manually using docker push.
Integration with GitHub is configured using the standard OAuth mechanism.
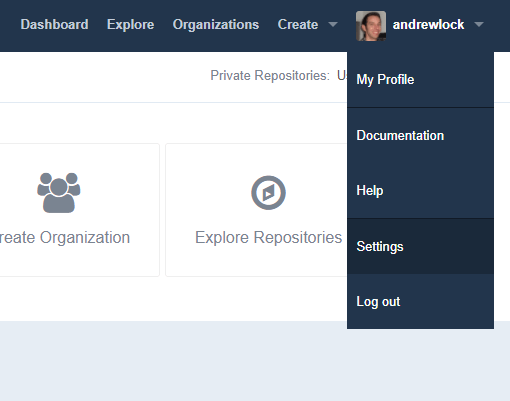
1. Click on the Profile > Settings menu item from the top right of Docker Hub.
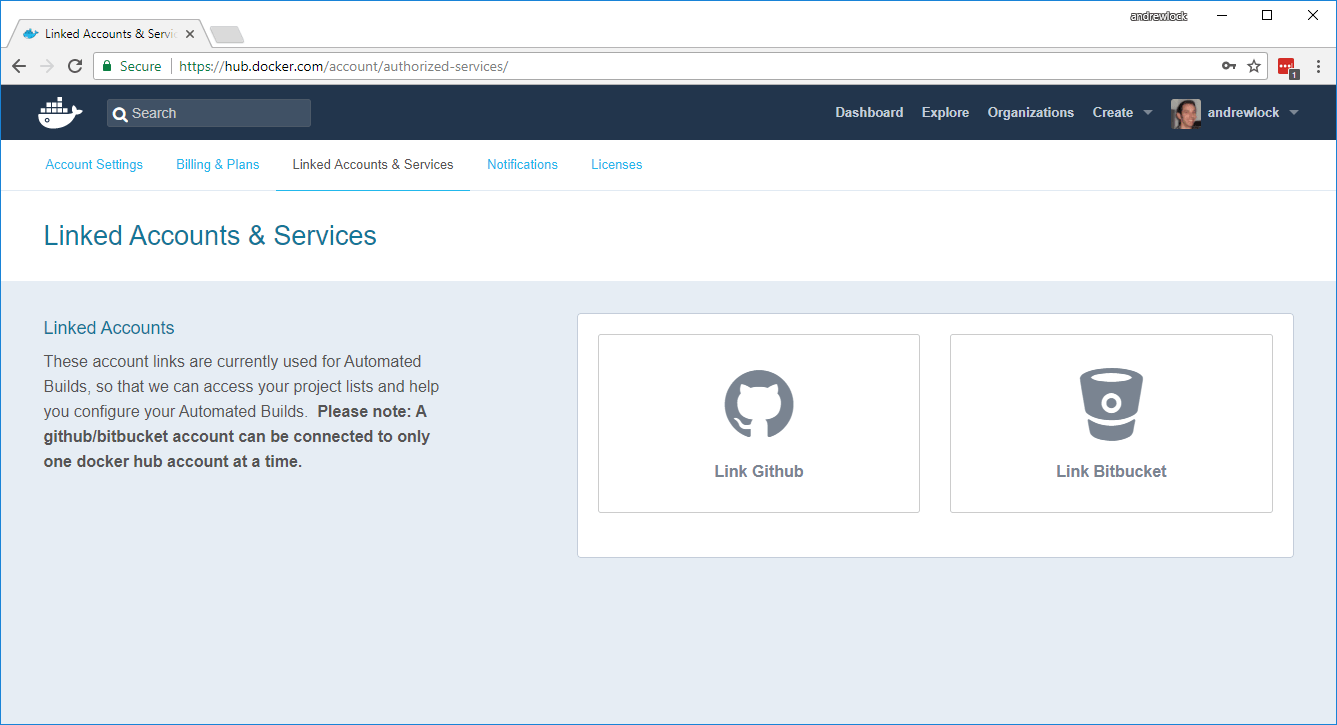
2. From the top menu, choose Linked Accounts & Services and select Link GitHub.
3. On the following page you're presented with two options. You can either provide read and write access to both your public and private repositories, or you can provide read-only access to your public repositories. If you go for read-only access, you'll have to do some extra work to setup automated builds (see point 6 in the following section).
Important Docker Hub needs write access to automatically configure your repositories with the required web-hooks to build your Docker images.

4. Authorise Docker Hub to access your GitHub repo

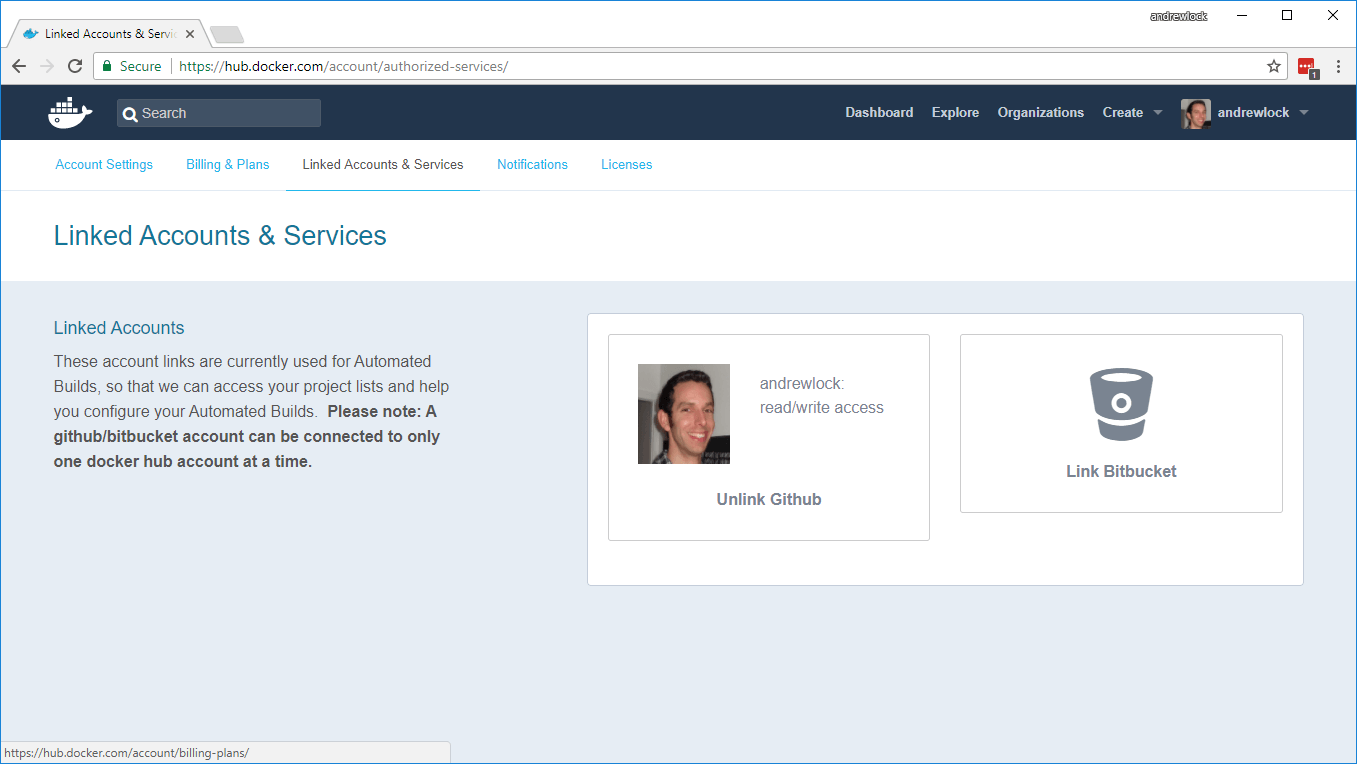
5. Once your account is linked, it will show up in Docker Hub.
Now the account is linked, we can setup an automated build for our Docker images, so they are automatically published to GitHub.
Configuring an automated build
You can create an automated build in Docker Hub so that every push to your GitHub triggers a new build of a Docker image.
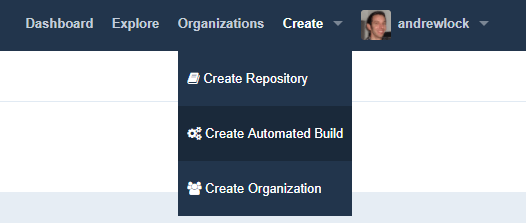
1. Click Create > Create Automated Build from the top menu
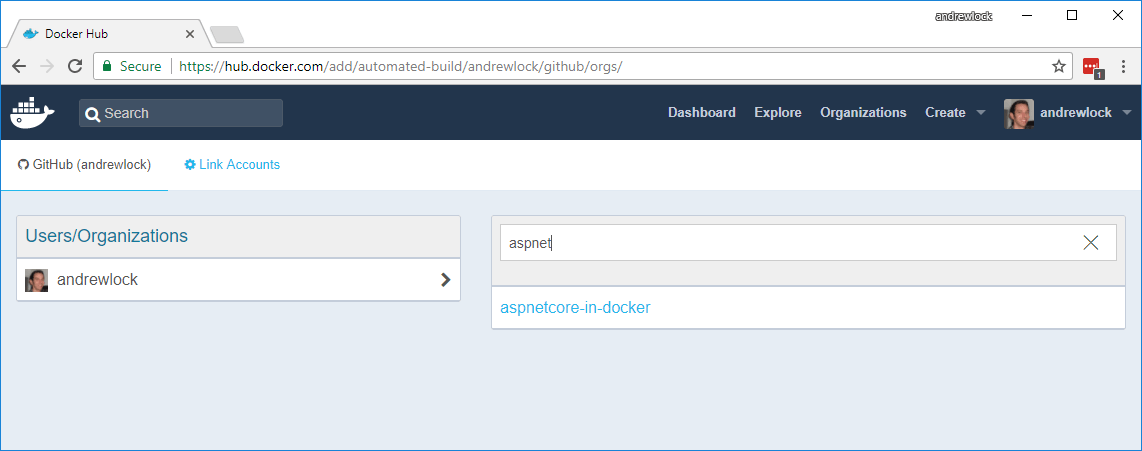
2. You're presented with a list of all the available repositories connected to your GitHub account. Choose the repository you wish to configure from the list, or search to narrow down the list:
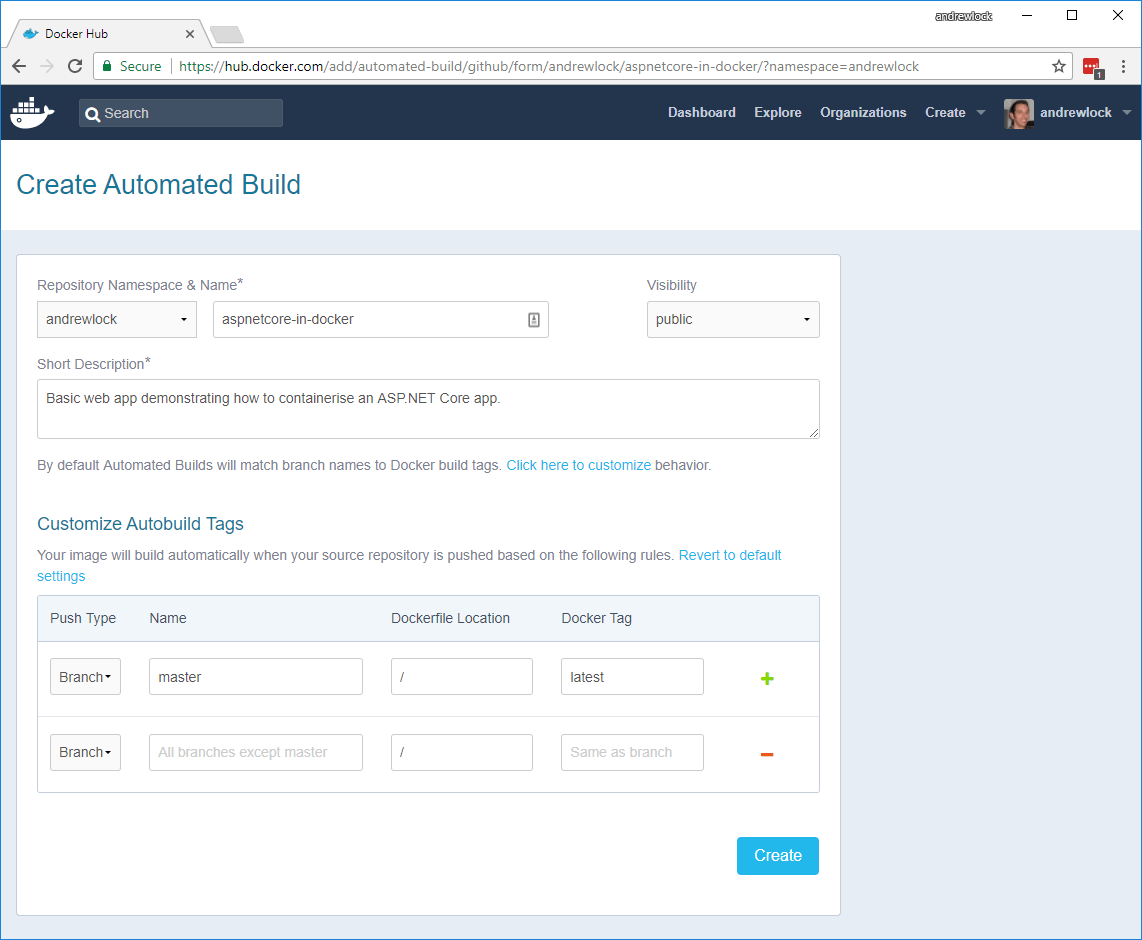
3. Customise the build. You can provide a name for the Docker repository that images will be pushed to, along with a description. Docker hub will automatically build Docker images and tag them based on the branch configuration. By default, pushing to the master branch will tag Docker images with the special latest tag, otherwise they'll be tagged with the branch name. I just left the defaults below.
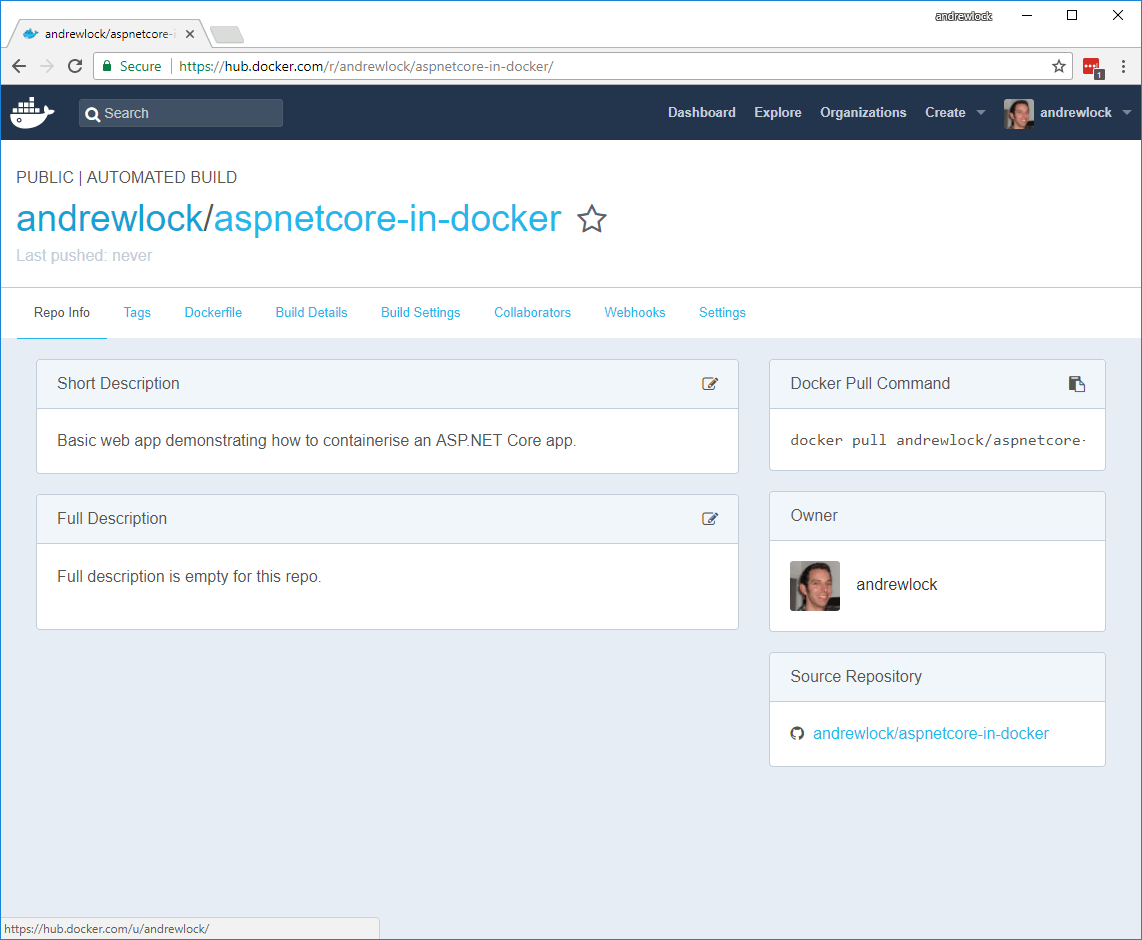
4. View your new repository. By setting up an automated build, you've created a new Docker repository for your images, in this example at andrewlock/aspnetcore-in-docker. This page contains various details about the Docker images in the repository.
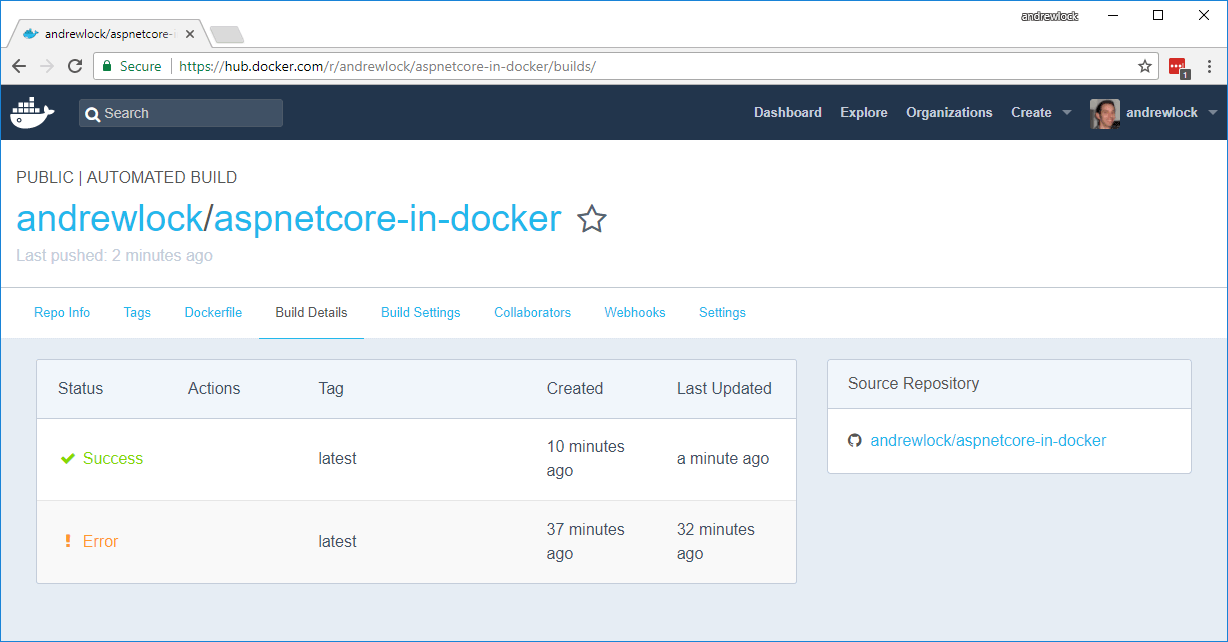
5. Navigate to Build Details to see which builds are currently running. When you push to GitHub, the Docker Hub integration will kick off a build of your Dockerfile, tag the image as appropriate, and push to your Docker Hub repository:
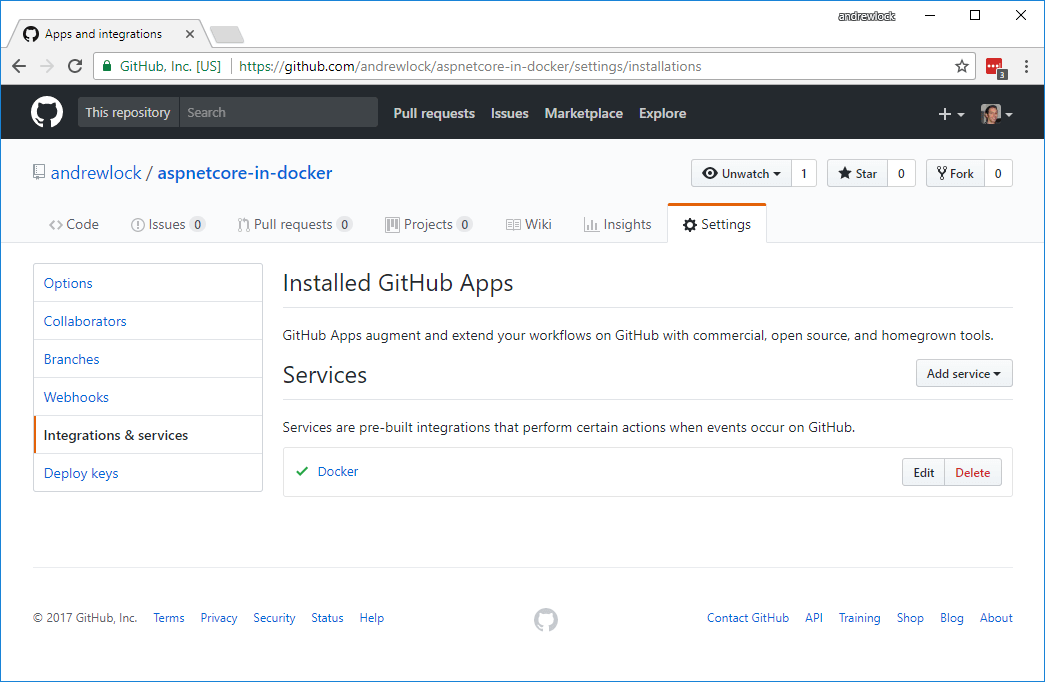
6. If you chose to only grant read-only access to your GitHub account, you'll need to add the Docker Hub integration to your repository manually. To do this go to the Settings page for your GitHub repository (not your profile) and choose Integrations and Services. You'll need to add the Docker service, as shown below so Docker Hub is notified of pushes to your GitHub repository.
We've just built and published our first Docker image on Docker Hub using an automated build process. Now we can take it for a spin!
Running the docker image
You can pull the latest version of your Docker image using docker pull, for example
docker pull andrewlock/aspnetcore-in-docker
This uses the latest tag by default, which always matches the most recently built image from the master branch:
$ docker pull andrewlock/aspnetcore-in-docker
Using default tag: latest
latest: Pulling from andrewlock/aspnetcore-in-docker
3e17c6eae66c: Already exists
4041d8a28951: Already exists
f8ad8f42d05d: Already exists
55b6ebe9b140: Already exists
83778bf3f266: Already exists
830e558d106a: Pull complete
cd471fda7e3f: Pull complete
Digest: sha256:5fb4de0d2d30d424af8cf085e7dba5570f54b7ca353c1cbd6c82dbbe1dab334c
Status: Downloaded newer image for andrewlock/aspnetcore-in-docker:latest
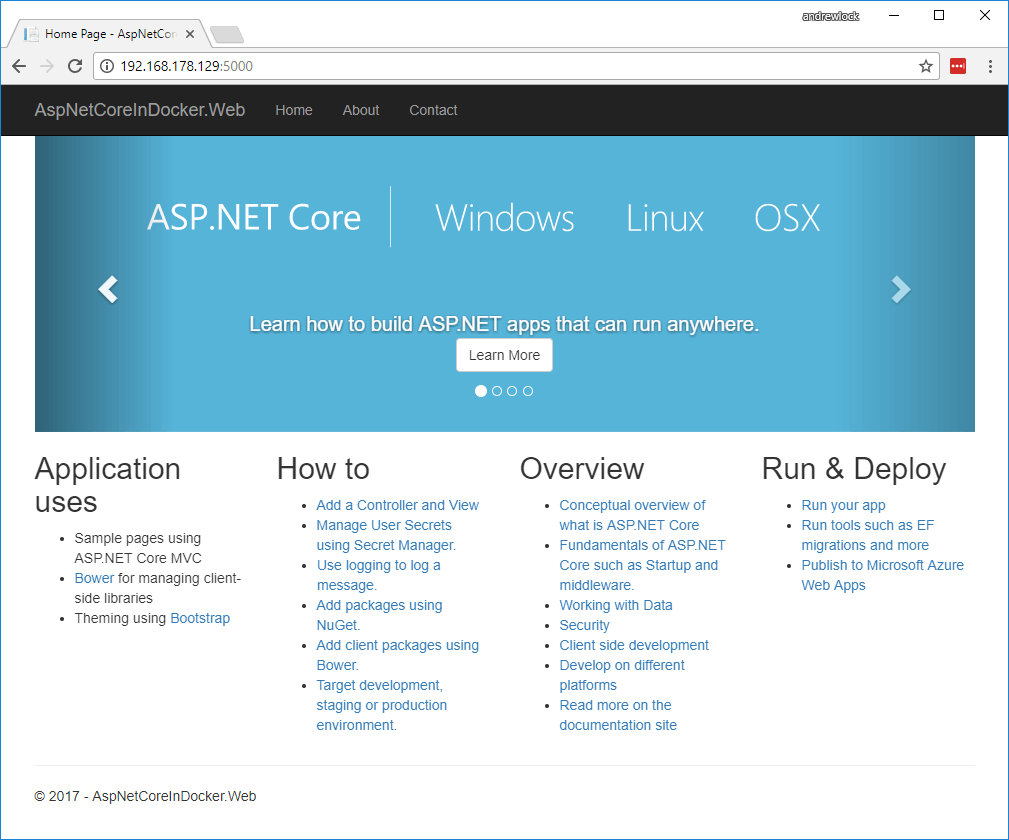
We can run the container in the background and bind it to port 5000 using:
docker run -d -p 5000:80 andrewlock/aspnetcore-in-docker
Et voilà, we have an ASP.NET Core application, with the source code in GitHub, automatically built using Docker Hub, running locally in a Docker container:
Summary
In this post I showed how to create a Docker Hub account, how to setup integration with GitHub, and how to add automatic builds, so that pushing to a GitHub repository causes a new Docker image to be pushed to your repository in Docker Hub. The main point to be aware of is that you need to provide write access for Docker hub, so that it can configure the integration for your app. If you only want to provide read-only access to your repositories, you'll need to configure the integration yourself.