About 18 months ago, I wrote a GitHub app that would automatically assign any issues raised in a GitHub repository to a specific user using Probot. However, GitHub apps are essentially deprecated at this point, as they've been superseded by GitHub actions.
In this post I show how you can install a GitHub action workflow into your repository that automatically assigns new issues to specific users.
Why do you need this?
Many of the repositories I have in GitHub are small-ish libraries, in which I'm the main (sometimes sole) maintainer. That's fine by me, they're not big enough in scope to need more people working on them. But it means that in general, any issues raised need to be addressed by me.
The trouble is, keeping track of open issues isn't easy. GitHub has its notifications page, but that still doesn't make it easy for me to quickly see all outstanding issues across my repositories. My solution is to automatically assign the issues to me. That way I can use the "assigned" filters in the notifications and issues pages
Previously, I wrote a simple GitHub App using Probot and Glitch. This worked well for a time, but it had limitations, required running the app externally (using Glitch) and is using now-obsolete APIs that will soon be deprecated. Luckily, GitHub actions can now fill in the gaps.
Auto-assigning issues using GitHub actions
I'm not going to go into detail about GitHub actions here, but in short, GitHub actions allows you to run code when an event happens in your GitHub repository. One of the most common events is for a push to your repository, so you can use GitHub actions for running continuous integration builds of your application.
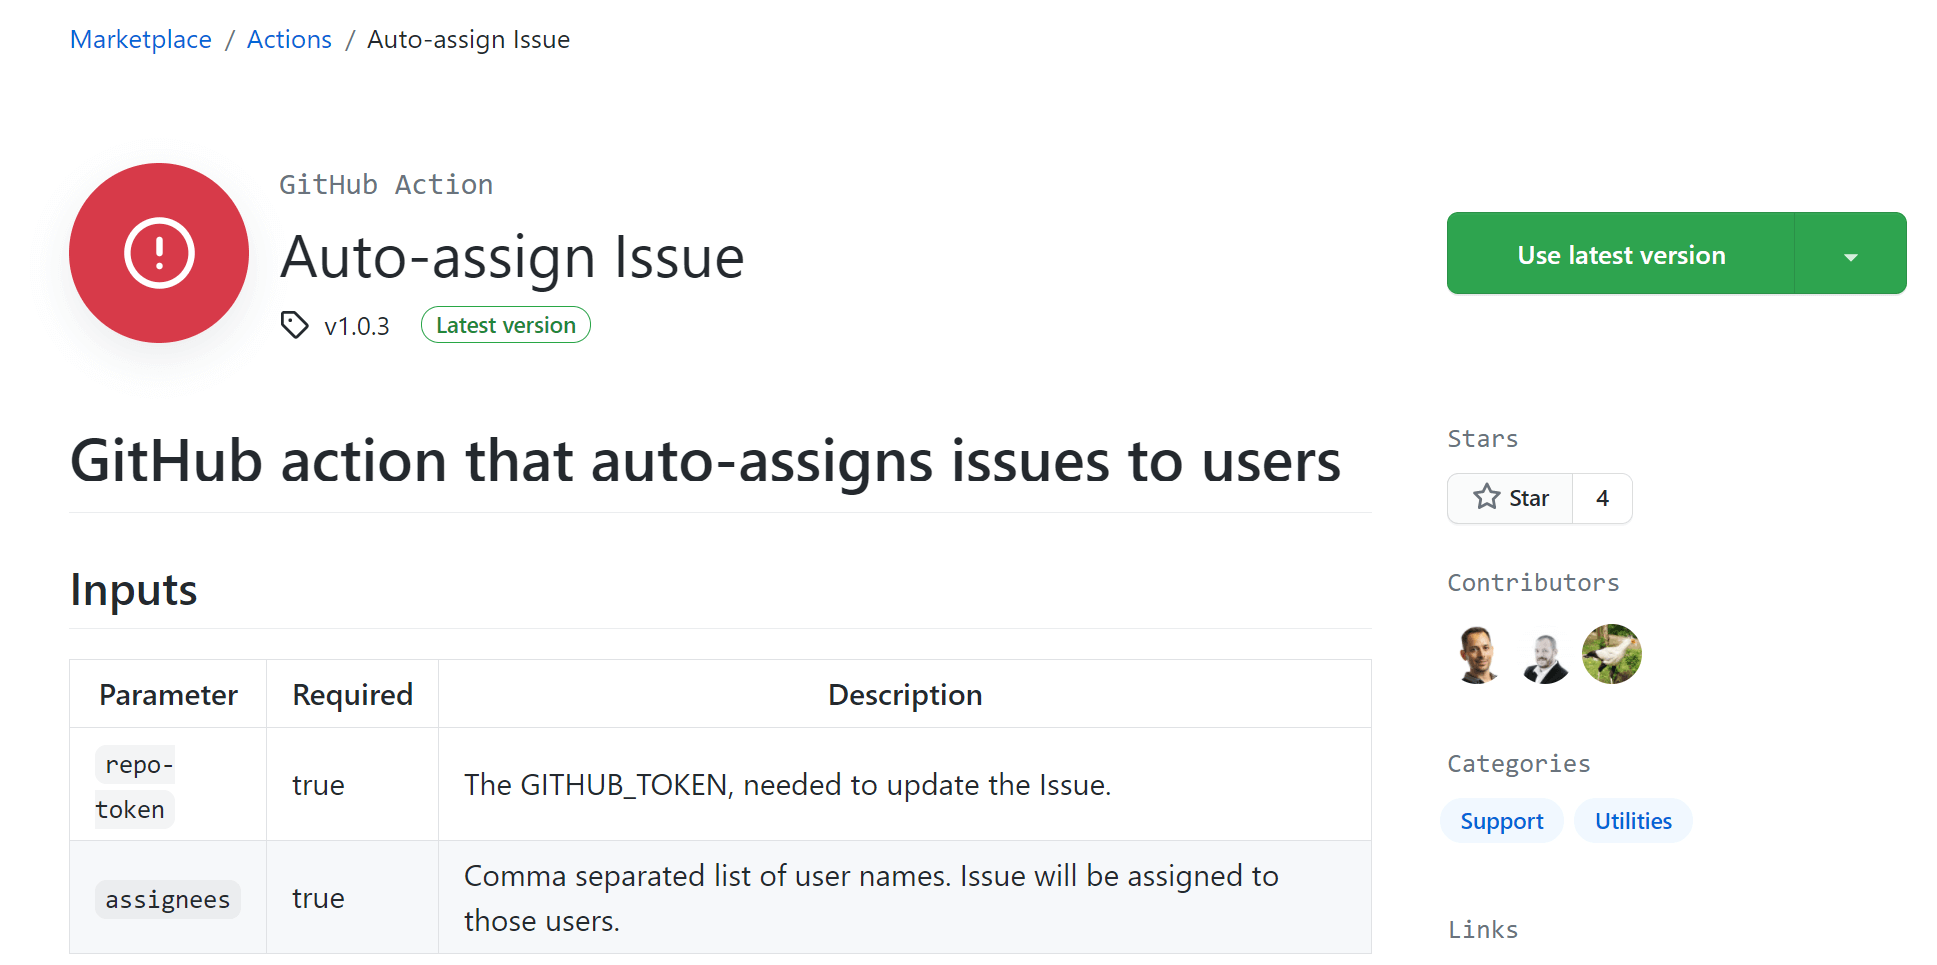
In this case, I'm going to configure a GitHub action to run every time an issue is created in my repository. Instead of creating the action myself, I'm going to use an action published in the GitHub marketplace: Auto-assign issue
This issue does exactly what it says on the tin: it assigns new issues to one or more users.
Adding a new workflow to a repository
Adding a new workflow to a repository just requires creating a .yaml file in the .github/workflows folder in your repository. Alternatively, GitHub provides a UI for adding a new workflow to your application in the browser.
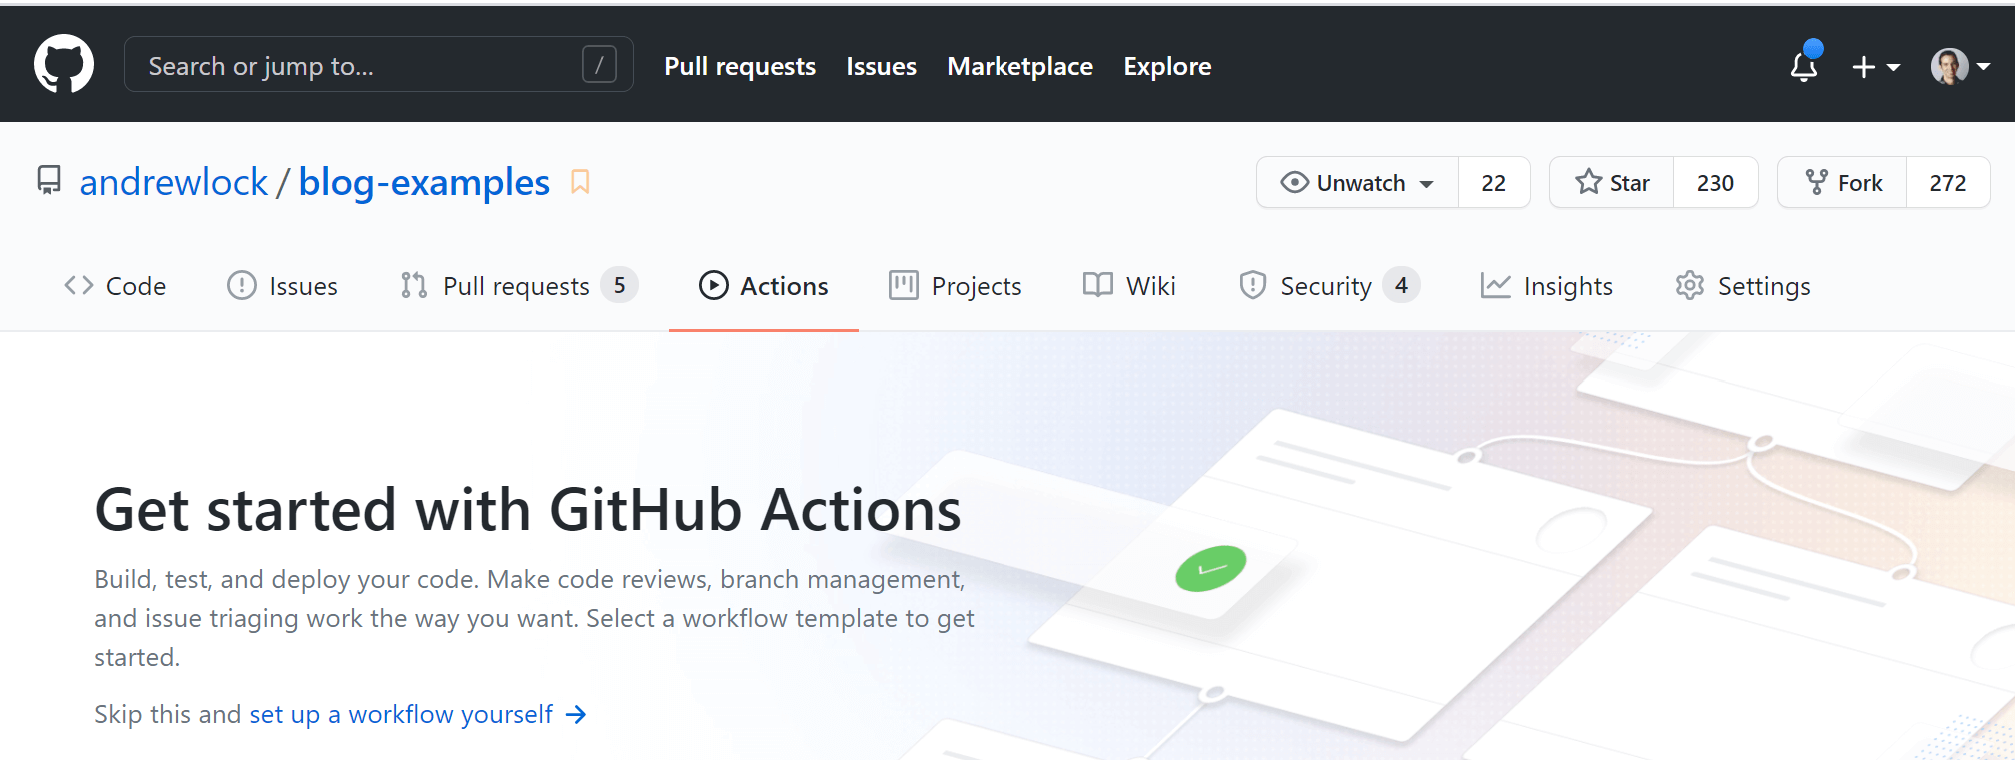
Go to the "Actions" tab in your repository on GitHub. In the example below, for my blog-examples repository, the URL is https://github.com/andrewlock/blog-examples/actions/new:
Click the link to "set up a workflow yourself". There's also a whole range of started templates available if you're new to setting up CI.
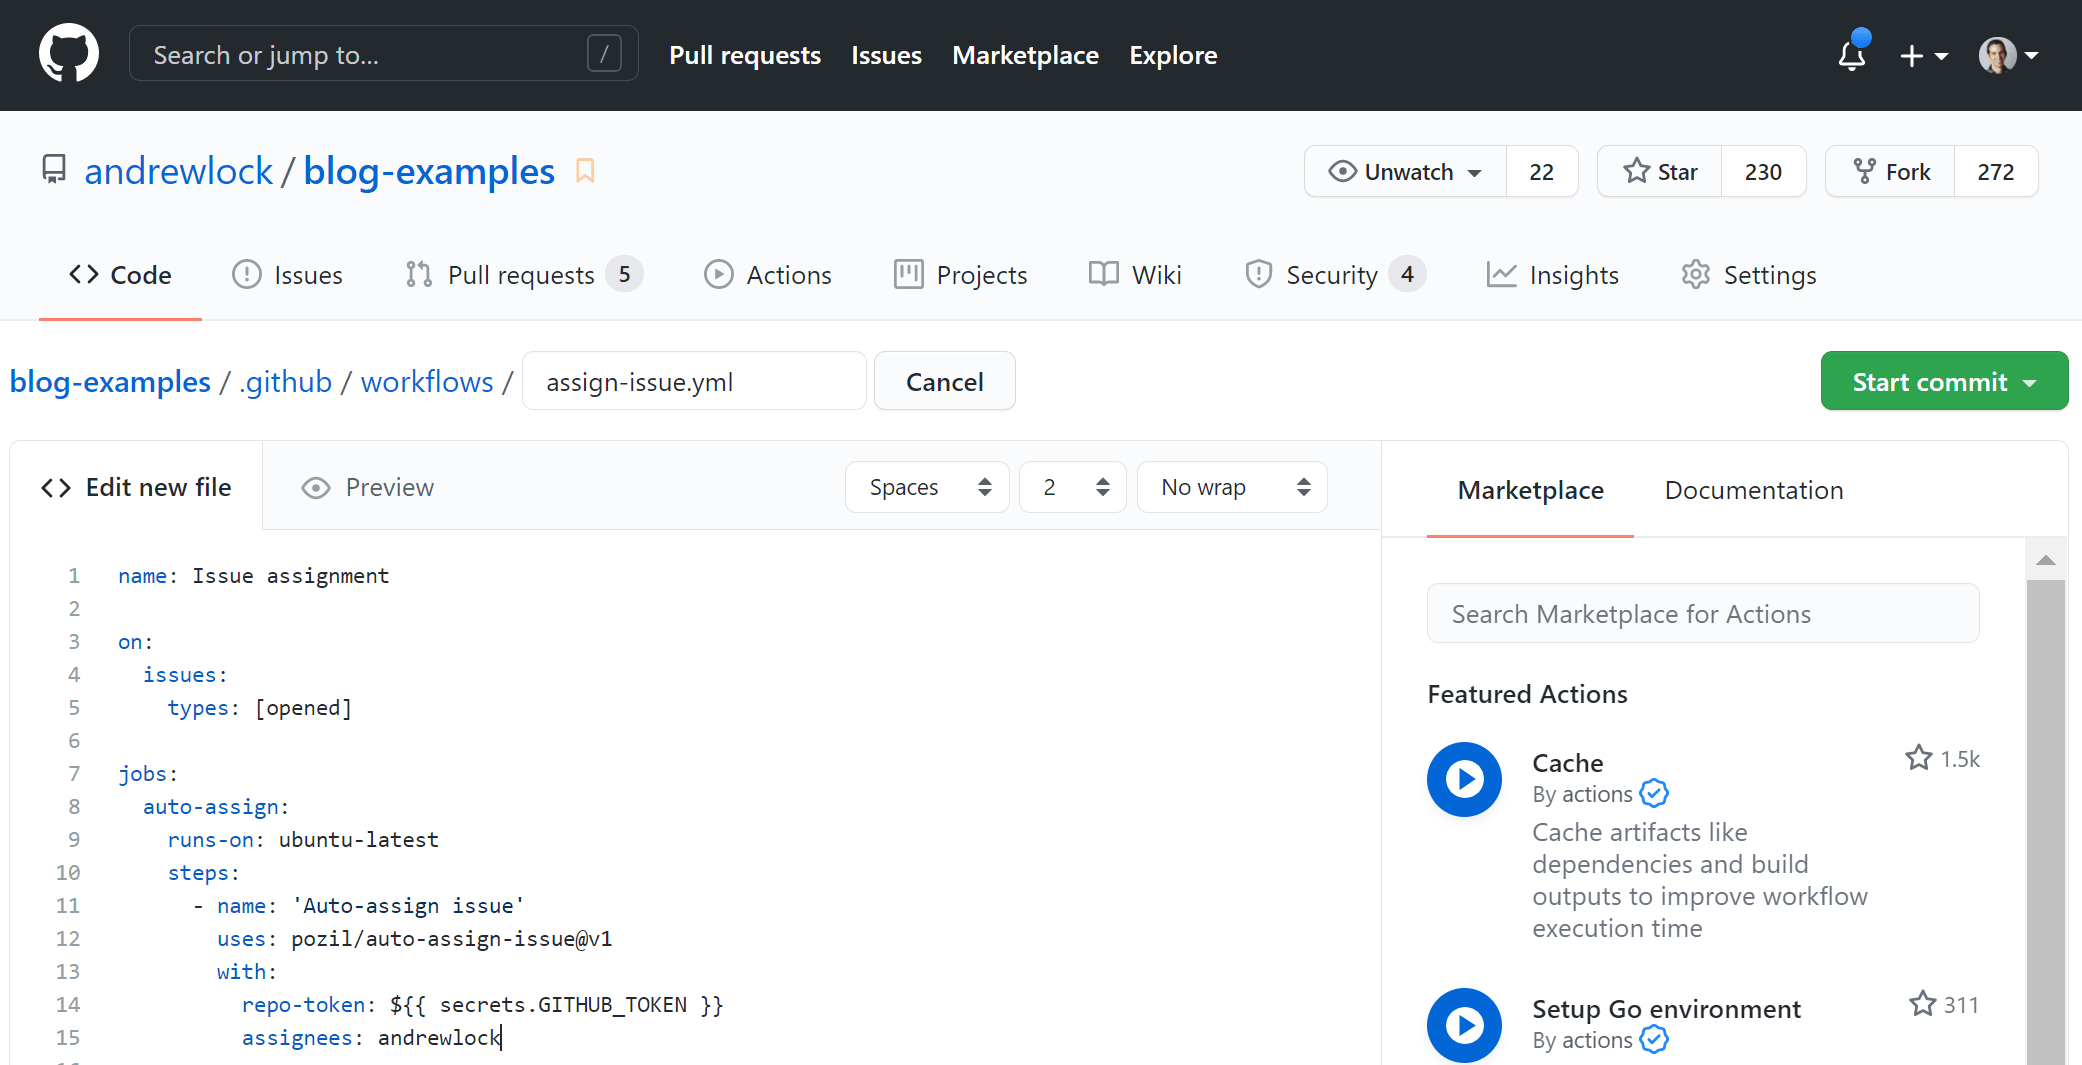
Clicking the link takes you to the workflow editor. This is a simple YAML editor with some basic validation, which should help avoid making the worst mistakes. Choose an appropriate name for the file, for example assign-issue.yml
If you'd prefer, you can create the file locally and push using a normal Git workflow instead.
Add the following YAML to the workflow, replacing andrewlock with a comma-separated list of GitHub usernames you'd like to be auto-assigned to issues.
name: Issue assignment

on:
  issues:
    types: [opened]

jobs:
  auto-assign:
    runs-on: ubuntu-latest
    steps:
      - name: 'Auto-assign issue'
        uses: pozil/auto-assign-issue@v1
        with:
          repo-token: ${{ secrets.GITHUB_TOKEN }}
          assignees: andrewlock
This workflow uses the open-source pozil/auto-assign-issue action. You can view the source code for this action at https://github.com/pozil/auto-assign-issue. It is a very basic action, but it does everything I want!
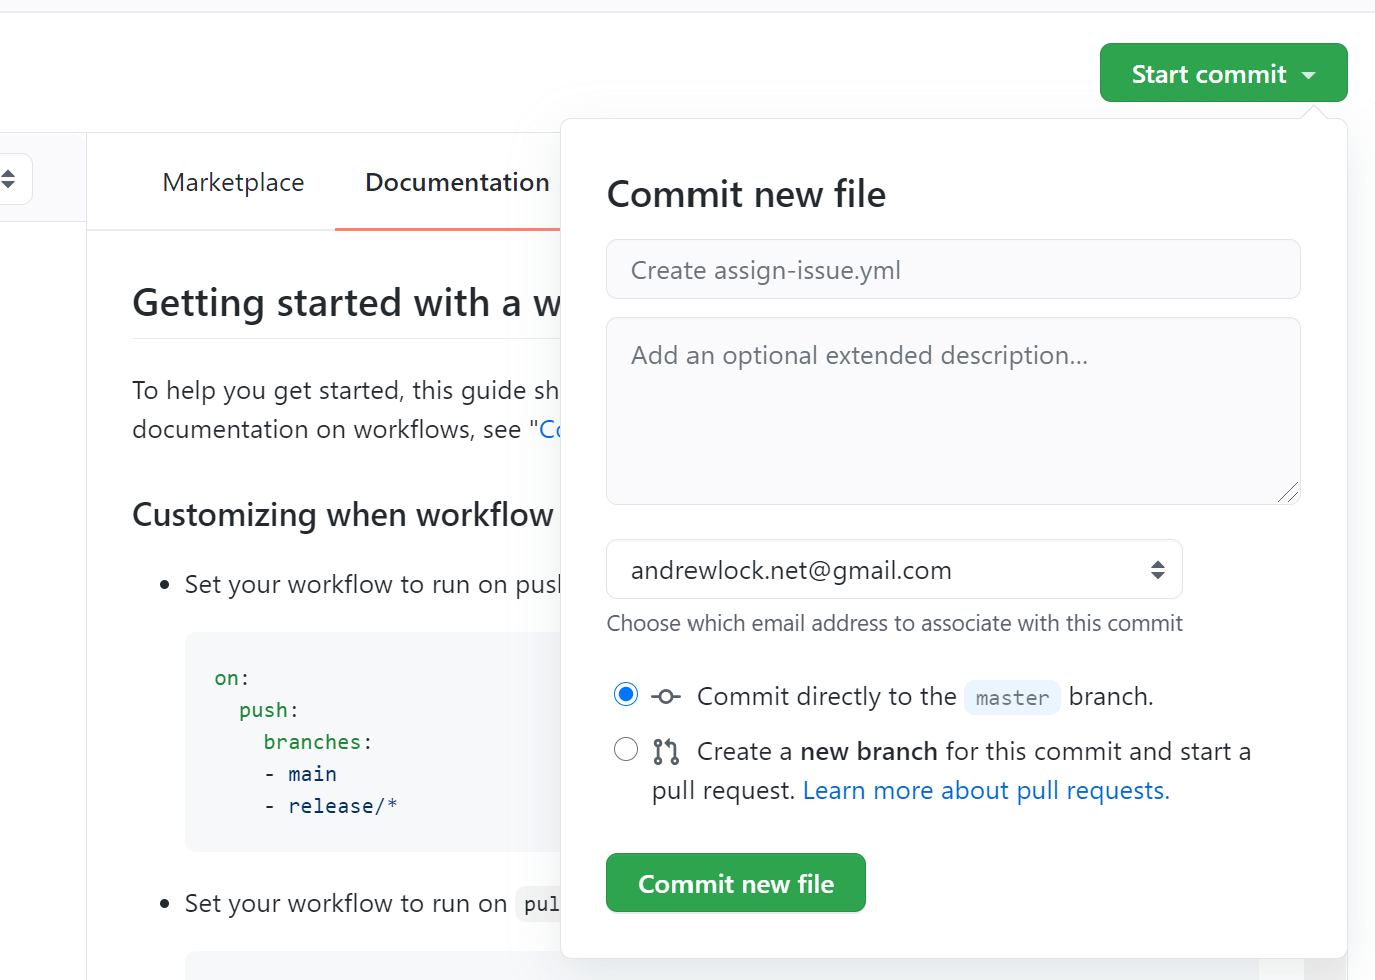
Once you're happy, click the "Start Commit" button and optionally add a new commit message and description to commit the file to your Git repository. You can either commit directly to your main branch if your branch policy allows, or you can create a PR to merge it through the normal flows:
That's all there is to it. The new workflow file is created in your GitHub repository, and you can also view it under the Actions tab. Time to take it for a spin!
Testing the auto-assign issue action
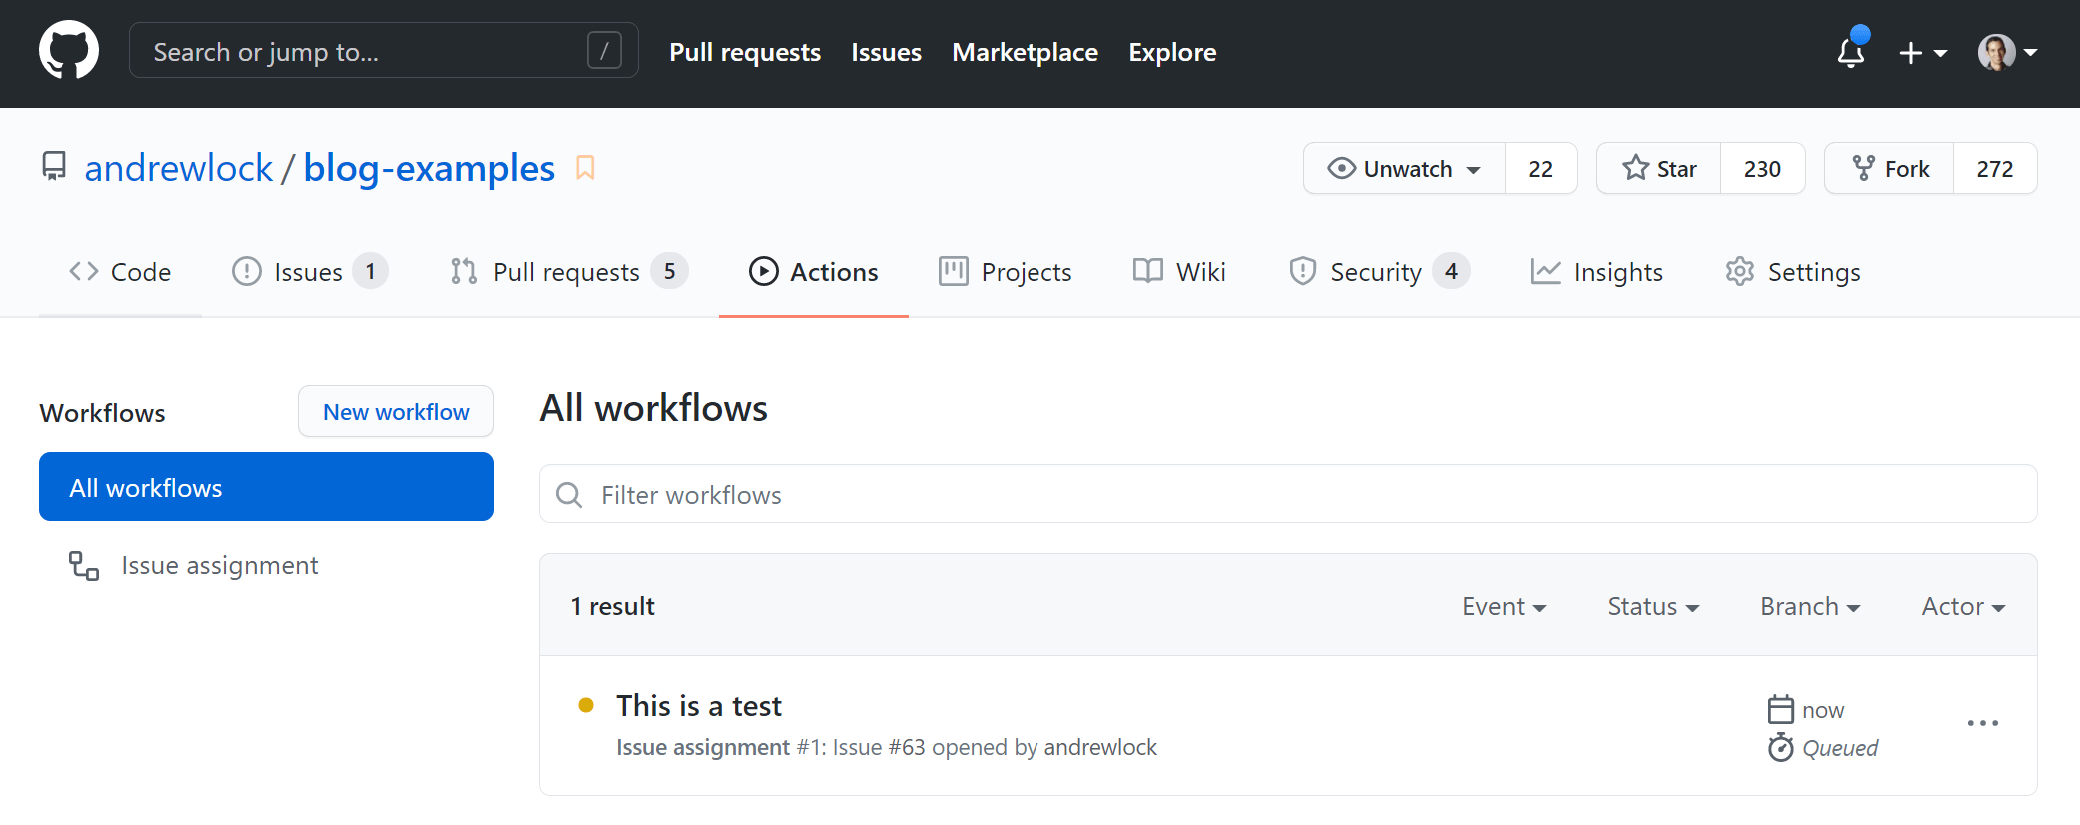
This is an easy one to test, simply create a test issue in your repository! When you do, you won't see the issue assigned immediately, but if you check the Actions tab, you'll see that the "Issue assignment" workflow is running:
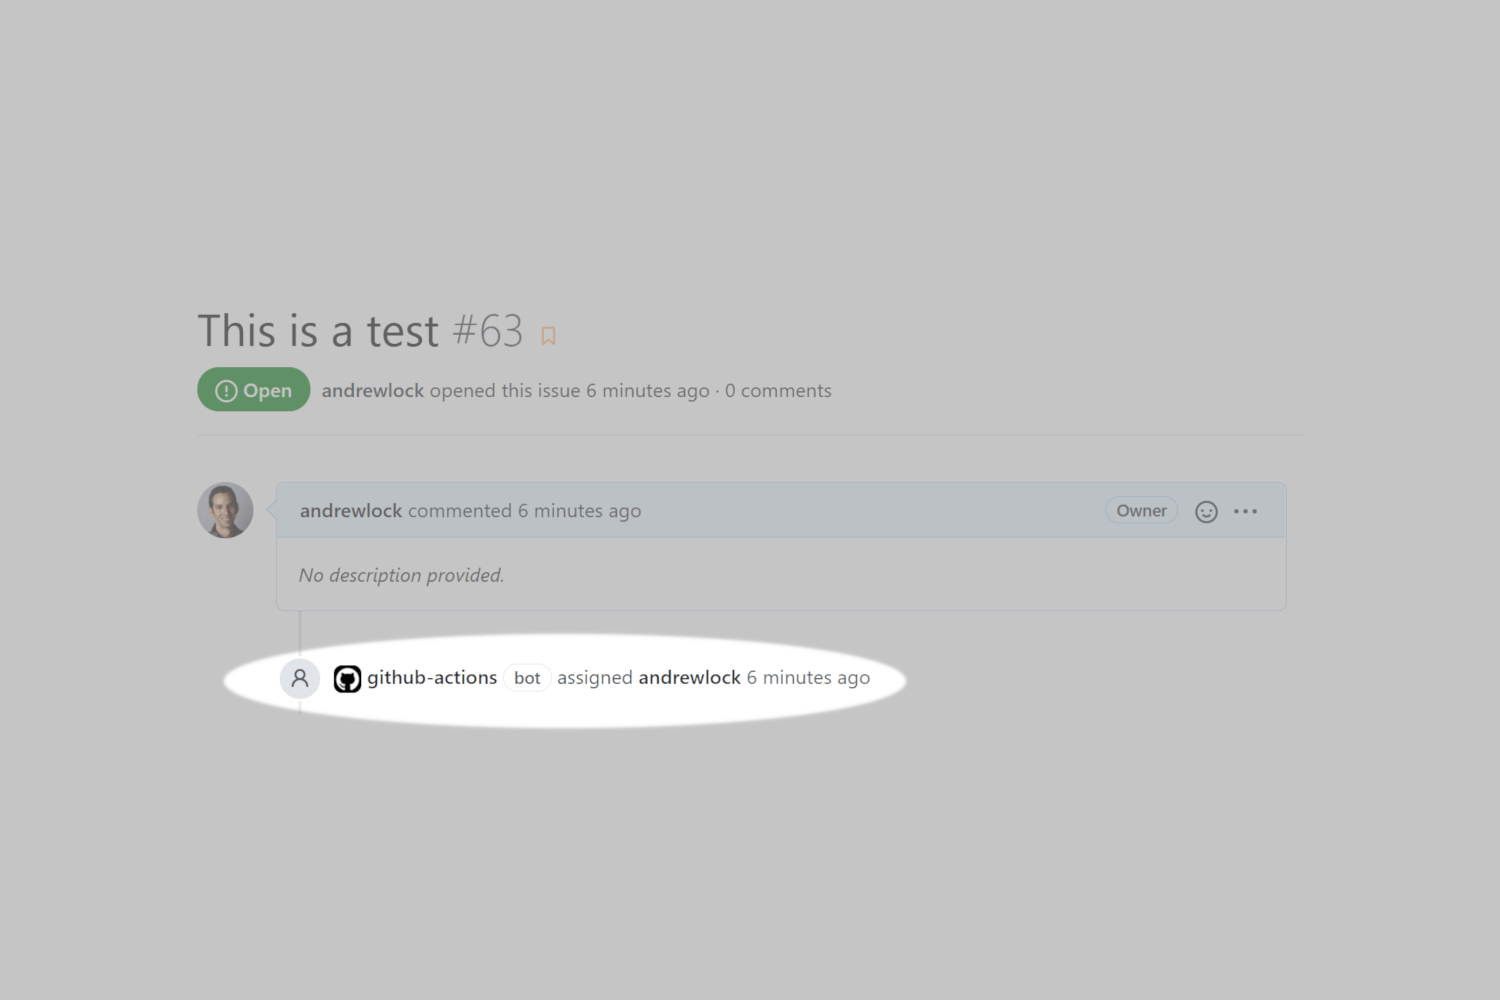
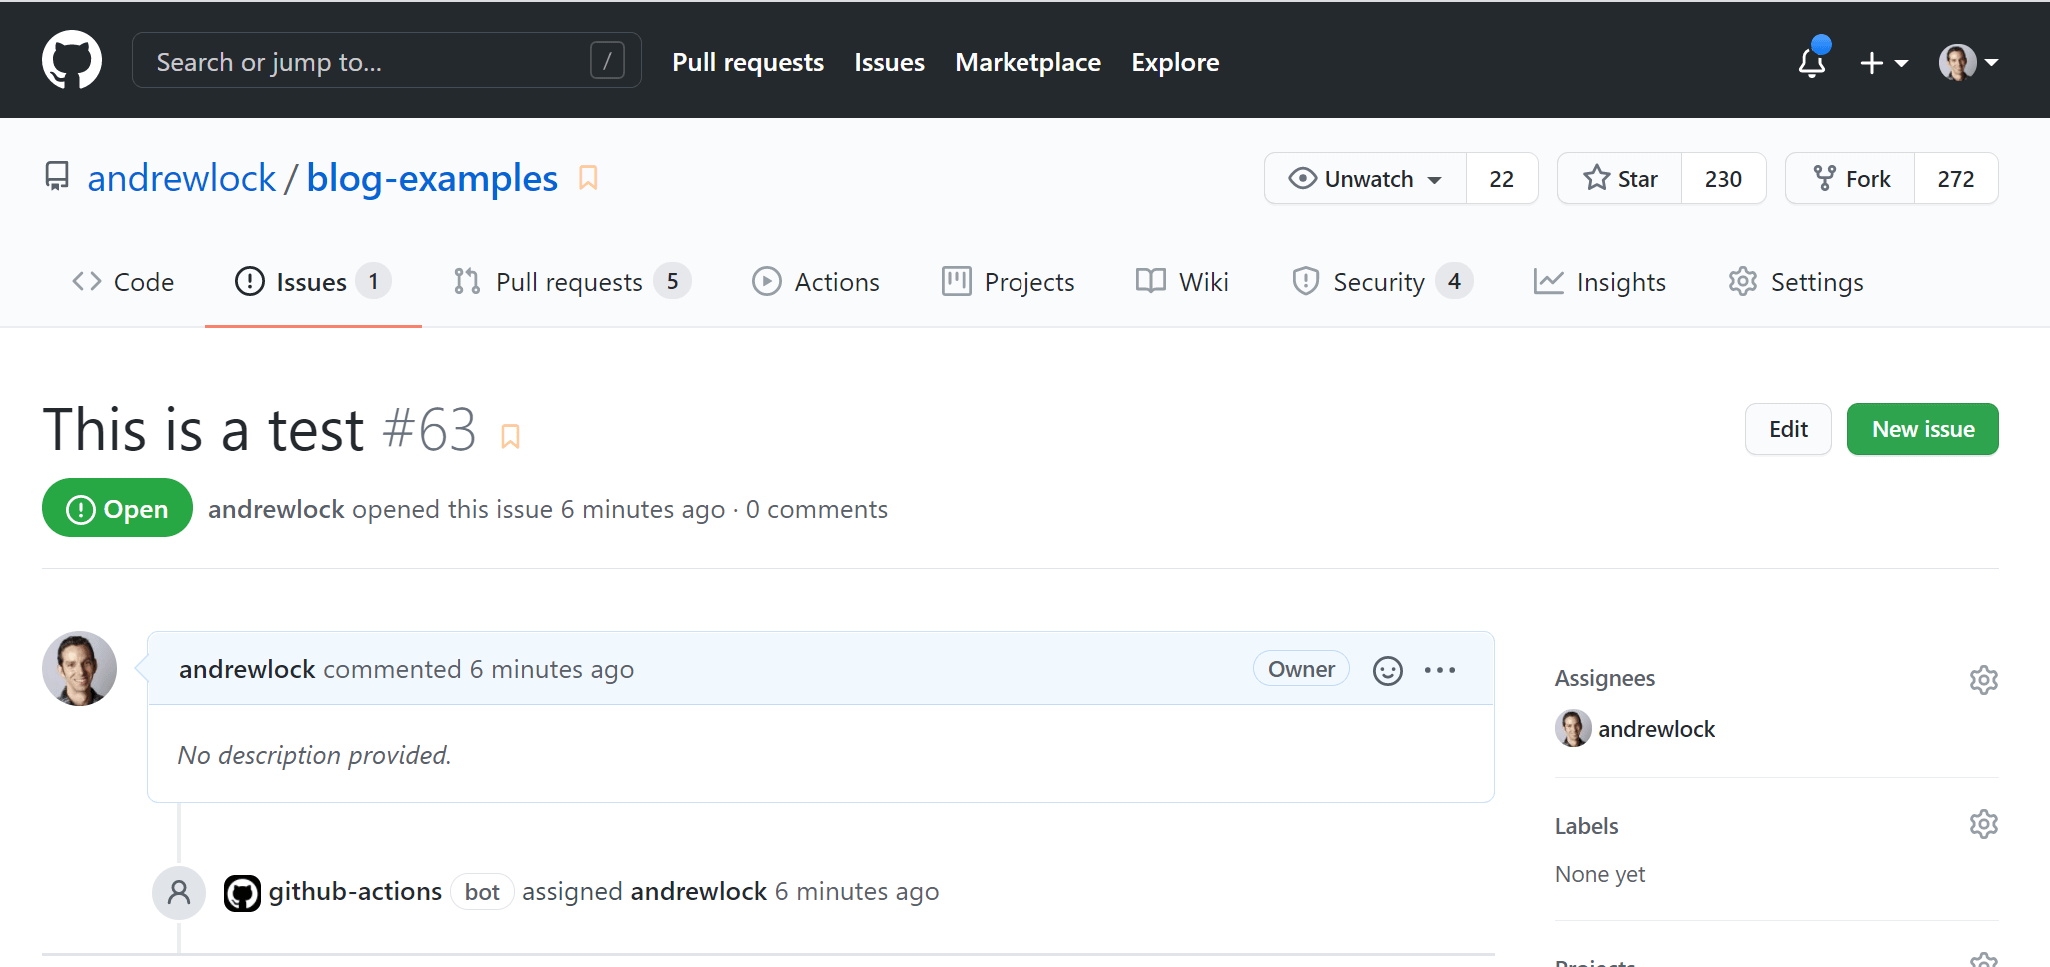
After a few seconds or so, you should see the workflow has turned green. You can click on the workflow to view the details of the workflow. If you click on the name of the workflow file, you can view the logs for the workflow. In this case you can see that the workflow assigned issue 63 to the user andrewlock:
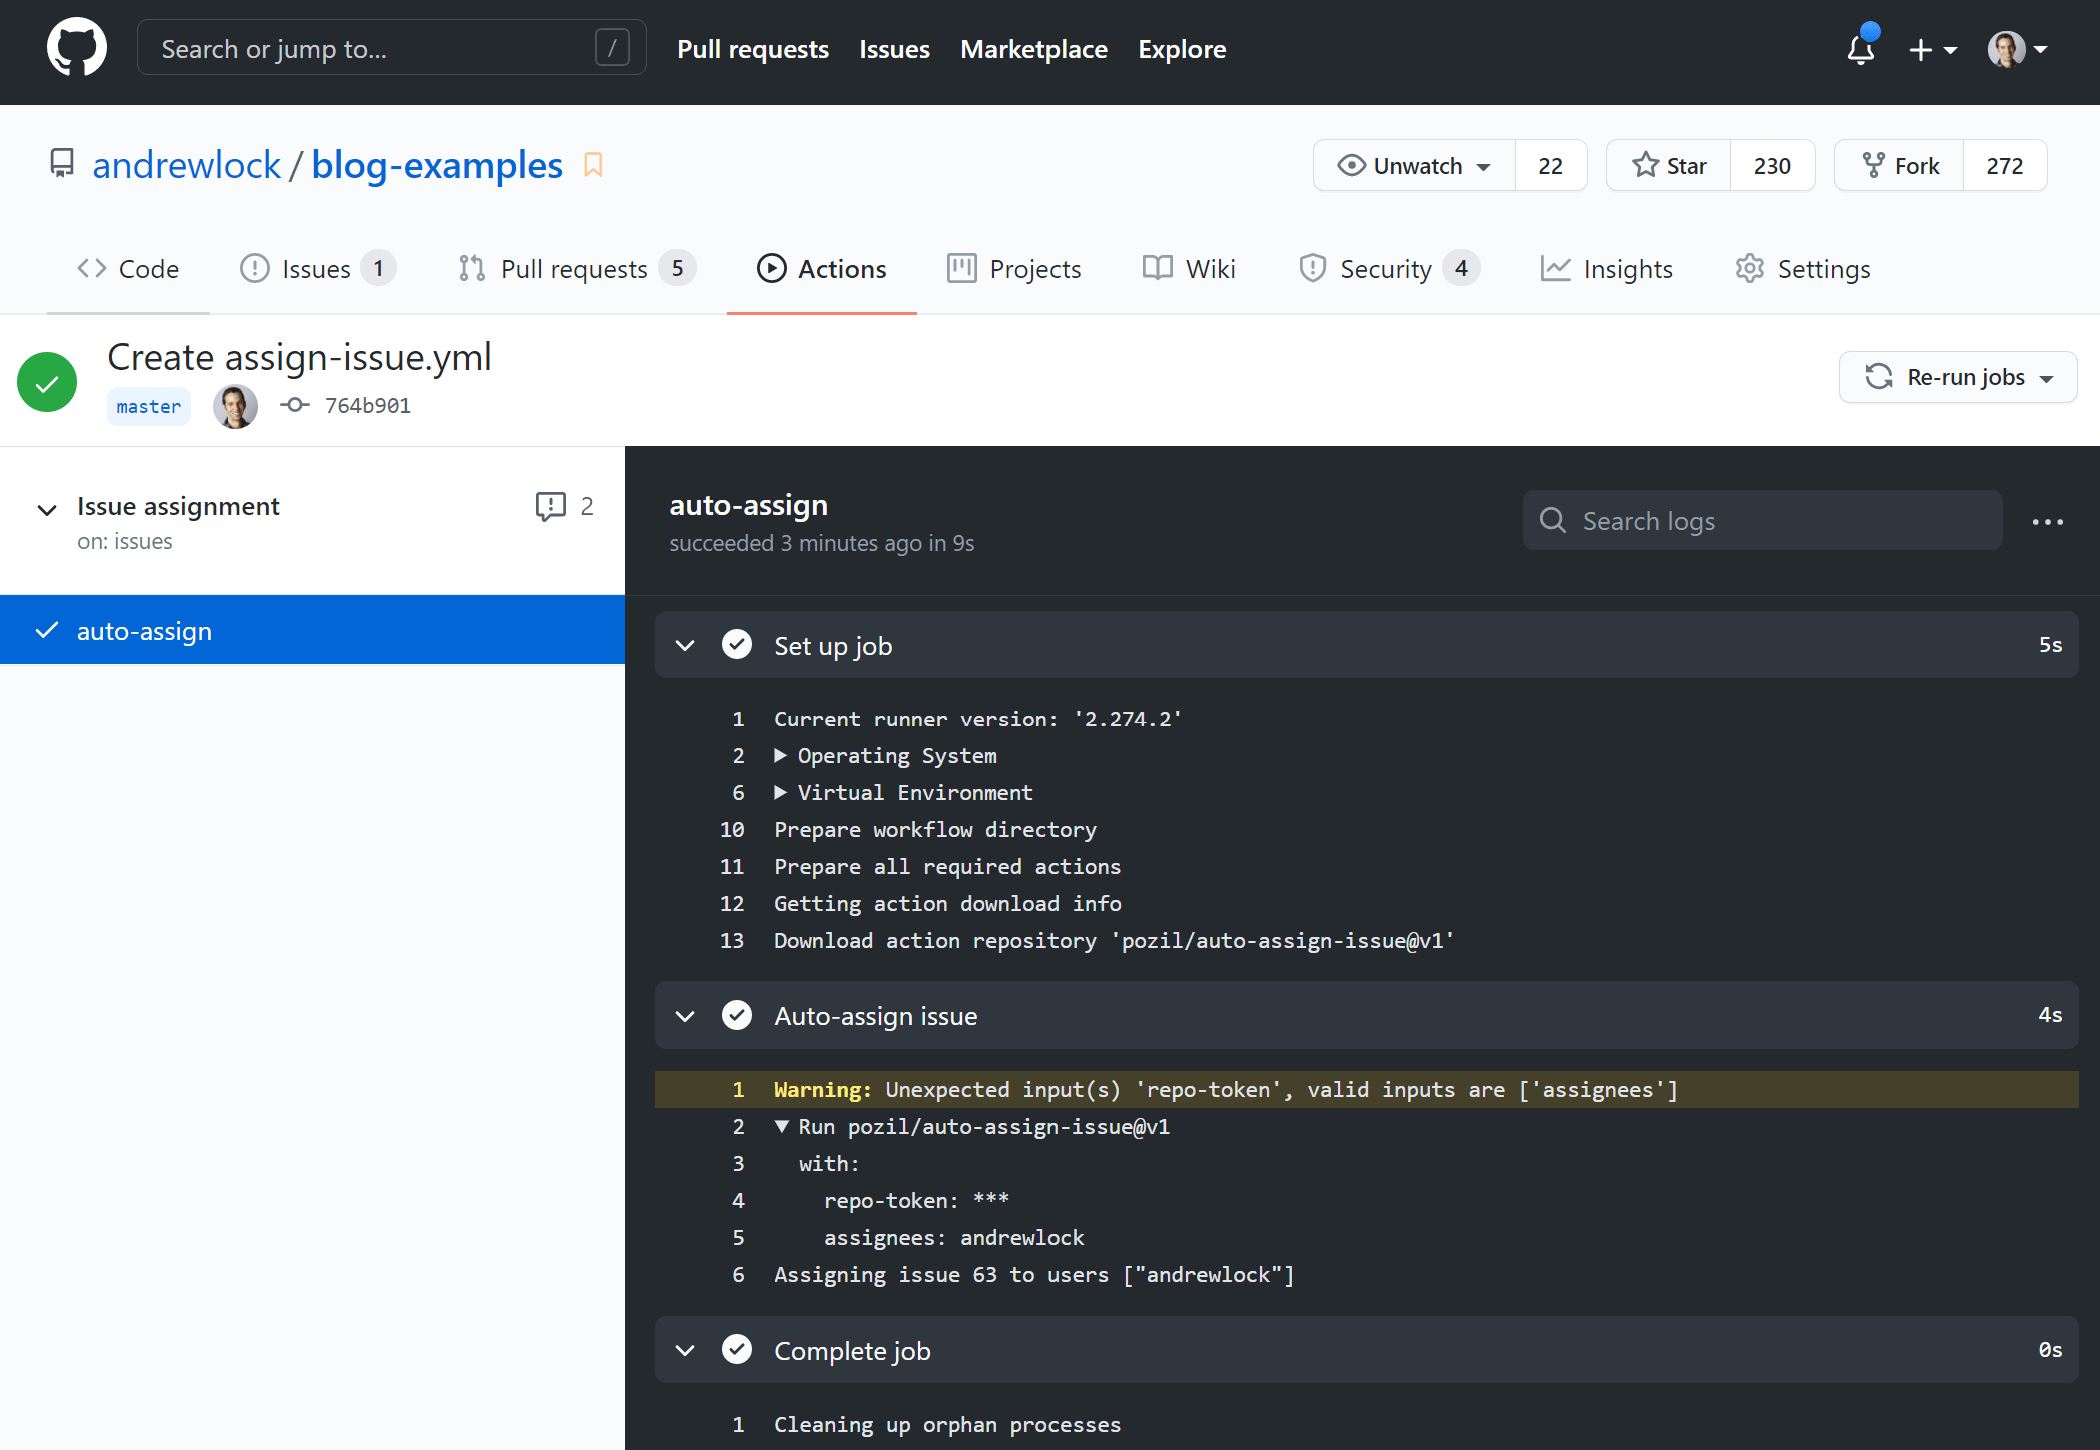
I'm not sure what that
Unexpected input(s)warning is about, but it worked fine, so I chose to ignore it!
If we head back to the issue we can see that GitHub actions assigned the issue to me as expected!
This whole workflow is much easier to use than the ProBot approach I was using previously, and can allow for some very sophisticated workflows. For now, this does everything I need!
The only downside I've found of actions vs GitHub Apps is that you need to explicitly add this workflow to every repository, instead of installing it "globally" at the account level.
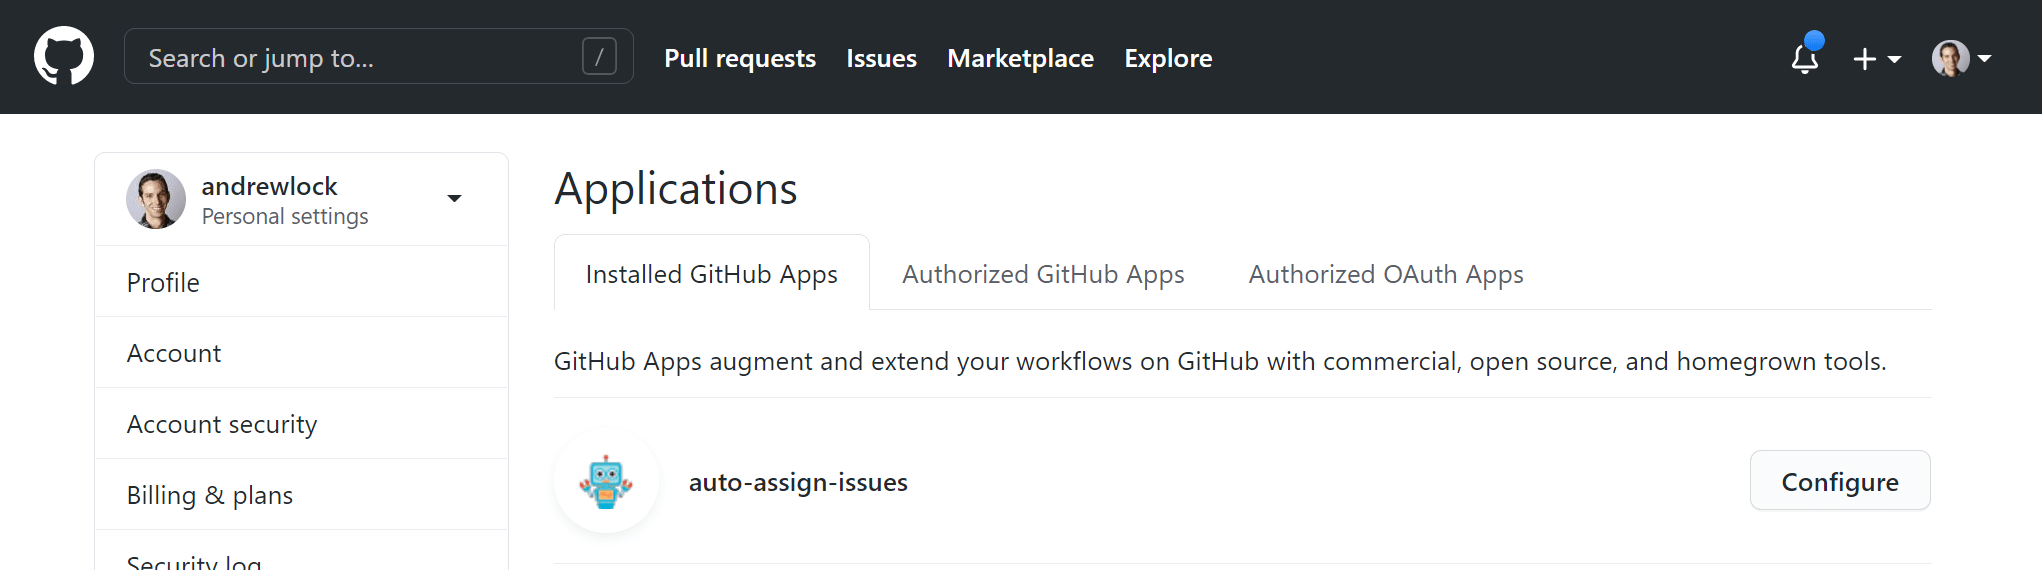
Removing the old app
With the new GitHub action in place, I can now remove the old Probot app I created. Navigate to https://github.com/settings/installations, or click Settings > Applications and click "Configure" next to the app to remove:
To uninstall the app, scroll down to the bottom of the next page, and click "uninstall". This will uninstall the app from your account.
And you're all done. The uninstallation will enter a queue, but the app will be removed from your installed apps list soon.
Summary
In this post I described how I replaced a Probot app (deployed to Glitch) for auto-assigning GitHub issues with a GitHub action instead. I used an existing GitHub action from the marketplace to quickly add the same functionality, without requiring me to deploy an app externally.