In the previous post I described several ways to run database migrations when deploying to Kubernetes. In this post, I show to implement my preferred approach using Kubernetes Jobs and init containers. I'll show an example Helm Chart for a job, and how to update your existing application pods to use init containers that wait for the job to complete.
A quick recap: the database migration solution with Jobs and init containers
In my previous post I discussed the need to run database migrations as part of an application deployment, so that the database migrations are applied before the new application code starts running. This allows zero-downtime deployments, and ensures that the new application code doesn't have to work against old versions of the database.
As I mentioned in the previous post, this does still require you to be thoughtful with your database migrations so as to not break your application in the period after running migrations but before your application code is fully updated.
The approach I described consists of three parts:
- A .NET Core command line project, as part of the overall application solution, that executes the migrations against the database.
- A Kubernetes job that runs the migration project when the application chart is installed or upgraded.
- Init containers in each application pod that block the execution of new deployments until after the job has completed successfully.
With these three components, the overall deployment process looks like the following:

For the remainder of the post I'll describe how to update your application's Helm Charts to implement this in practice.
The sample application
For this post I'll extend a sample application I described in a previous post. I described creating a helm chart containing two sub-applications, an "API app", with a public HTTP API and associated ingress, and a "service app" which did not have an ingress, and would be responsible, for example, for handling messages from a message bus.

Currently the test-app chart consists of two sub-charts:
test-app-api: the API app, with a template for the application deployment (managing the pods containing the application itself), a service (an internal load-balancer for the pods), and an ingress (exposing the HTTP endpoint to external clients)test-app-service: the "message bus handler" app, with a template for the application deployment (managing the pods containing the application itself) and a service for internal communication (if required).
These sub charts are nested under the top-level test-app, giving a folder structure something like the following:
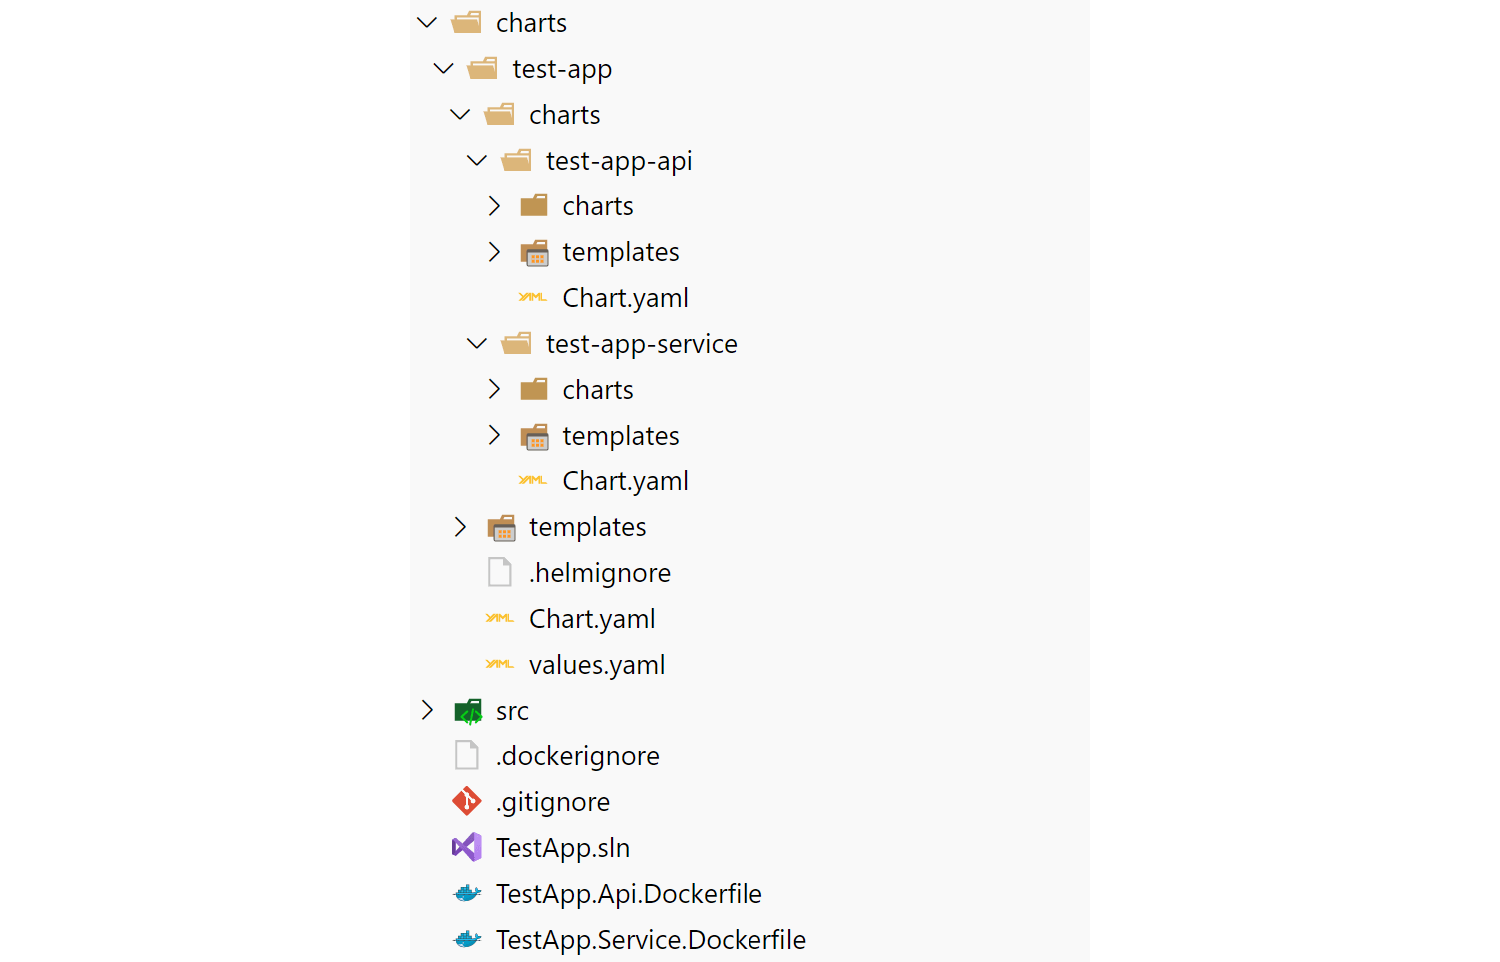
In this post we assume we now need to run database migrations when this chart is installed or updated.
The .NET Core database migration tool
The first component is the separate .NET project that executes database migrations. There are lots of tools you can use to implement the migrations. For example:
- Use EF Core's migrations directly from a global tool
- Execute EF Core migrations manually by calling
Database.Migrate(). - Using an alternative library such as DbUp or FluentMigrator.
- Use some other tool entirely. You're running in Docker, so it doesn't even need to be .NET.
For our projects we typically have a "utility" command line tool that we use for running ad-hoc commands. We use Oakton for parsing command line arguments and typically have multiple commands you can issue. "Migrate database" is one of these commands.
Just so we have something to test, I created a new console application using dotnet new console and updated the Program.cs to sleep for 30s before returning successfully:
using System;
using System.Threading;

namespace TestApp.Cli
{
    class Program
    {
        static void Main(string[] args)
        {
            Console.WriteLine("Running migrations...");
            Thread.Sleep(30_000);
            Console.WriteLine("Migrations complete!");
        }
    }
}
This will serve as our "migration" tool. We'll build it into a Docker container, and use it to create a Kubernetes Job that is deployed with the application charts.
Creating a Kubernetes Job
The Helm Chart template for a Kubernetes Job is similar in many ways to the Helm Chart template for an application deployment, as it re-uses the "pod manifest" that defines the actual containers that make up the pod.
The example below is the full YAML for the Kubernetes Job, including support for injecting environment variables as described in a previous post. I'll discuss the YAML in more detail below
apiVersion: batch/v1
kind: Job
metadata:
  name: {{ include "test-app-cli.fullname" . }}-{{ .Release.Revision }}
  labels:
    {{- include "test-app-cli.labels" . | nindent 4 }}
spec:
  backoffLimit: 1
  template:
    metadata:
      labels:
        {{- include "test-app-cli.selectorLabels" . | nindent 8 }}
    spec:
      containers:
      - name: {{ .Chart.Name }}
        image: "{{ .Values.image.repository }}:{{ .Values.image.tag | default .Chart.AppVersion }}"
        imagePullPolicy: {{ .Values.image.pullPolicy }}
        command: ["dotnet"]
        args: ["TestApp.Cli.dll", "migrate-database"]
        env:
          {{- $env := merge .Values.env .Values.global.env -}}
          {{ range $k, $v := $env }}
            - name: {{ $k | quote }}
              value: {{ $v | quote }}
          {{- end }}
      restartPolicy: {{ .Values.job.restartPolicy }}
apiVersion, version, metadata
This section is standard for all Kubernetes manifests. It specifies that we're using version 1 of the Job manifest, and we use some of Helm's helper functions to create appropriate labels and names for the created resource.
One point of interest here - we create a unique
namefor the job by appending the revision number. This ensures that a new migration job is created on every install/upgrade of the chart.
backoffLimit
This property is specific to the Job manifest, and indicates the number of times a job should be retried if it fails. In this example, I've set .spec.backoffLimit=1, which means we'll retry once if the migrations fail. If the migrations fail on the second attempt, the Job will fail completely. In that case, as the job will never complete, the new version of the application code will never run.
template
This is the main pod manifest for the job. It defines which containers will run as part of the job and their configuration. This section is very similar to what you will see in a typical deployment manifest, as both manifests are about defining the containers that run in a pod.
The main difference in this example, is that I've overridden the command and args properties. This combination of command and args is equivalent to running dotnet TestApp.Cli.dll migrate-database when the container starts.
That's all there is to the job manifest. Create the manifest as the only template in the test-app-cli sub-chart of the top-level test-app:
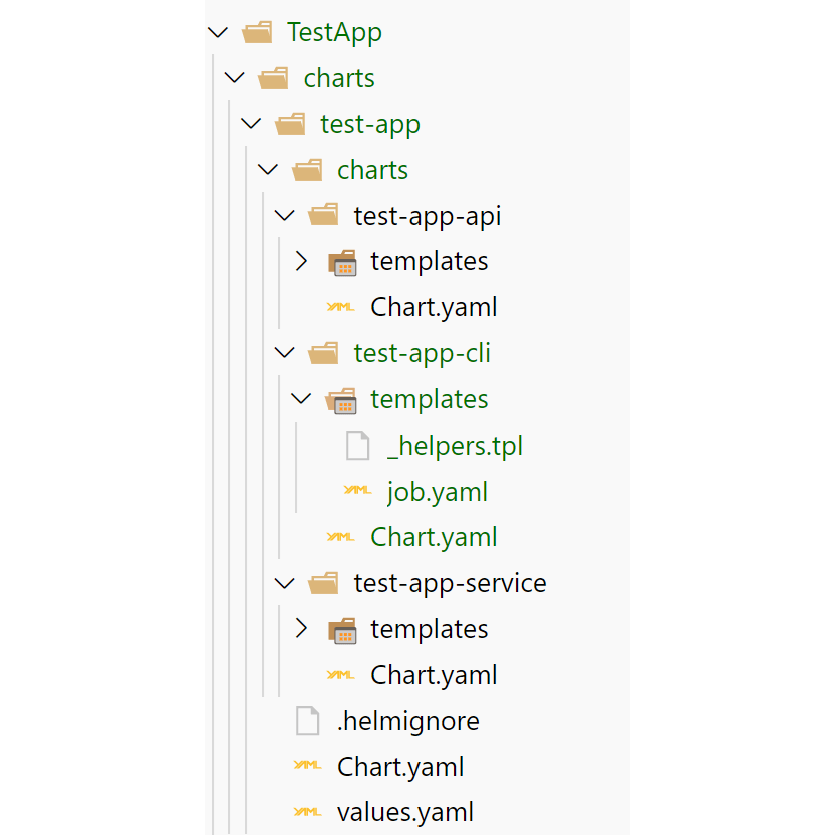
One final thing is to add some configuration to the top-level values.yaml file, to configure the migration app:
test-app-cli:

  image:
    repository: andrewlock/my-test-cli
    pullPolicy: IfNotPresent
    tag: ""

  job:
    ## Should the job be rescheduled on the same node if it fails, or just stopped
    restartPolicy: Never
I've added some default values for the container. You could add extra default configuration if required, for example standard environment variables, as I showed in a previous post.
Testing the job
At this point, we could test installing our application, to make sure the job executes correctly.
Assuming you have helm installed and configured to point to a cluster, and that you have built and tagged your containers as version 0.1.1, you can install the top-level chart by running:
helm upgrade --install my-test-app-release . \
  --namespace=local \
  --set test-app-cli.image.tag="0.1.1" \
  --set test-app-api.image.tag="0.1.1" \
  --set test-app-service.image.tag="0.1.1" \
  --debug
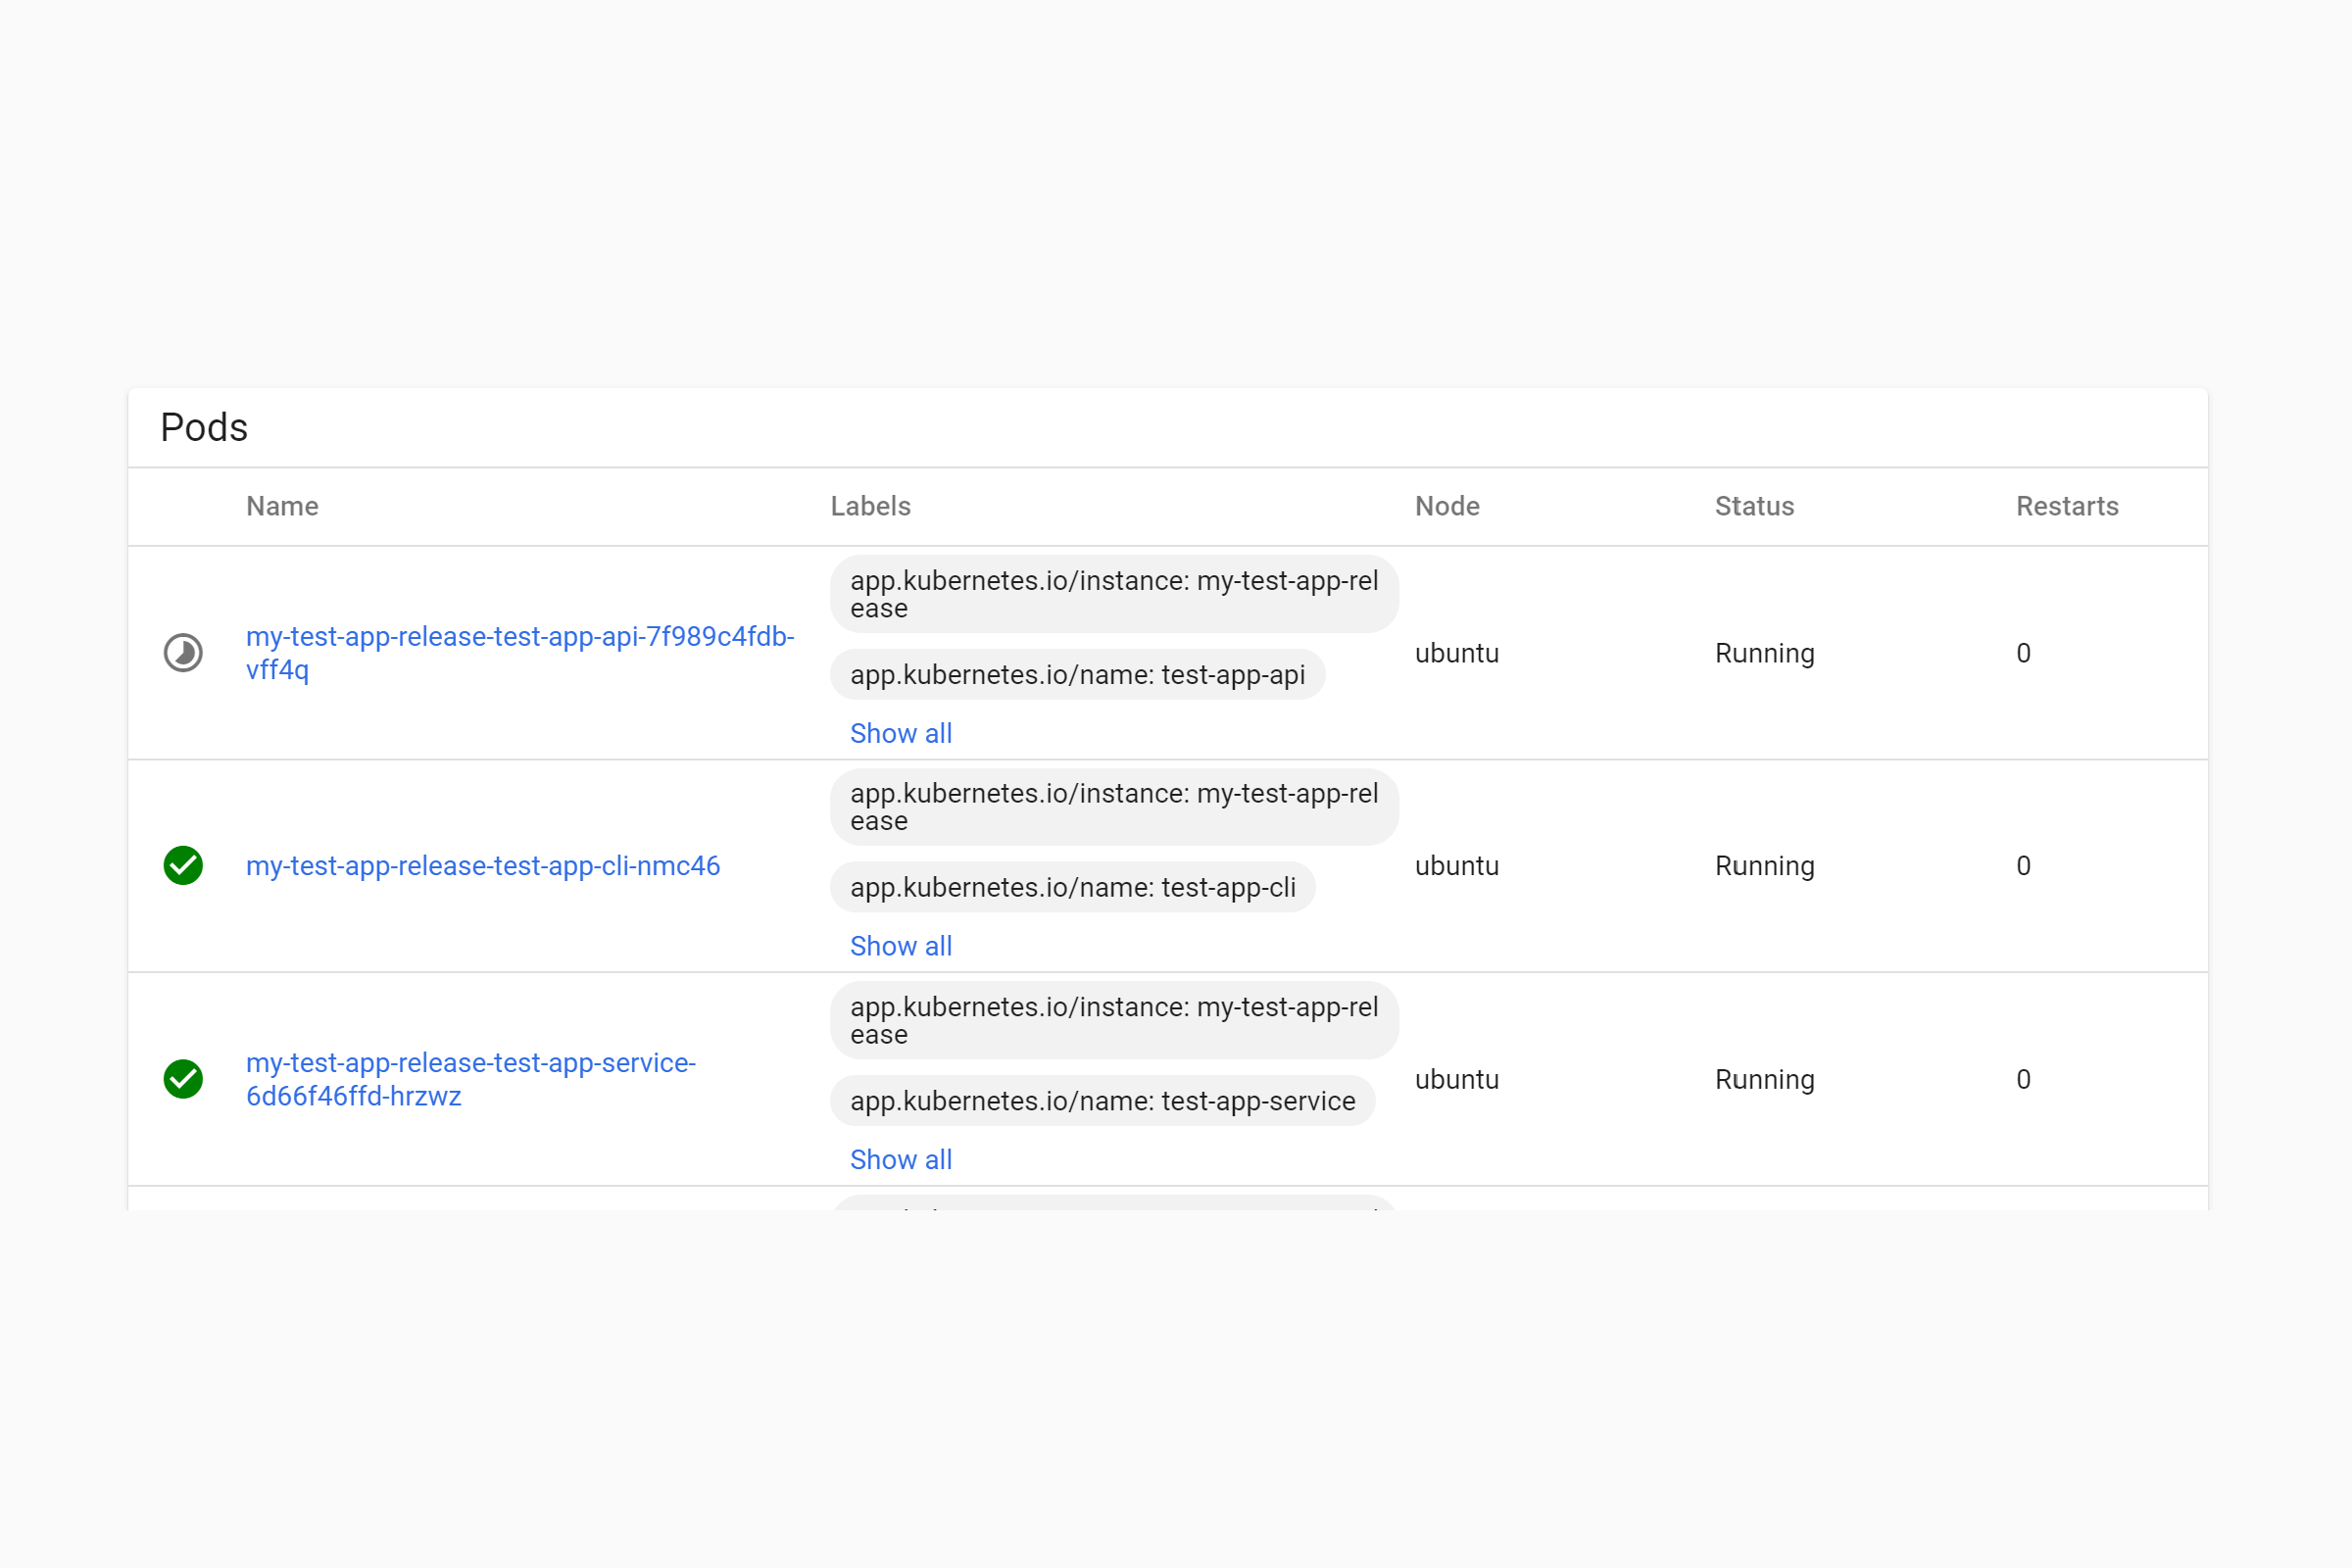
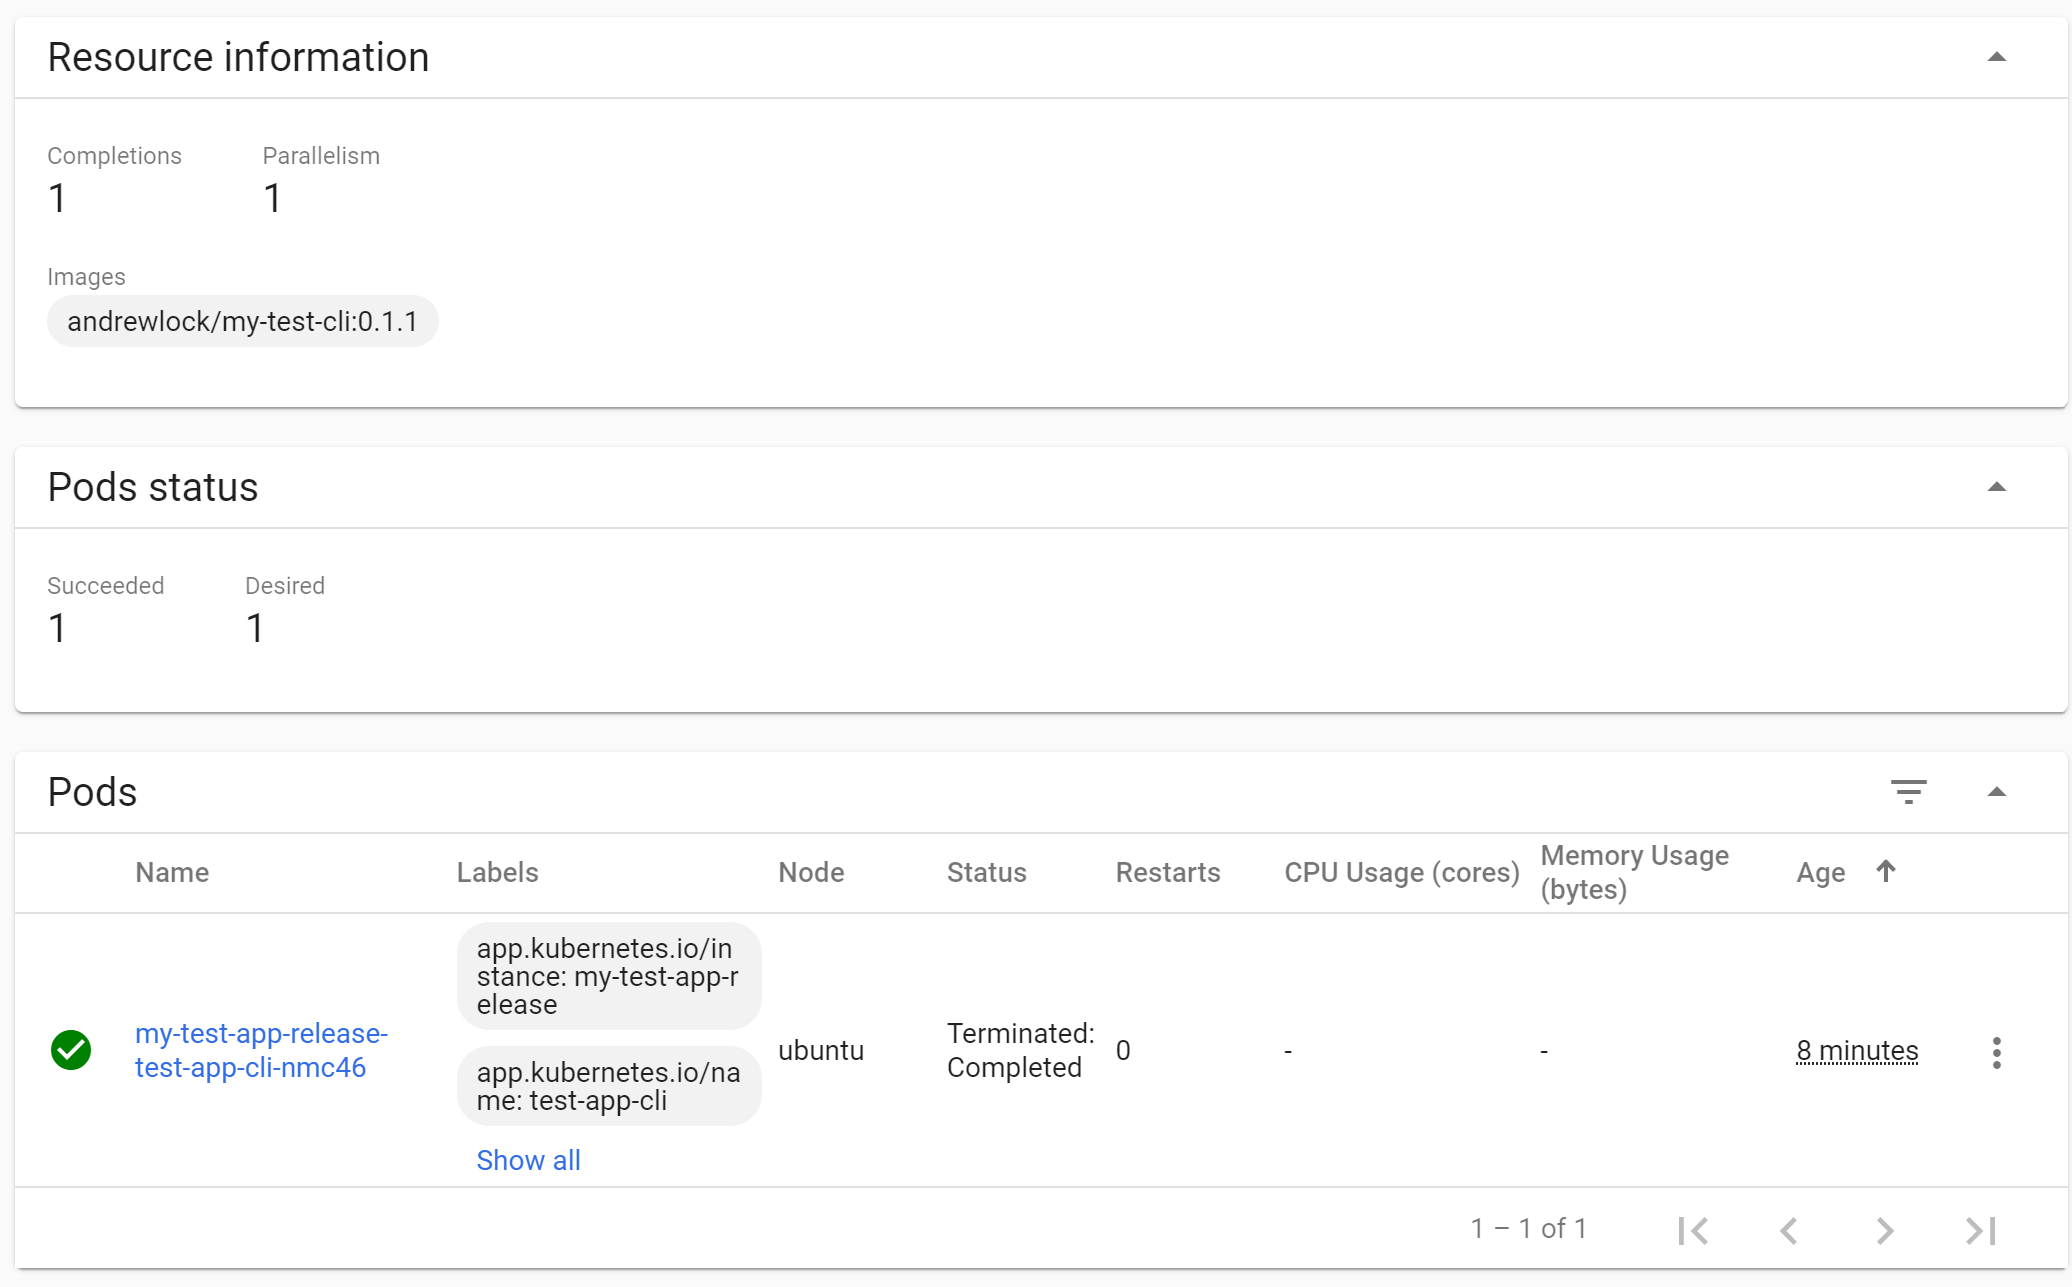
If you check the Kubernetes dashboard after running this command, you'll see a new Job has been created, called my-test-app-release-test-app-cli:

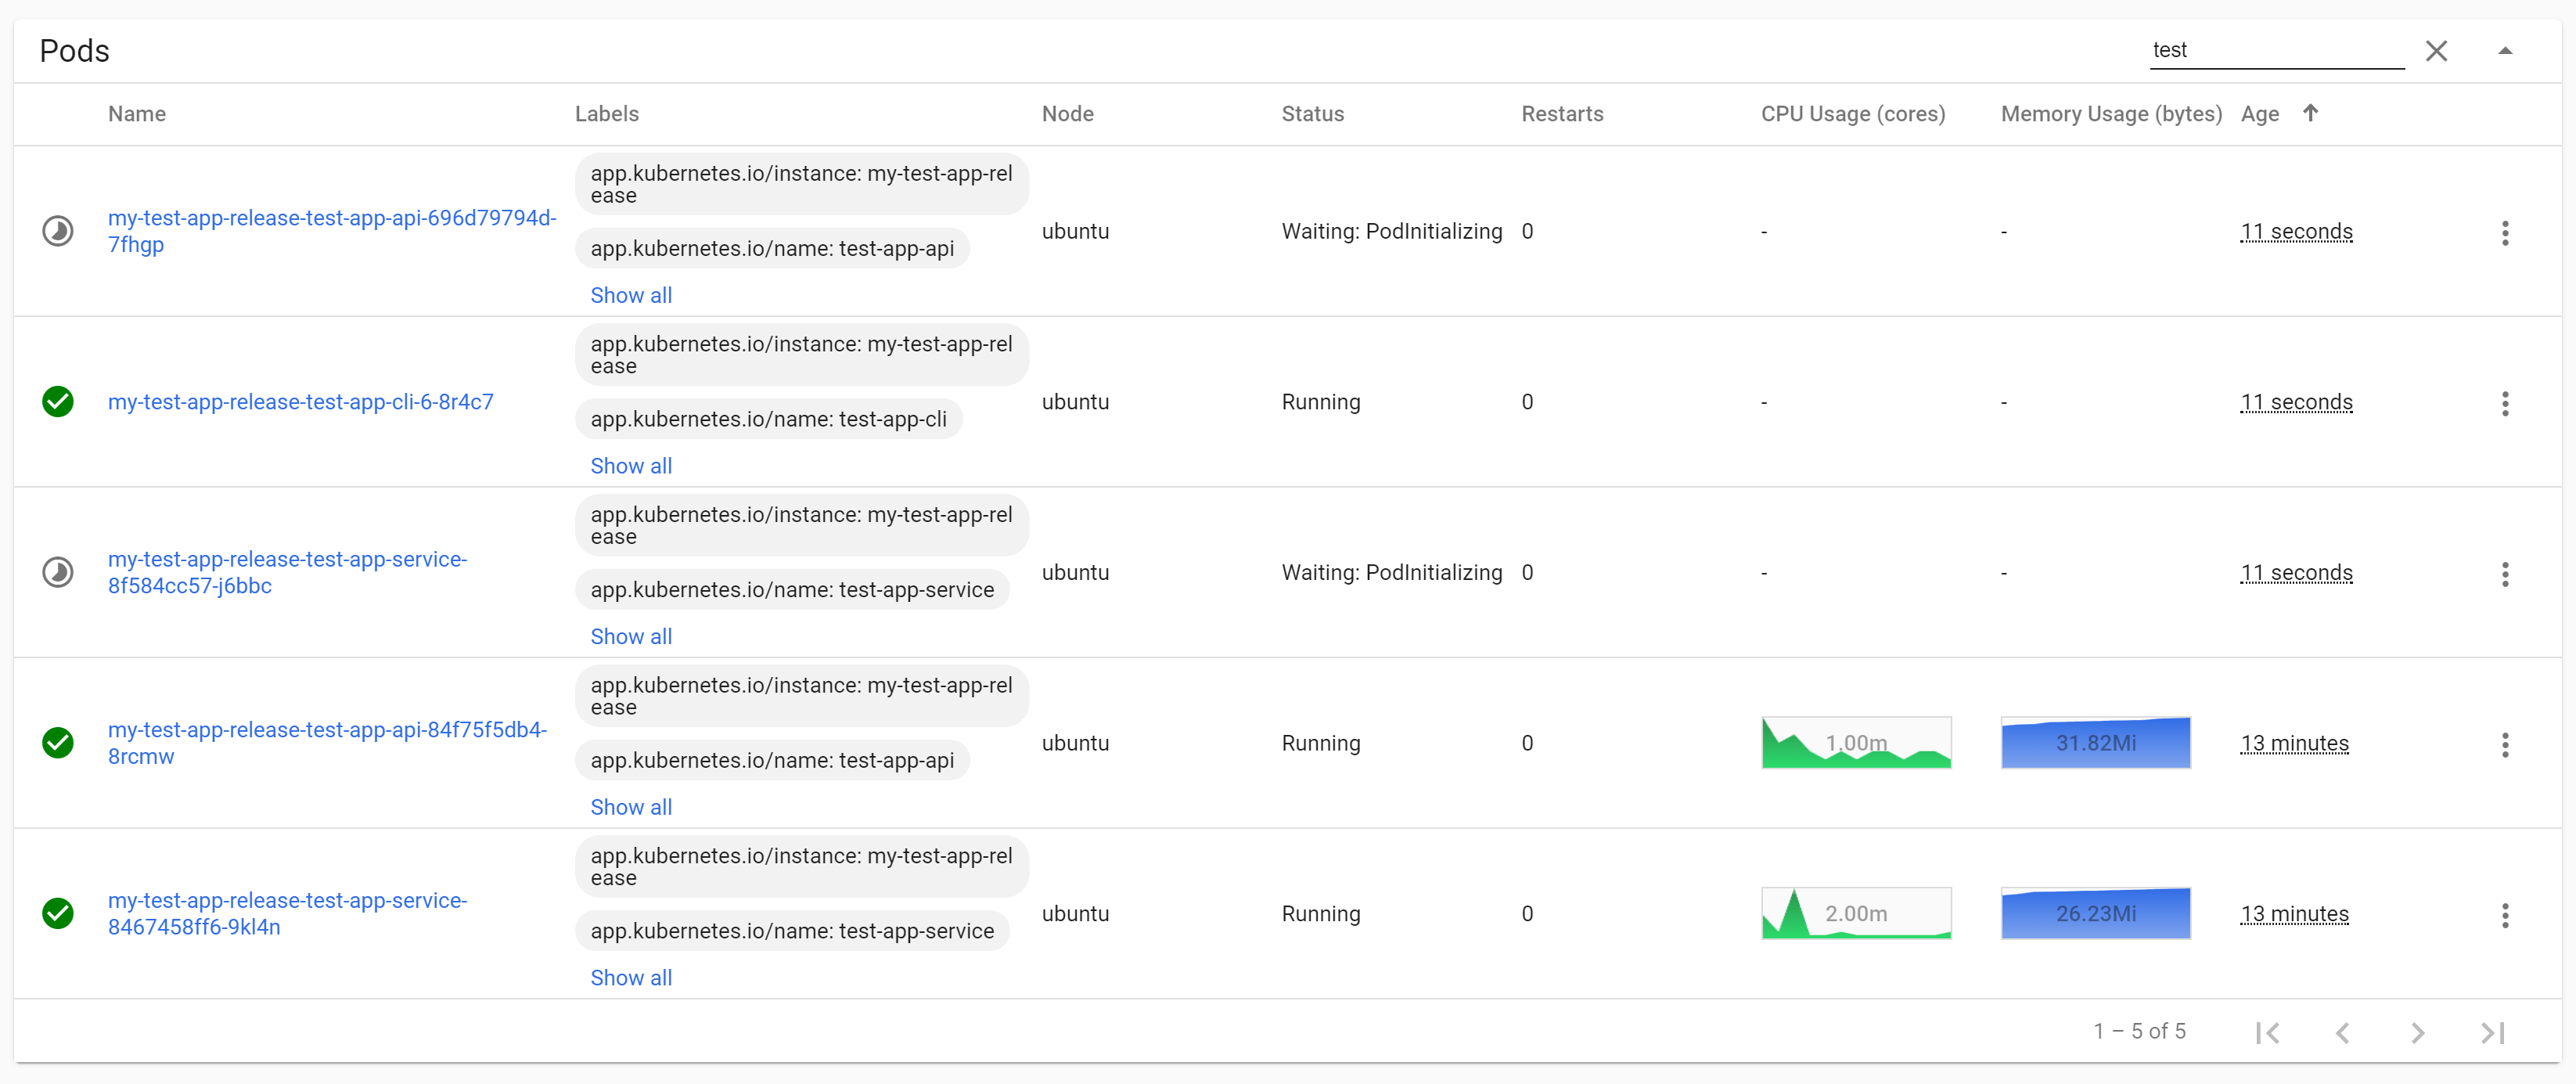
The 1/1 in the Pods column indicates that the Job is executing an instance of your CLI pod. If you check in the Pods section, you'll see that the app, CLI, and service pods are running. In the example below, the API pod is still in the process of starting up:
Note that we haven't implemented the init containers yet, so our application pods will immediately start handling requests without waiting for the job to finish. We'll address this shortly.
After 30 seconds, our Thread.Sleep() completes, and the "migration" pod exits. At this point the Job is complete. If you view the Job in the Kubernetes dashboard you'll see that the Pod shows a status of Terminated: Completed with a green tick, and that we have reached the required numbers of "completions" for the Job (for details on more advanced job requirements, see the documentation).
We're now running migrations as part of our deployment, but we need to make sure the migrations complete before the new application containers start running. To achieve that, we'll use init containers.
Using init containers to delay container startup
A Kubernetes pod is the smallest unit of deployment in Kubernetes. A pod can contain multiple containers, but it typically only has a single "main" container. All of the containers in a pod will be scheduled to run together, and they'll all be removed together if the main container dies.
Init containers are a special type of container in a pod. When Kubernetes deploys a pod, it runs all the init containers first. Only once all of those containers have exited gracefully will the main containers be executed. Init containers are often used for downloading or configuring pre-requisites required by the main container. That keeps your container application focused on it's one job, instead of having to configure it's environment too.
In this case, we're going to use init containers to watch the status of the migration job. The init container will sleep while the migration job is running (or if it crashes), blocking the start of our main application container. Only when the job completes successfully will the init containers exit, allowing the main container to start.
groundnuty/k8s-wait-for
In this section I'll show how to implement an init container that waits for a specific job to complete. The good news is there's very little to write, thanks to a little open-source project k8s-wait-for. The sole purpose of this project is exactly what we describe: to wait for pods or jobs to complete and then exit.
We can use a Docker container containing the k8s-wait-for script, and include it as an init container in all our application deployments. With a small amount of configuration, we get the behaviour we need.
For example, the manifest snippet below is for the test-app-api's deployment.yaml. I haven't shown the whole file for brevity—the important point is the initContainers section:
apiVersion: apps/v1
kind: Deployment
metadata:
  name: {{ include "test-app-api.fullname" . }}
spec:
  template:
    # ... metadata and labels elided
    spec:
      # The init containers
      initContainers:
      - name: "{{ .Chart.Name }}-init"
        image: "groundnuty/k8s-wait-for:1.3"
        imagePullPolicy: {{ .Values.image.pullPolicy }}
        args:
        - "job"
        - "{{ .Release.Name }}-test-app-cli-{{ .Release.Revision}}"
      containers:
      # application container definitions
      - name: {{ .Chart.Name }}
          image: "{{ .Values.image.repository }}:{{ .Values.image.tag | default .Chart.AppVersion }}"
        # ...other container configuration
The initContainers section is the interesting part. We provide a name for the container (I've used the name of the sub-chart with an -init suffix, e.g. test-app-api-init), and specify that we should run the Docker image groundnuty/k8s-wait-for:1.3, using the specified imagePullPolicy from configuration.
We specify what the init container should wait for in the args dictionary. In this case we choose to wait for a job with the name "{{ .Release.Name }}-test-app-cli-{{ .Release.Revision}}". Once Helm expands that template, it will look something like my-test-app-release-test-app-cli-6, with the final Revision number incrementing with each chart update. That matches the name: we gave to the job that is deployed in this release.
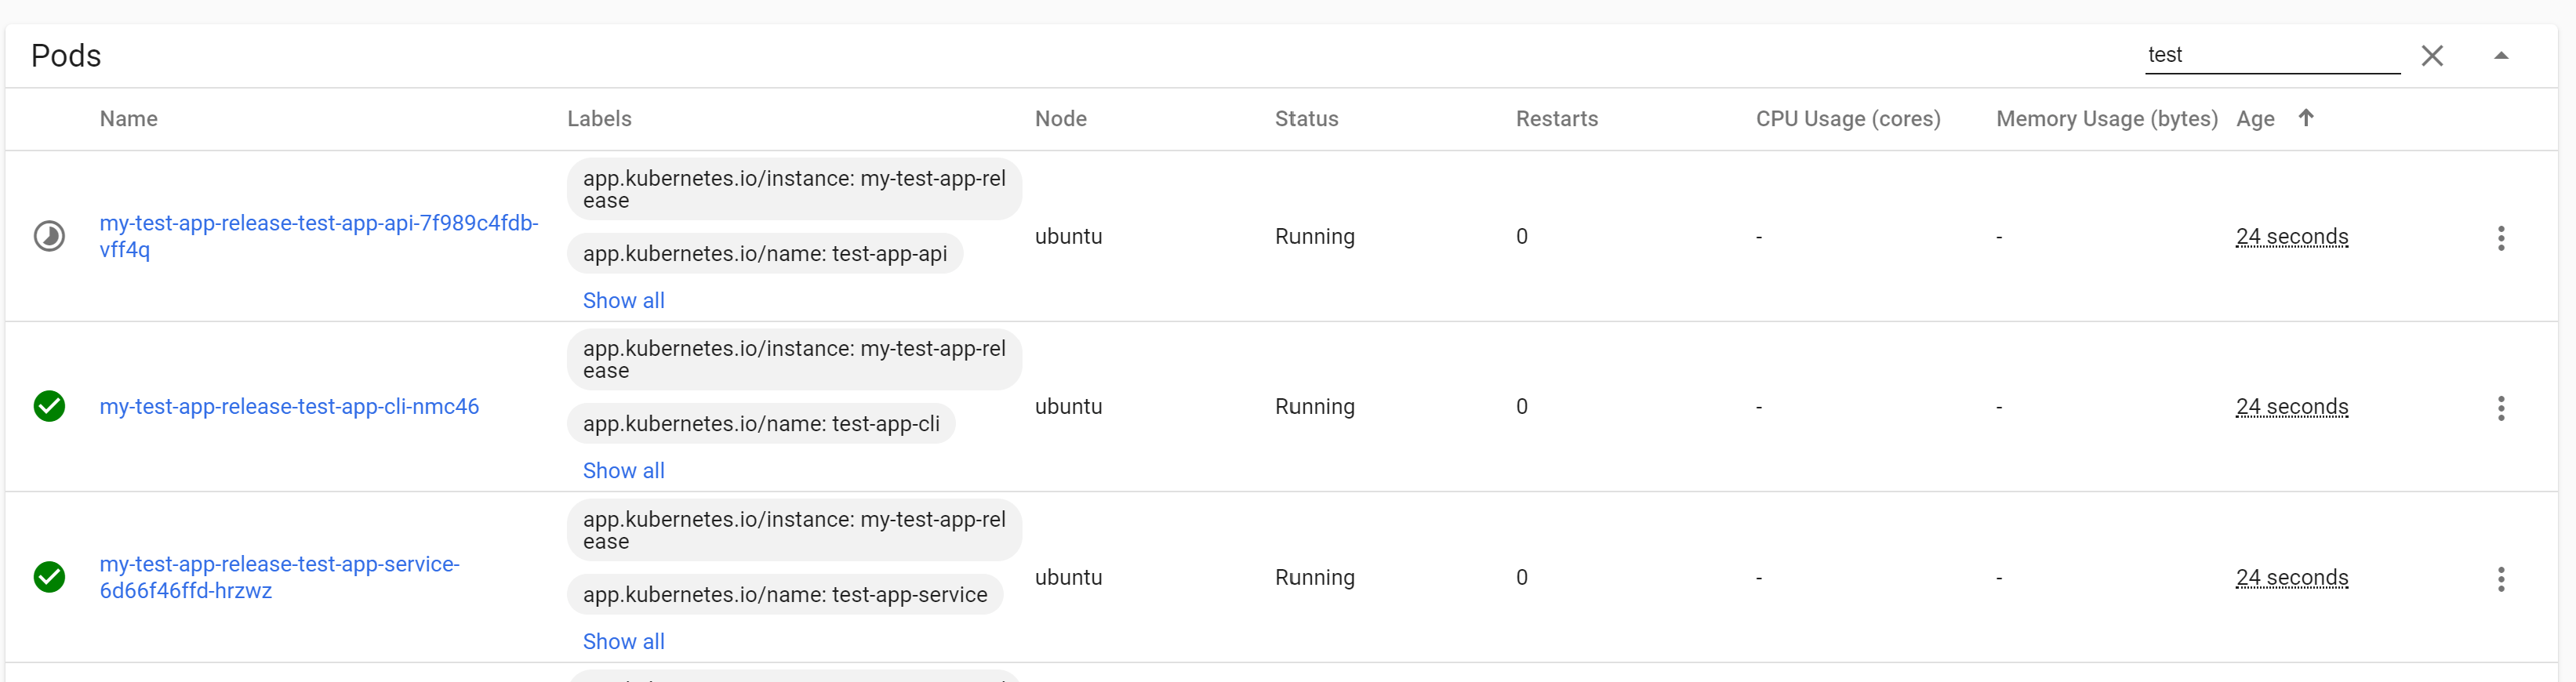
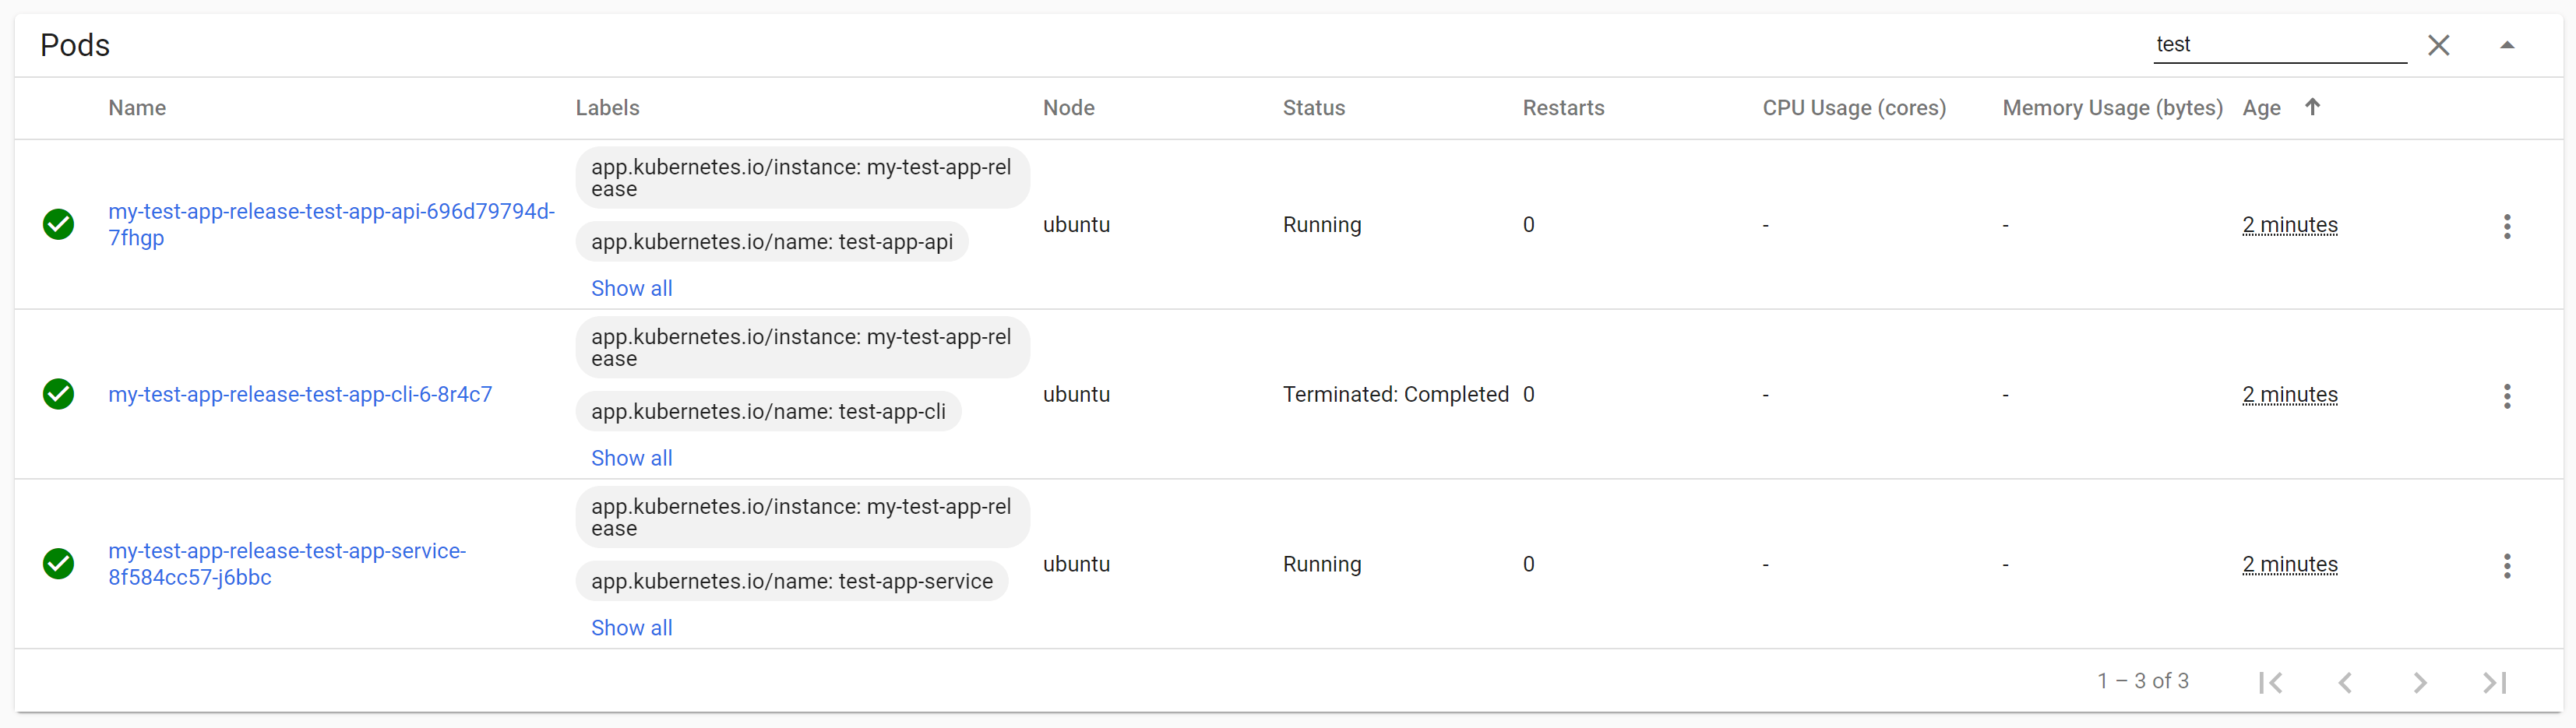
And that's it. Add the initContainers section to all your "main" application deployments (two in this case: the API app and the message handler service). Next time you install a chart, you'll see the behaviour we've been chasing. The new application deployments are created at the same time as the job, but they don't actually start. Instead, they sit in the PodInitializing status:
As you can see in the previous image, while the job is running and the new application pods are blocked, the existing application pods continue to run and handle the traffic.
In practice, it's often unnecessary to have zero-downtime deployments for message-handling services, and it increases the chance of data inconsistencies. Instead, we typically use a "Recreate" strategy instead of Rolling Update for our message-handling apps (but use a rolling update for our APIs to avoid downtime).
Once the job completes, the init containers will exit, and the new application pods can start up. Once their startup, readiness, and liveness probes indicate they are healthy, Kubernetes will start sending them traffic, and will scale down the old application deployments.
Congratulations! You've just done a zero-downtime database migration and deployment with Kubernetes 🙂
Summary
In this post I showed how you can use Kubernetes jobs and init containers to run database migrations as part of a zero-downtime application upgrade. The Kubernetes job runs a single container that executes the database migrations as part of the Helm Chart installation. Meanwhile, init containers in the main application pods prevent the application containers from starting. Once the job completes, the init containers exit, and the new application containers can start.